It is kind of you to make Mr. Potatohead look as presentable as possible.
But I think I would have done a head swap.

Work in Progress
Huibs T34 tank project
-

Bluefalchion
- Posts: 3575
- Member since:
23 Dec 2010, 07:57


 Moderator
Peter wrote:I like icing on cake! Maybe next FIGZ I must bring a "vlaai" with icing on it with me!
The figure isn't the nicest one I ever seen but I got respect for it age!
I say YES for the icing on the vlaai.
And I underline the nice treating of the tank commander. I have done the same years ago with the ex ESCI figure included in the Italeri Valentine tank, which is really crap. Sorry no photo.
But I did it not like huib, the master of afv.

-

MABO
") Supporting Member (Gold)
Supporting Member (Gold) - Posts: 9166
- Member since:
12 May 2008, 18:01
Thank you very much, guys!
The icing on the cake
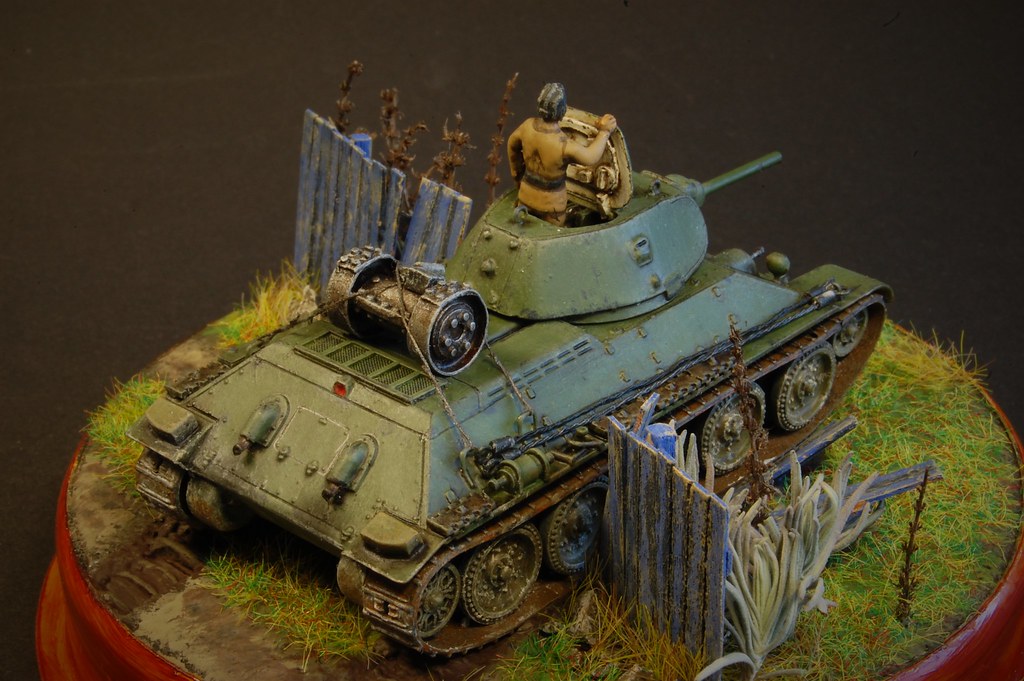
Here it comes. This last addition to the T34 really is a finishing touch.

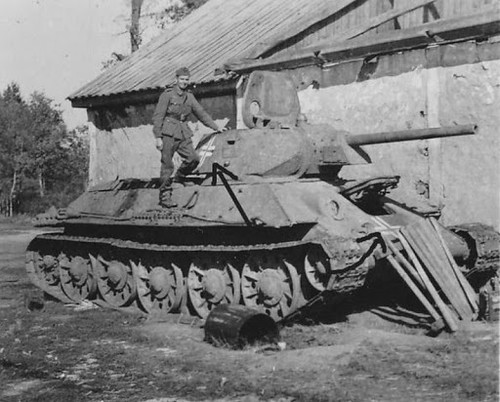
As I wrote before this first operational version of the T34 suffered from serious mechanical flaws, including too weak a transmission. As the Soviet army was hardly equipped with recovery vehicles and mobile workshops, this lead to a huge loss of vehicles due to mechanical failure. As a temporary solution many crews decided to bring a spare gearbox and differential on the engine deck. In case of failure, repair could take place on the spot, by changing the gearbox, if necessary under enemy fire. A gearbox on the engine deck is thus very typical for these early T34's. I found several pictures of it.
So my plan is to scratch this characteristic gearbox/differential unit and add it to the model.

The basic parts from tube and card.

Basic form constructed.

Further elaborated and detailed.

Painted.
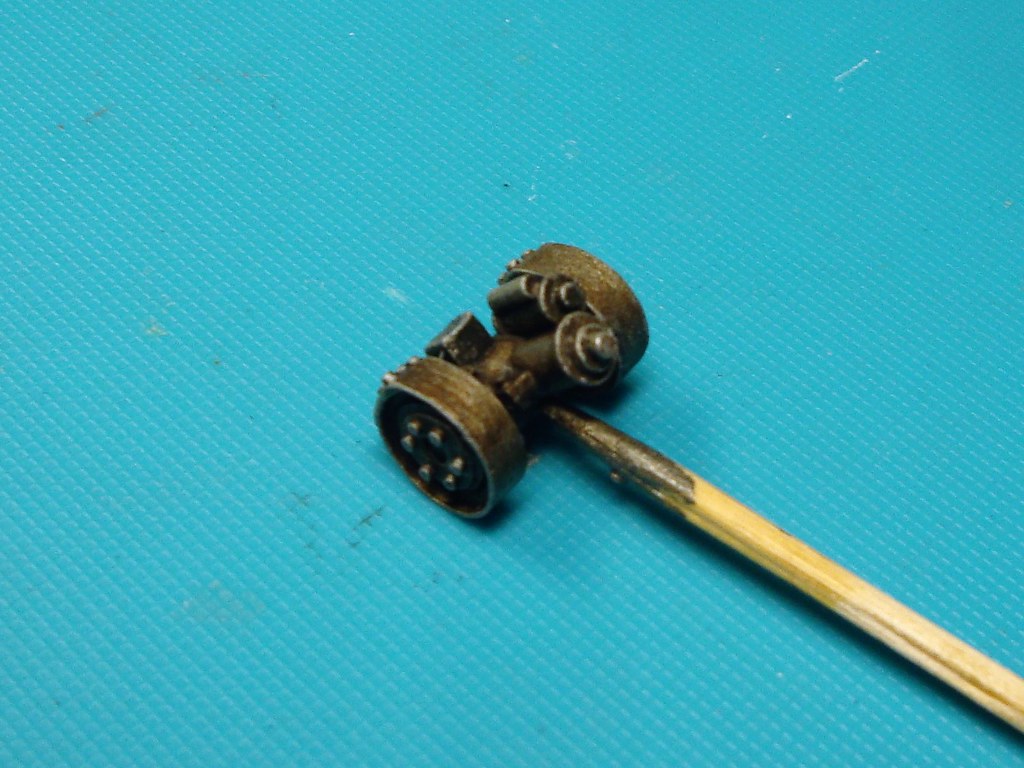
Weathered (with lots of oil and toil)

Fixed to the tank using sewing thread.

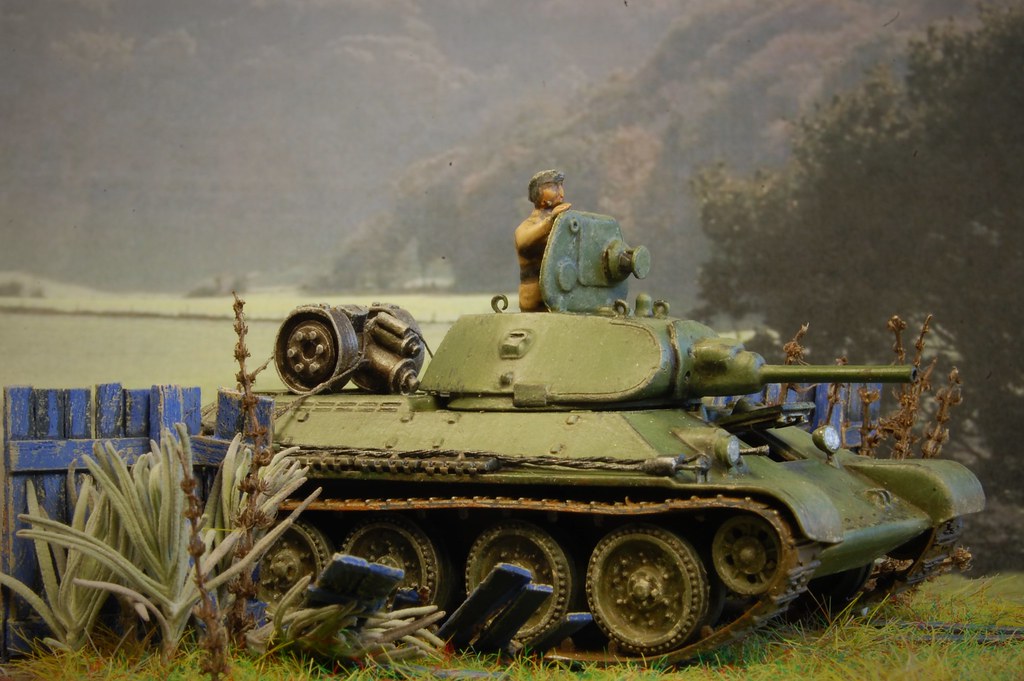
Finished! Now I have to think about a small base....
The icing on the cake
Here it comes. This last addition to the T34 really is a finishing touch.
As I wrote before this first operational version of the T34 suffered from serious mechanical flaws, including too weak a transmission. As the Soviet army was hardly equipped with recovery vehicles and mobile workshops, this lead to a huge loss of vehicles due to mechanical failure. As a temporary solution many crews decided to bring a spare gearbox and differential on the engine deck. In case of failure, repair could take place on the spot, by changing the gearbox, if necessary under enemy fire. A gearbox on the engine deck is thus very typical for these early T34's. I found several pictures of it.
So my plan is to scratch this characteristic gearbox/differential unit and add it to the model.
The basic parts from tube and card.
Basic form constructed.
Further elaborated and detailed.
Painted.
Weathered (with lots of oil and toil)
Fixed to the tank using sewing thread.
Finished! Now I have to think about a small base....
-

huib
- Posts: 978
- Member since:
12 Dec 2015, 15:57
Your spare transmission look TOP! Like the whole Tank. 
If you think about that. It is a bit crazy. Isn`t it ?
Pre war T34 drive around with a spare transmission like a backpacker.
Your b/w pics are for sure not the only one I have seen.
If you think about that. It is a bit crazy. Isn`t it ?
Pre war T34 drive around with a spare transmission like a backpacker.
Your b/w pics are for sure not the only one I have seen.
-

Wiking
- Posts: 2829
- Member since:
14 Sep 2015, 10:03
Help keep the forum online!
or become a supporting member
-
MABO
- Supporting Member (Gold)
- Posts: 9166
- Member since:
12 May 2008, 18:01
Thank you guys, for your kind reactions!
Vignette (1)
I do not make vignettes for every vehicle, but as I do not like the tracks of this model very much, a vignette can be a good approach to hide them a bit.
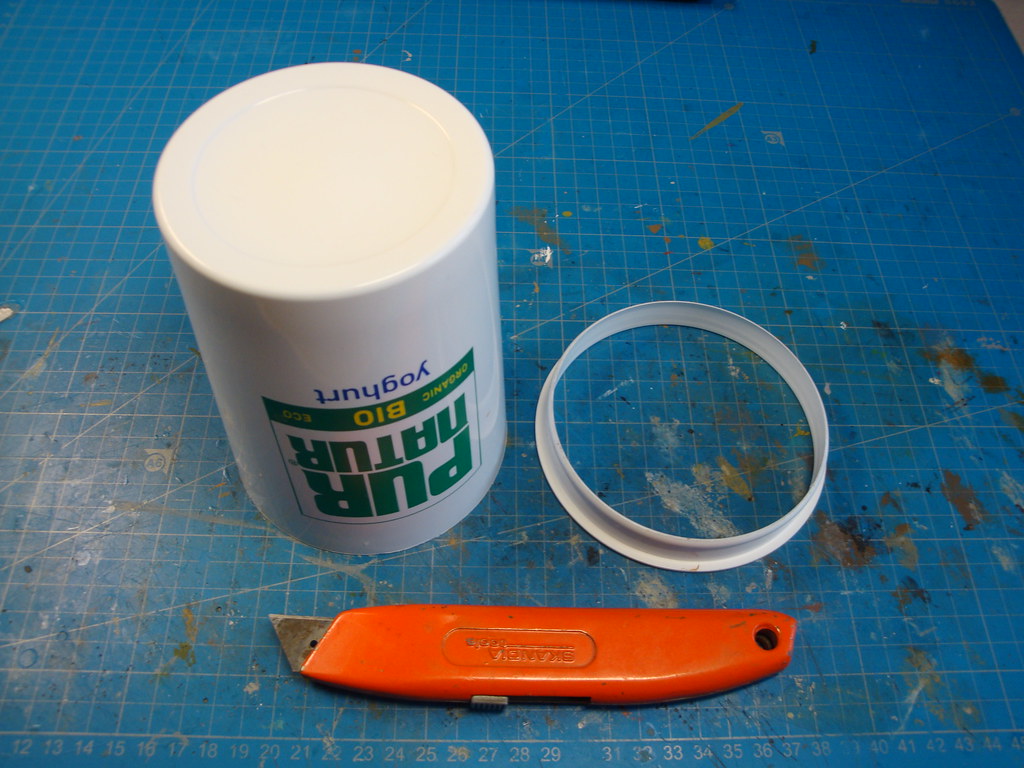
First I searched the house for a useful starting point: something round that I could pour some plaster in. Finally I arrived at the upper part of a plastic yoghurt container. For a starter I carefully cut this part off, and sanded the edges a bit.

Made a bottom from a piece of cardboard.
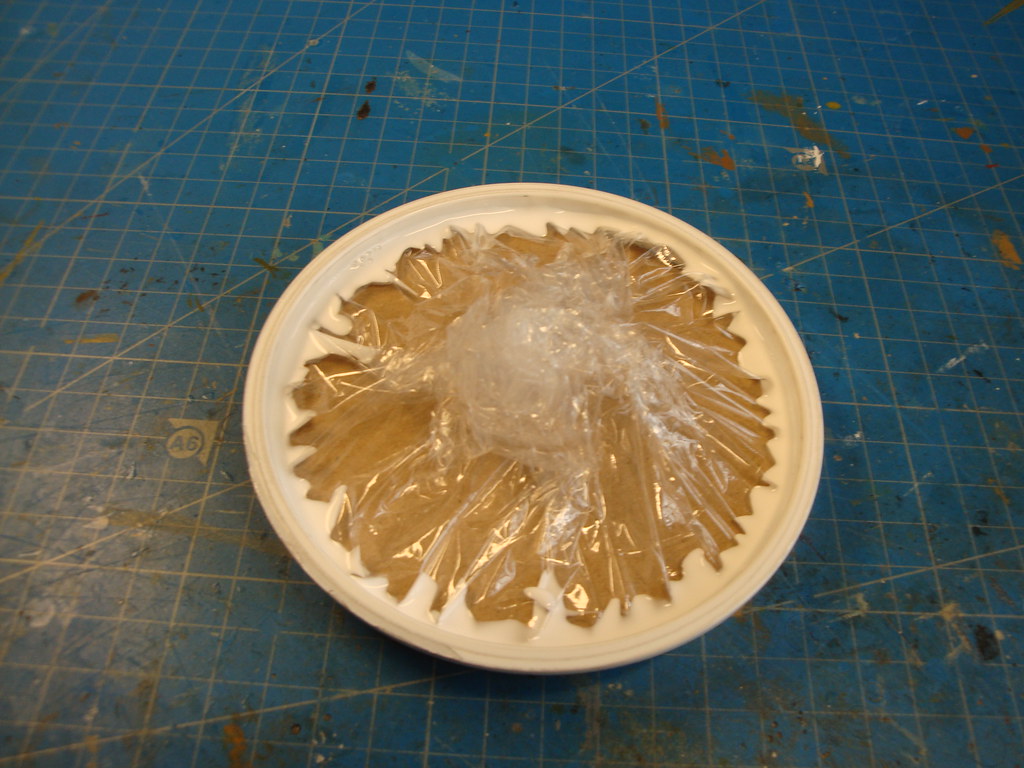
I covered the cardboard disc with plastic kitchen foil as a protective layer against the wet plaster, and sealed the seam with white pva glue.

Drew the outline of the tank, and made a fence from matches and cedar wood for lighting cigars, that is crushed by the tank. In fact it's the summer variant of the Matchbox vignette.

Fluid plaster poured in.

Just before the curing of the plaster I pressed in the tracks of the tank and added crushed parts of the fence, and some stones.
Now to continue with painting, weathering and gardening....
Vignette (1)
I do not make vignettes for every vehicle, but as I do not like the tracks of this model very much, a vignette can be a good approach to hide them a bit.
First I searched the house for a useful starting point: something round that I could pour some plaster in. Finally I arrived at the upper part of a plastic yoghurt container. For a starter I carefully cut this part off, and sanded the edges a bit.
Made a bottom from a piece of cardboard.
I covered the cardboard disc with plastic kitchen foil as a protective layer against the wet plaster, and sealed the seam with white pva glue.
Drew the outline of the tank, and made a fence from matches and cedar wood for lighting cigars, that is crushed by the tank. In fact it's the summer variant of the Matchbox vignette.
Fluid plaster poured in.
Just before the curing of the plaster I pressed in the tracks of the tank and added crushed parts of the fence, and some stones.
Now to continue with painting, weathering and gardening....
-
huib
- Posts: 978
- Member since:
12 Dec 2015, 15:57

Thank you Dykio and Peter!
Vignette (2)
It took a few days for the plaster to fully cure. Then it was time for painting.

First a black baselayer, providing shadows between the stones and along the fence.

Then the ground painted, partly soil, sand and mud, partly grass.

Next step was painting and weathering the fence.

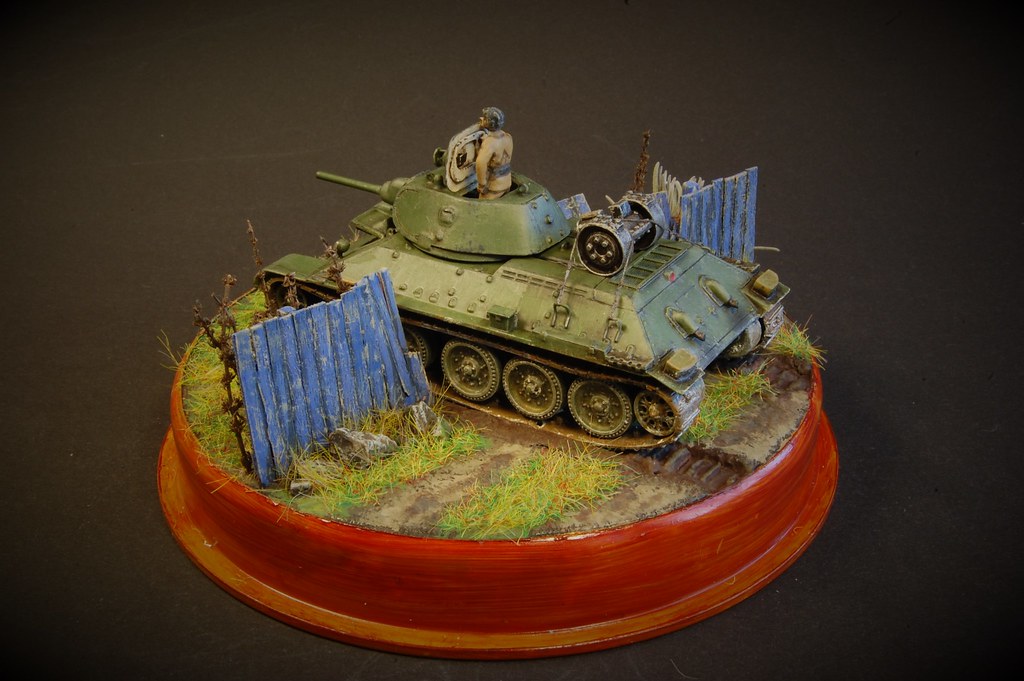
Using oilpaints I decorated the plastic base ring with a woodgraining. Then different kinds of grass were glued to the base.

Then some gardening was done. I collected some herbs from the garden. I think it´s rosemarin and dried out mint of last year.

Pressed some tiny holes in the plaster and glued a bit of shrubbery in them.

A pic from the opposite side. Base is ready!
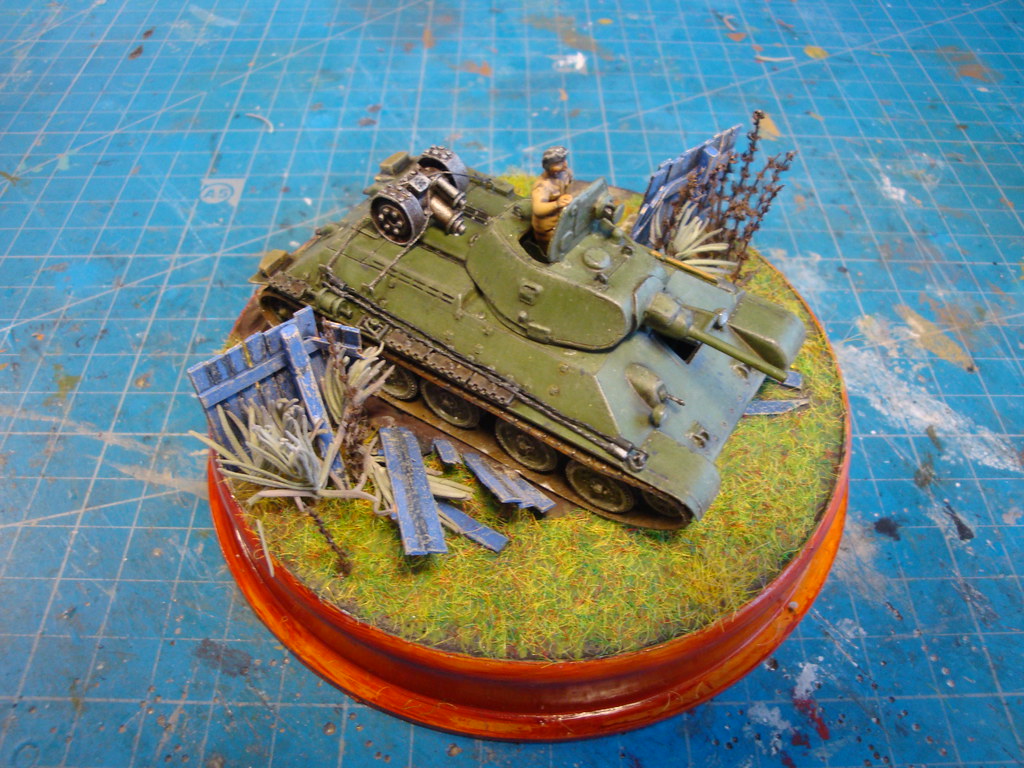
Tank in position and ready! Final pictures soon.
Vignette (2)
It took a few days for the plaster to fully cure. Then it was time for painting.
First a black baselayer, providing shadows between the stones and along the fence.
Then the ground painted, partly soil, sand and mud, partly grass.
Next step was painting and weathering the fence.
Using oilpaints I decorated the plastic base ring with a woodgraining. Then different kinds of grass were glued to the base.
Then some gardening was done. I collected some herbs from the garden. I think it´s rosemarin and dried out mint of last year.
Pressed some tiny holes in the plaster and glued a bit of shrubbery in them.
A pic from the opposite side. Base is ready!
Tank in position and ready! Final pictures soon.
-
huib
- Posts: 978
- Member since:
12 Dec 2015, 15:57
You make creating terrain bases seem so easy, but for me it is always an incredible struggle. I may try some of your techniques--if I get brave enough.
-
Bluefalchion
- Posts: 3575
- Member since:
23 Dec 2010, 07:57
This T34 get a spare gear.
New glasses, optics for the driver and his commander are far more important.
Or it is a standard rule during training of T34 tanks to breake throu a so nice old made wooden wall?

PS:
If the wooden wall will be painted in red instead of blue, will the russian tank stop in front of it?
New glasses, optics for the driver and his commander are far more important.
Or it is a standard rule during training of T34 tanks to breake throu a so nice old made wooden wall?
PS:
If the wooden wall will be painted in red instead of blue, will the russian tank stop in front of it?
-
Wiking
- Posts: 2829
- Member since:
14 Sep 2015, 10:03
-
MABO
- Supporting Member (Gold)
- Posts: 9166
- Member since:
12 May 2008, 18:01
Lovely work as always.
I love the use of dried natural vegetation.
It looks natural and does not reflect light.
Best wishes,
Chris
I love the use of dried natural vegetation.
It looks natural and does not reflect light.
Best wishes,
Chris
-
C M Dodson

- Posts: 2594
- Member since:
01 May 2015, 18:48

Help keep the forum online!
or become a supporting member
Thank you very much guys, for your kind comments!
No, only because illiterate kolchoz boys from Samara Oblast that do not know the difference between left and right are pressed into service, the vegetable garden of poor old babushka is crushed.
Wiking wrote:Or it is a standard rule during training of T34 tanks to breake throu a so nice old made wooden wall?
No, only because illiterate kolchoz boys from Samara Oblast that do not know the difference between left and right are pressed into service, the vegetable garden of poor old babushka is crushed.
-
huib
- Posts: 978
- Member since:
12 Dec 2015, 15:57
Esci/Revell T34-76 model 1942
And on with the next one. This will be a bit of a kitbash again. But first a short historical introduction:
T34-76 model 1942
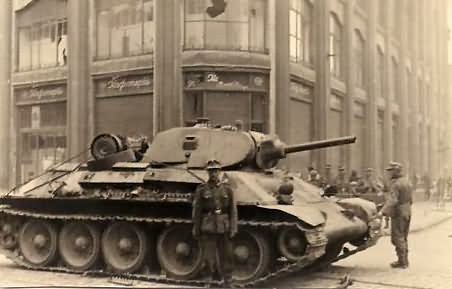
In the autumn of 1941 the Soviet Union got into a precarious situation as a lot of its heavy and armament industry was overrun by the Germans. The Soviets reacted by transporting as much as possible of their machinery and resources to the Ural regions, far behind Moscow. During this transition war production reached dramatic low figures, and for several months only one factory producing T34 tanks was operational: the Tractor Factory in Stalingrad, that would become famous one year later as it became the nucleus of the Battle of Stalingrad.
(Picture is in the Public Domain)
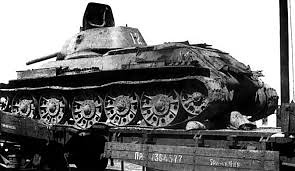
This problematic situation lead to more emphasis on simplicity and speed of production at the cost of quality and innovation. The outcome was the T34 model 1942, that was the most simpiflied model of the T34, quickly and roughly made by semi-schooled labour in primitive circumstances. Most visible on the model are the pressed steel road wheels, that caused quickwear on the tracks. Only when in the summer of 1942 the tank factories in the Urals reached full production capacity, there was room for innovation on the T34. But that is for the next model.
(Picture is in the Public Domain)
Because first I will try to build such a simplified T34 with steel wheels.
And on with the next one. This will be a bit of a kitbash again. But first a short historical introduction:
T34-76 model 1942
In the autumn of 1941 the Soviet Union got into a precarious situation as a lot of its heavy and armament industry was overrun by the Germans. The Soviets reacted by transporting as much as possible of their machinery and resources to the Ural regions, far behind Moscow. During this transition war production reached dramatic low figures, and for several months only one factory producing T34 tanks was operational: the Tractor Factory in Stalingrad, that would become famous one year later as it became the nucleus of the Battle of Stalingrad.
(Picture is in the Public Domain)
This problematic situation lead to more emphasis on simplicity and speed of production at the cost of quality and innovation. The outcome was the T34 model 1942, that was the most simpiflied model of the T34, quickly and roughly made by semi-schooled labour in primitive circumstances. Most visible on the model are the pressed steel road wheels, that caused quickwear on the tracks. Only when in the summer of 1942 the tank factories in the Urals reached full production capacity, there was room for innovation on the T34. But that is for the next model.
(Picture is in the Public Domain)
Because first I will try to build such a simplified T34 with steel wheels.
-
huib
- Posts: 978
- Member since:
12 Dec 2015, 15:57