Nice Chipping. I keep going.
Regards Jürgen

Work in Progress
Huibs T34 tank project
-
JueHue

- Posts: 153
- Member since:
25 Dec 2020, 13:01
-

MABO
") Supporting Member (Gold)
Supporting Member (Gold) - Posts: 9166
- Member since:
12 May 2008, 18:01


 Moderator
Thank you very much, guys!
Tricky tracks
In my experience these rubberband tracks are the most difficult and tricky part of building these vintage tank models. Each time you have to work hard to get something acceptable out of it. Yes, I doubted if I would buy myself some T34 PE tracks in 1/72, but they are expensive and I didn't know if they would fit my 1/76 model and I didn't look forward to bending a 120 or so miniscule tracklinks. So I didn't. Well, enough waffle, let's do it!
 [/url]
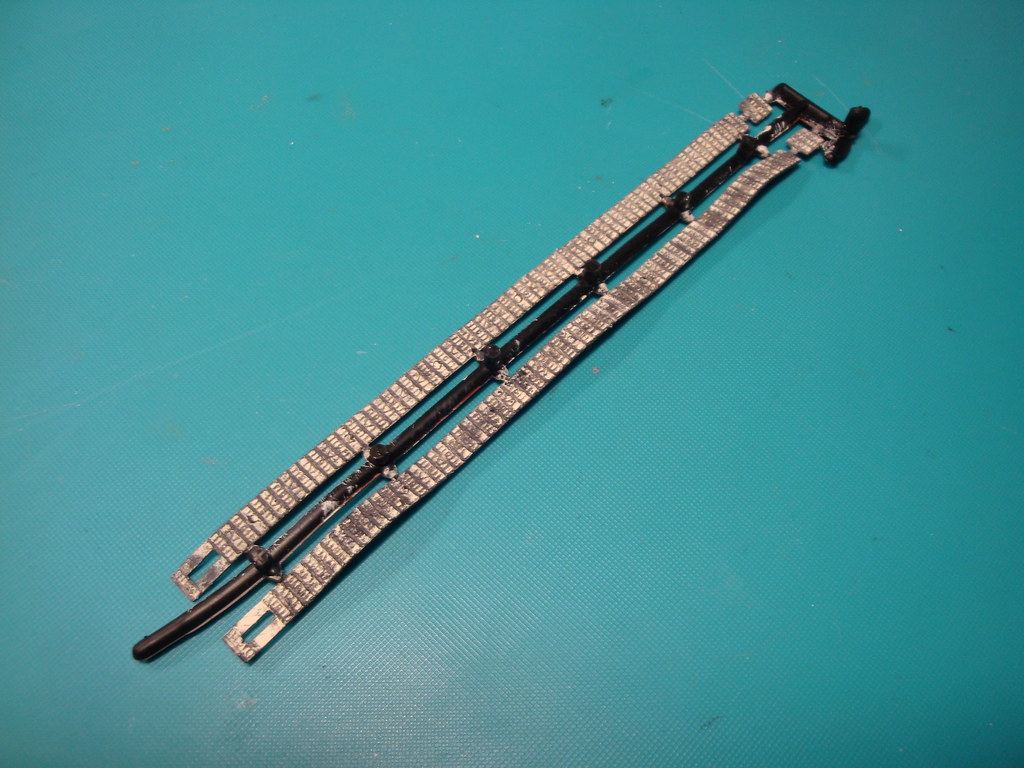
First the wheels were glued to the hull and lined up using a ruler.

On it's wheels. The gap between the second and third roadwheel is similar to it's successor, the T54/55.

And now for the tracks. They are made of black plastic, I think vinyl. It is soft, bendable and elastic. Not like those stiff tracks you find with some other old kits. But the big problem with these tracks is: paint and glue do not have a grip on it. Everythings is falling off. Very annoying.
The next challenge was: how to paint the tracks of a tank driving through snow? My theory was: snow will be pressed in the profile, but the outer contact surfaces will be clean and shiny metal, due to the sanding effect of snow. So I tried to imitate that by painting the tracks white and drybrushing them with panzer grey and gun metal.

The inside is more difficult, as it is continuously cleaned by the roadwheels, but also snow is all the time being sprayed in when driving. So I tried 'a bit of everything' approach: first a rusty brown, then a drybrush using gun metal, and finished with blotting up some white. A lot of hassle as the first layers would come off the vinyl all the time.
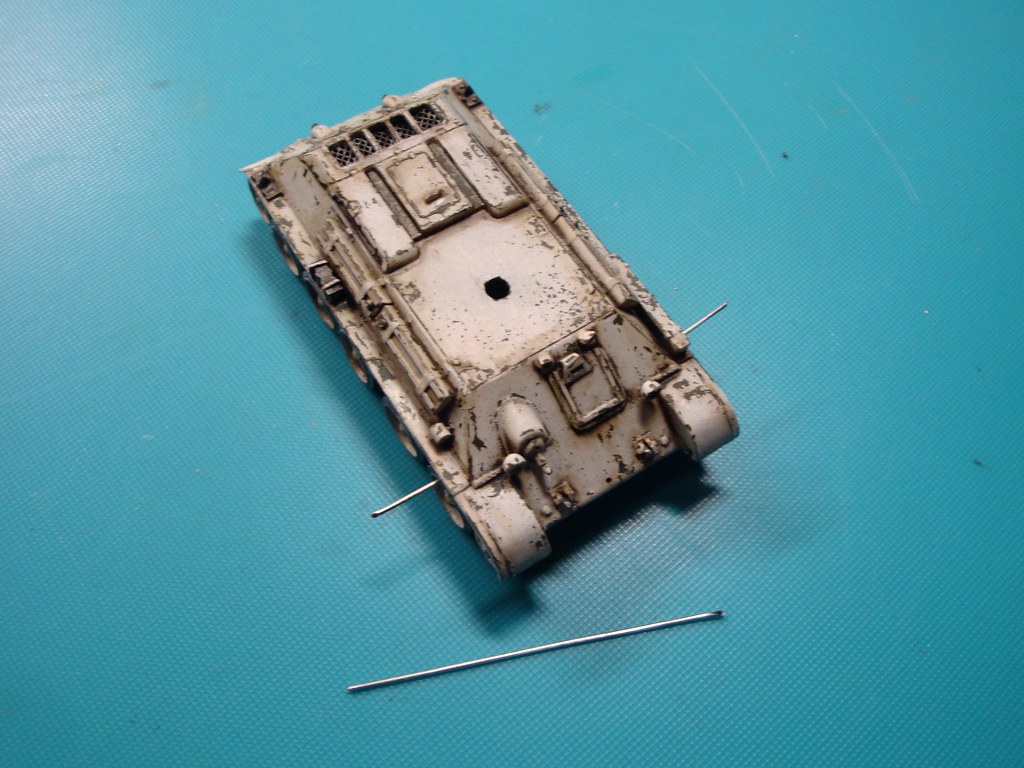
Then I placed some lengths of iron wire through the hull, just above the first and last roadwheels: drilled holes in the right spots, wriggled the rion wire through them, cut them at the right length and fixated them using a drop of CA glue. The wires serve to press the tracks against the roadwheels, simulating track sag. If you don't the tracks will unrealistically press upwards against the mudguards.
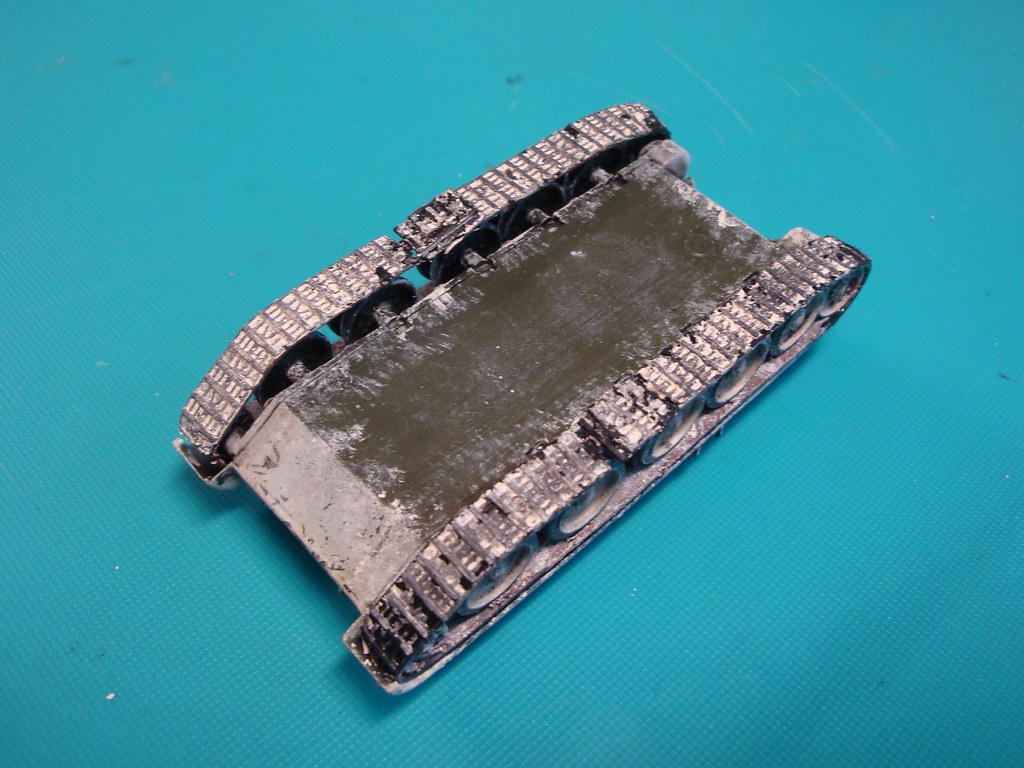
Then I tried to install the tracks as careful as possible. @#$%^&* (Some bad words) Paint was flaking of all the time, especially in the sharp bends around the drive wheel and tension wheel. And the link between the track ends developed a big gap under tension. Awful! How to solve this?
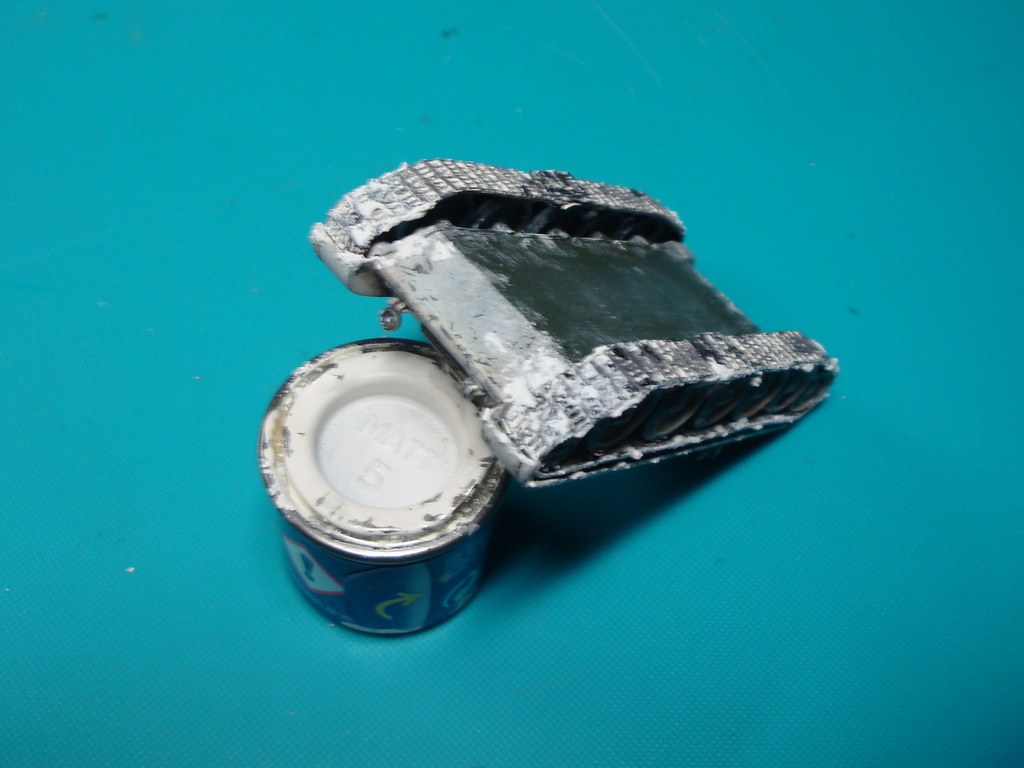
First the paint on the treacks was restored. And now the snowy theme turns out a blessing in disguise (although heavy mud could do the job too). I made a porridge from flour and white paint and used that to fill the gaps in the tracks. The remainder was used to add clods of snow in other places around the tracks, fenders and wheels.

This is what it looks now.
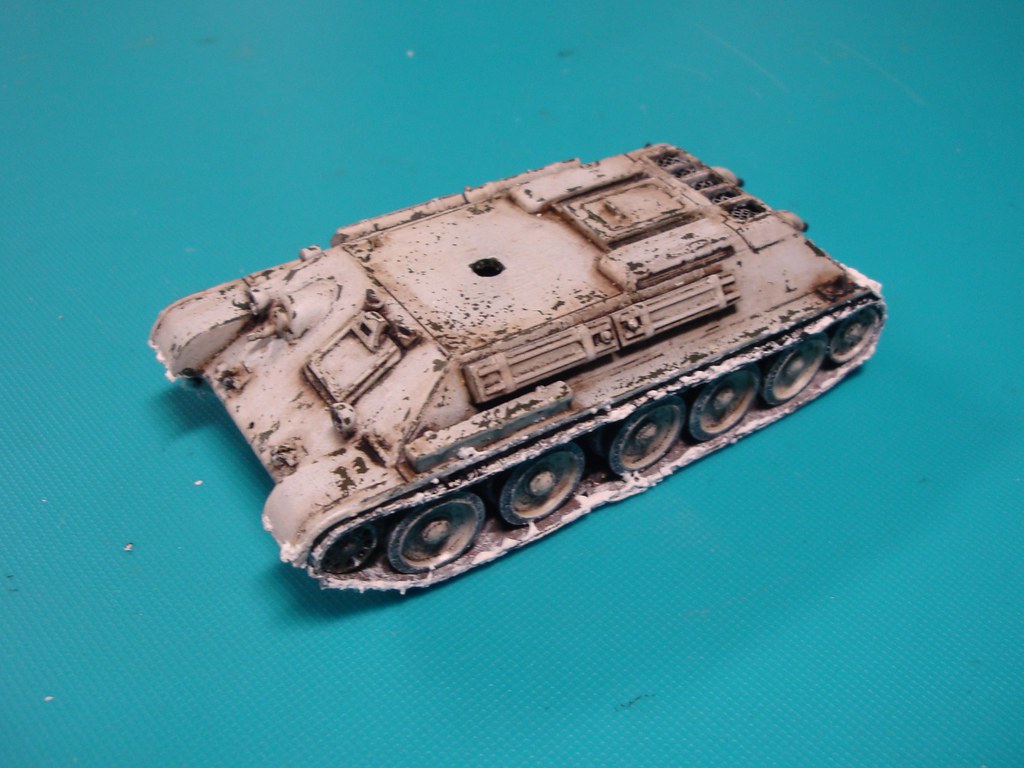
A pic from the opposite side.
Almost ready. On to the last additions.
Tricky tracks
In my experience these rubberband tracks are the most difficult and tricky part of building these vintage tank models. Each time you have to work hard to get something acceptable out of it. Yes, I doubted if I would buy myself some T34 PE tracks in 1/72, but they are expensive and I didn't know if they would fit my 1/76 model and I didn't look forward to bending a 120 or so miniscule tracklinks. So I didn't. Well, enough waffle, let's do it!
[/url]First the wheels were glued to the hull and lined up using a ruler.
On it's wheels. The gap between the second and third roadwheel is similar to it's successor, the T54/55.
And now for the tracks. They are made of black plastic, I think vinyl. It is soft, bendable and elastic. Not like those stiff tracks you find with some other old kits. But the big problem with these tracks is: paint and glue do not have a grip on it. Everythings is falling off. Very annoying.
The next challenge was: how to paint the tracks of a tank driving through snow? My theory was: snow will be pressed in the profile, but the outer contact surfaces will be clean and shiny metal, due to the sanding effect of snow. So I tried to imitate that by painting the tracks white and drybrushing them with panzer grey and gun metal.
The inside is more difficult, as it is continuously cleaned by the roadwheels, but also snow is all the time being sprayed in when driving. So I tried 'a bit of everything' approach: first a rusty brown, then a drybrush using gun metal, and finished with blotting up some white. A lot of hassle as the first layers would come off the vinyl all the time.
Then I placed some lengths of iron wire through the hull, just above the first and last roadwheels: drilled holes in the right spots, wriggled the rion wire through them, cut them at the right length and fixated them using a drop of CA glue. The wires serve to press the tracks against the roadwheels, simulating track sag. If you don't the tracks will unrealistically press upwards against the mudguards.
Then I tried to install the tracks as careful as possible. @#$%^&* (Some bad words) Paint was flaking of all the time, especially in the sharp bends around the drive wheel and tension wheel. And the link between the track ends developed a big gap under tension. Awful! How to solve this?
First the paint on the treacks was restored. And now the snowy theme turns out a blessing in disguise (although heavy mud could do the job too). I made a porridge from flour and white paint and used that to fill the gaps in the tracks. The remainder was used to add clods of snow in other places around the tracks, fenders and wheels.
This is what it looks now.
A pic from the opposite side.
Almost ready. On to the last additions.
-

huib
- Posts: 978
- Member since:
12 Dec 2015, 15:57
-

Kostis Ornerakis
In memoriam- Posts: 1280
- Member since:
14 Feb 2016, 18:16
Help keep the forum online!
or become a supporting member
Thanks, Kostis and Peter!
Reconstructing the diorama
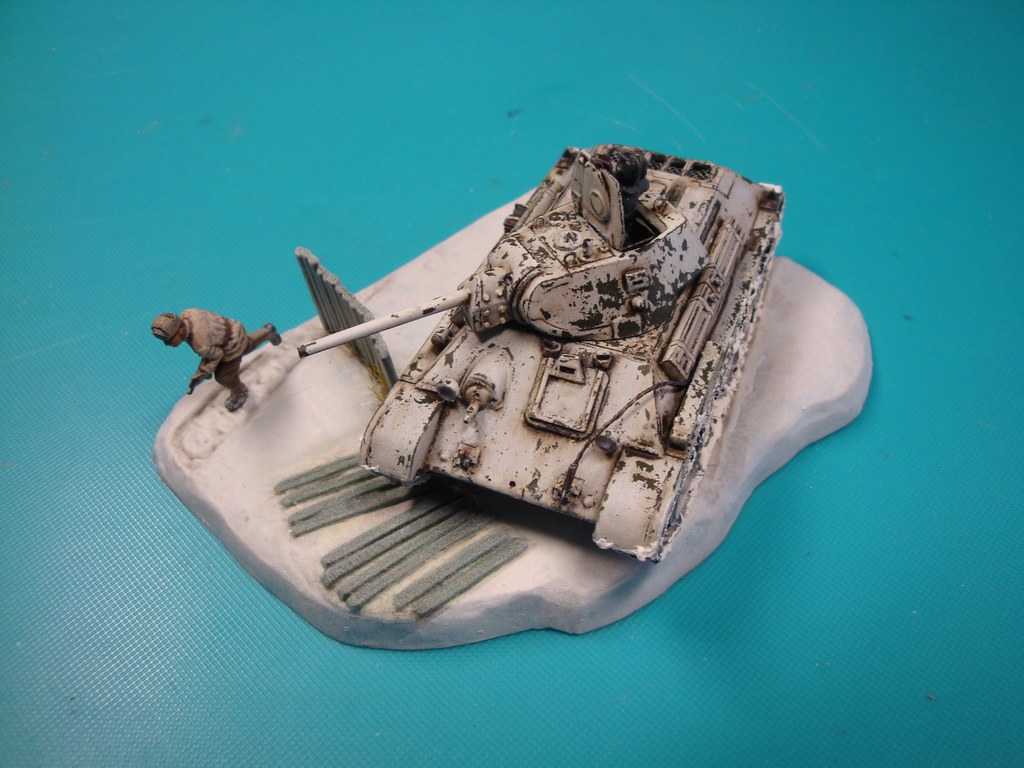
After the tracks were on, I made a dryfit of the tank on the diorama:
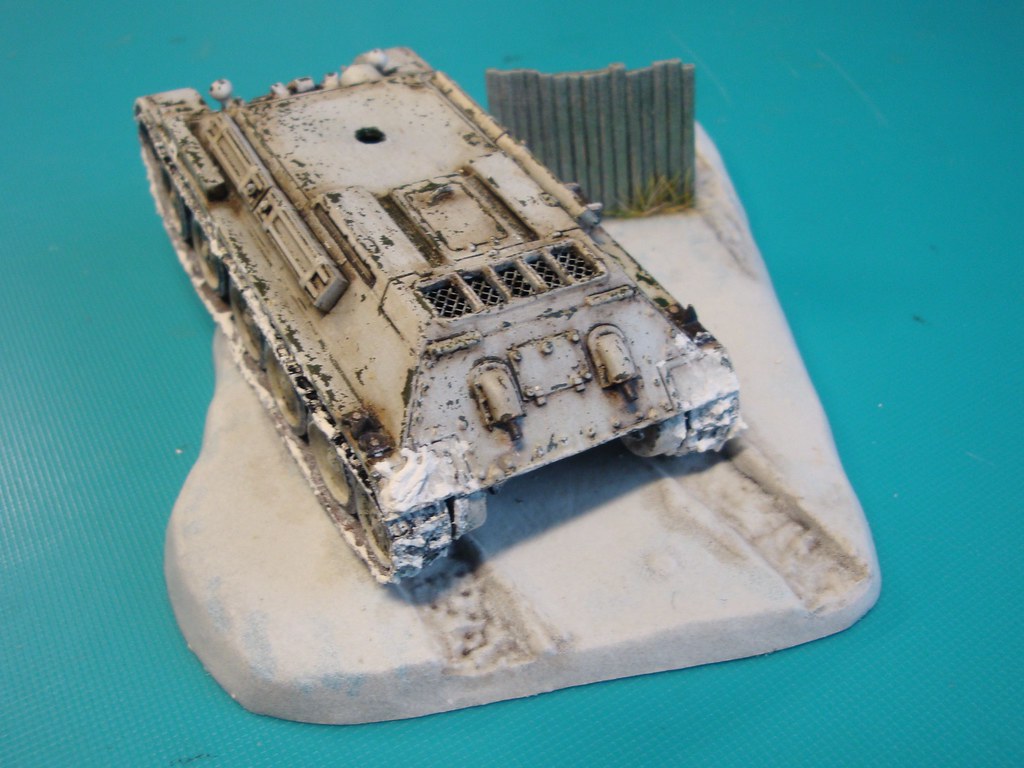
Hm, it doesn't fit!

I read someone complain about that earlier. The trackmarks in the snow are too close together. Quite sloppy, Matchbox!
What to do about it?
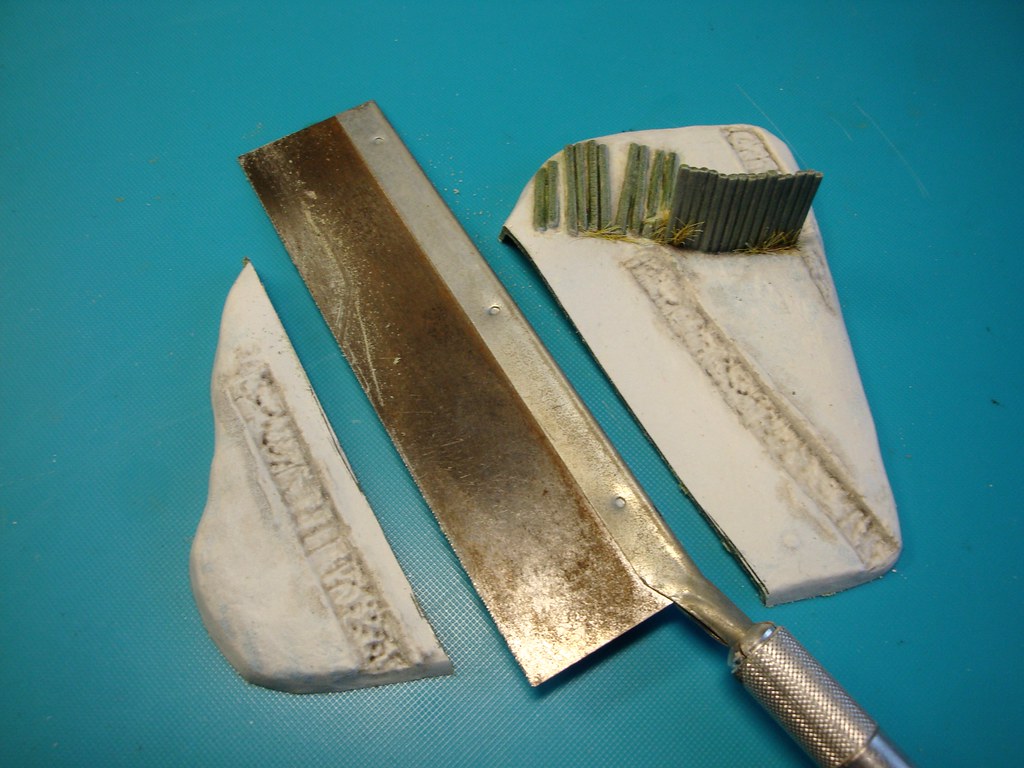
Well, cut the diorama in two!
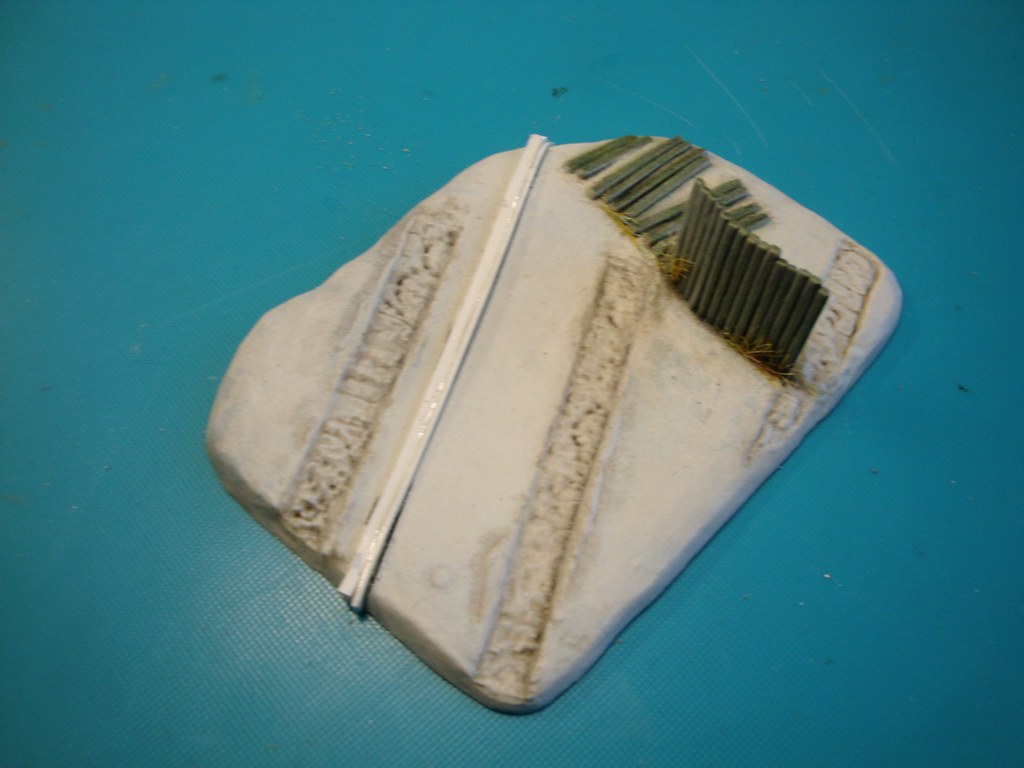
Insert 3mm of plastic and do some grinding, filling and sanding.

A respray.

As if nothing happened. Well if you take a close look you can see it, but that will be largely hidden under the tank.
On to the last update.
Reconstructing the diorama
After the tracks were on, I made a dryfit of the tank on the diorama:
Hm, it doesn't fit!
I read someone complain about that earlier. The trackmarks in the snow are too close together. Quite sloppy, Matchbox!
What to do about it?
Well, cut the diorama in two!
Insert 3mm of plastic and do some grinding, filling and sanding.
A respray.
As if nothing happened. Well if you take a close look you can see it, but that will be largely hidden under the tank.
On to the last update.
-
huib
- Posts: 978
- Member since:
12 Dec 2015, 15:57

Thank you Peter and Wiking.
The last details
A few small things, and then it's ready.
Some exhaust stains on the back of the hull, using black pastel chalk.

A towing cable, made of copper wire, iron wire and modelling tape.

The towing cable painted and weathered. Below the radio antenna.
The towing cable bent to shape and glued in position.

The antenna glued in position. Almost invisble it is positioned horizontally on the fender between the spare tracks on the left and the antenna pod on the right.
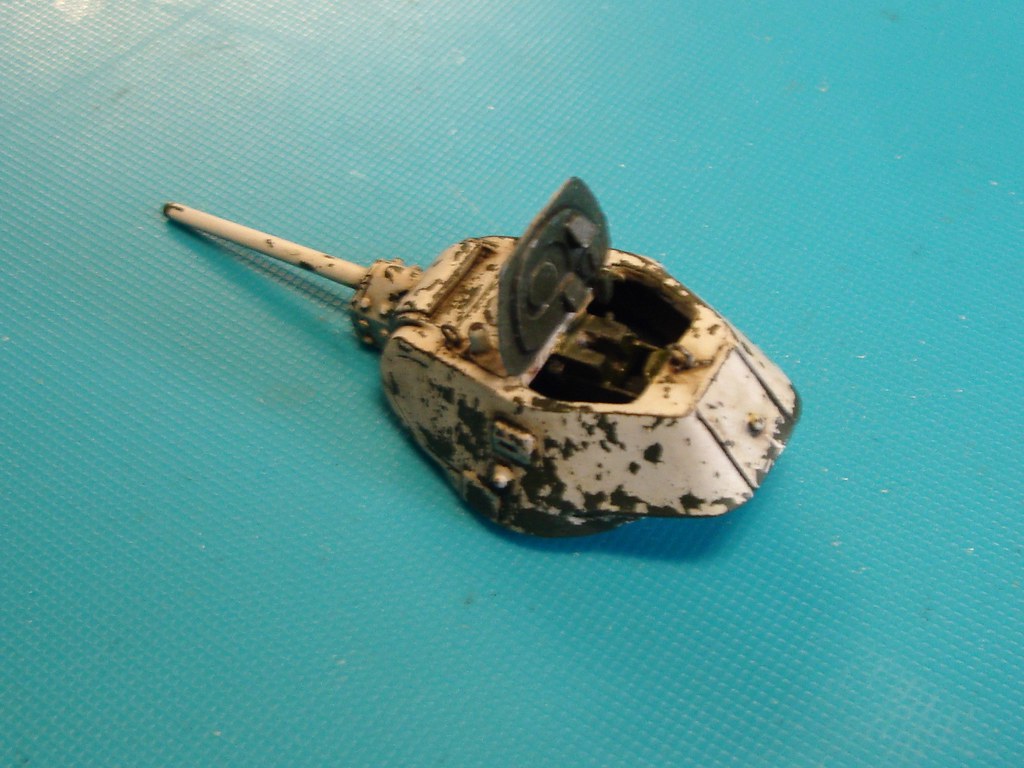
Turret hatch glued in postion.
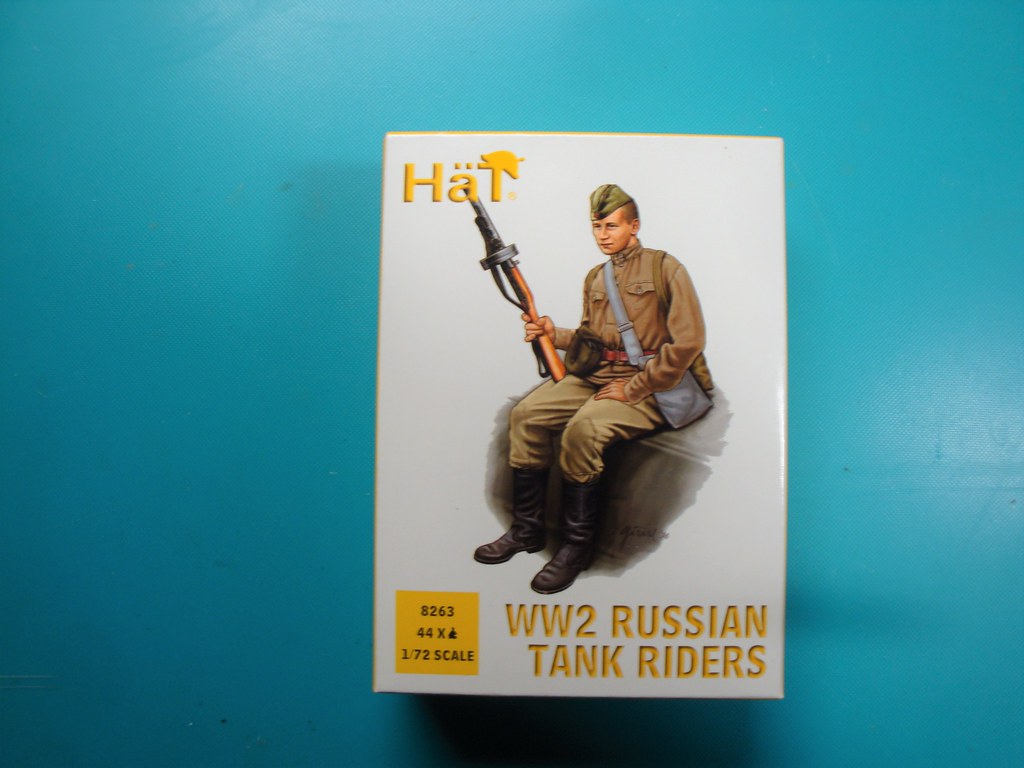
I bought me a box of Hät Russian tank riders to decorate my Russian tanks.

For this tank I choose a crewmember.

But for a nice fit he needs some surgery: a new arm from iron wire and green stuff.

Painted.
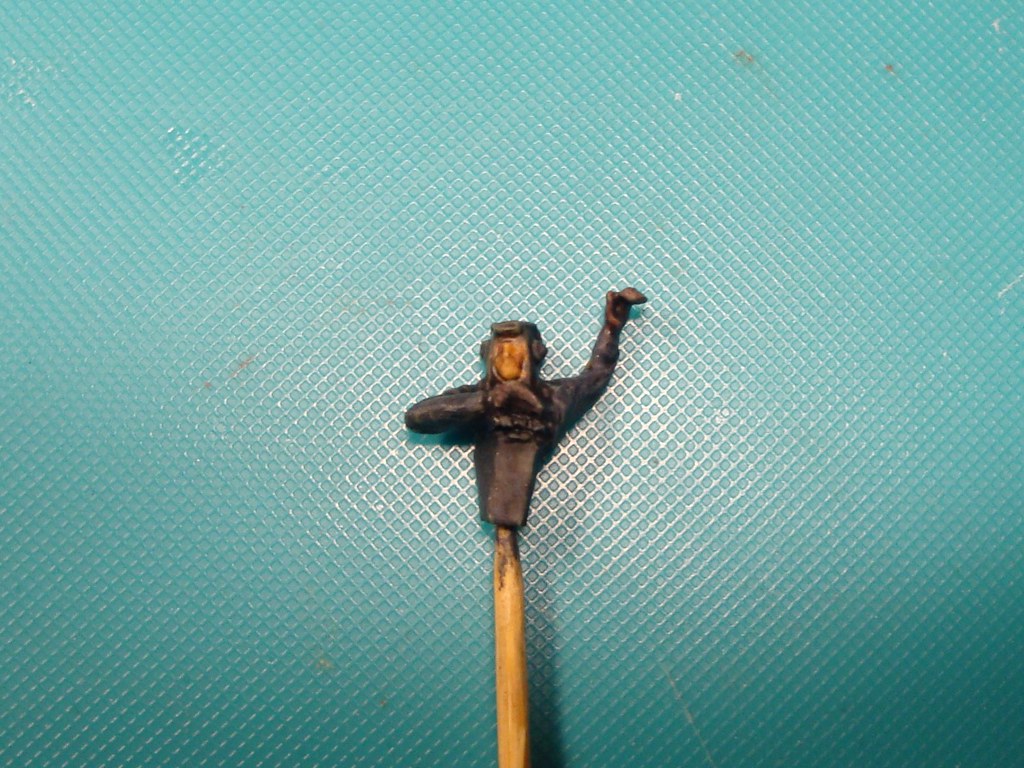
After some weathering and a matt varnish, his face is almost gone unfortunately.

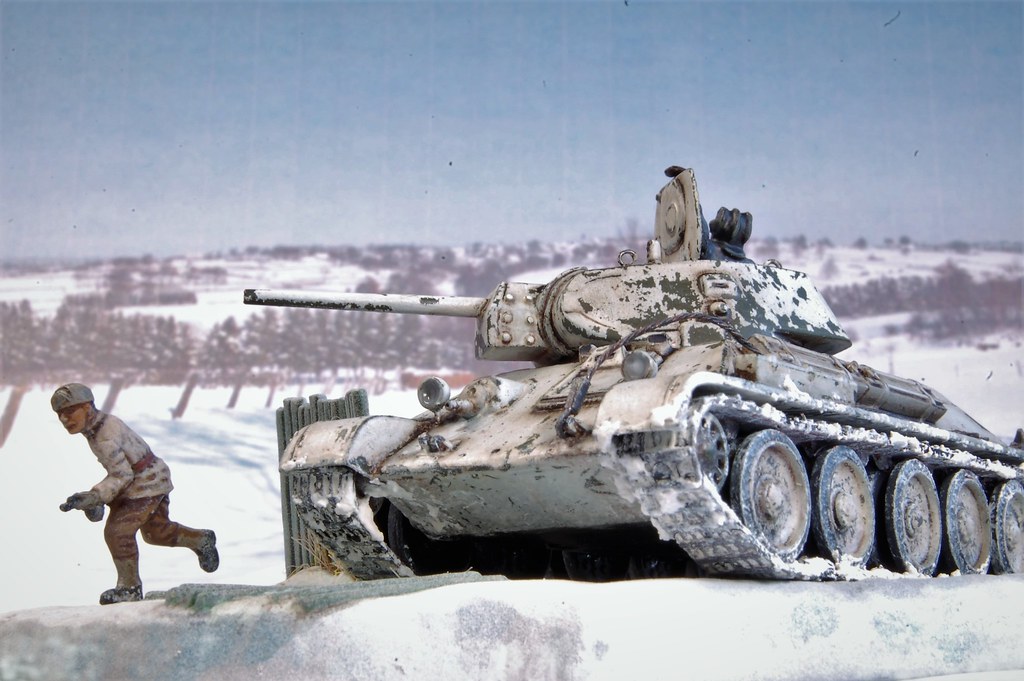
Finished!
Final pictures soon!
The last details
A few small things, and then it's ready.
Some exhaust stains on the back of the hull, using black pastel chalk.
A towing cable, made of copper wire, iron wire and modelling tape.
The towing cable painted and weathered. Below the radio antenna.
The towing cable bent to shape and glued in position.
The antenna glued in position. Almost invisble it is positioned horizontally on the fender between the spare tracks on the left and the antenna pod on the right.
Turret hatch glued in postion.
I bought me a box of Hät Russian tank riders to decorate my Russian tanks.
For this tank I choose a crewmember.
But for a nice fit he needs some surgery: a new arm from iron wire and green stuff.
Painted.
After some weathering and a matt varnish, his face is almost gone unfortunately.
Finished!
Final pictures soon!
-
huib
- Posts: 978
- Member since:
12 Dec 2015, 15:57


Fujimi 1/76 T34-76a
And on with the next one. This kit has already announced itsself, as I used part of its wheels for the Matchbox T34:

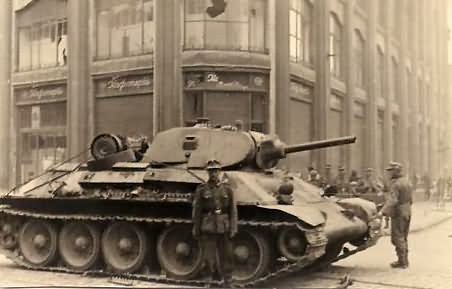
This is it. The Fujimi 1/76 T34/76a. A nice old kit. First issue from 1974. Back then this kit was considered the best of the then three available 1/76 T34 kits: Airfix, Matchbox and Fujimi. And it still holds its ground, although nowadays in 1/72 much better kits are available. Please also note the dramatic box art, on which a Soviet tank commander shoots a German infantry man attempting to attack his tank with a bundle of grenades.
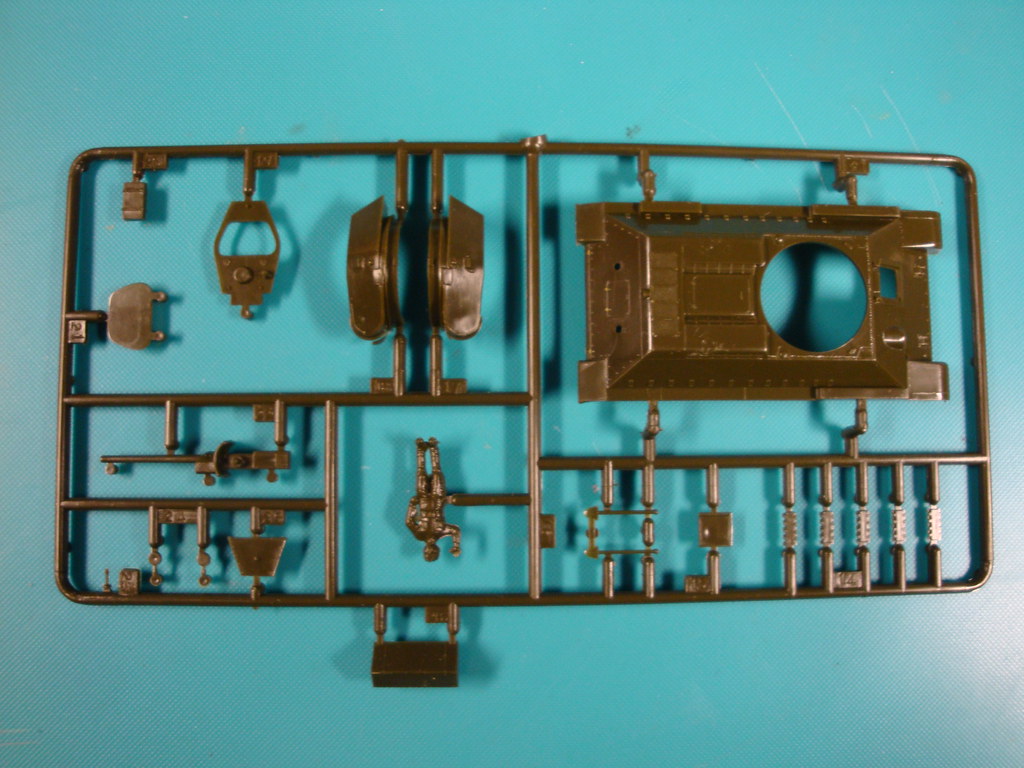
What's in the box? Two sprues, of which the first one contains the upper hull and the turret parts.

An the second one contains the lower hull and the wheels.

Rubber band tracks and a small decalsheet. That's all.
But what to do with this kit?
And on with the next one. This kit has already announced itsself, as I used part of its wheels for the Matchbox T34:
This is it. The Fujimi 1/76 T34/76a. A nice old kit. First issue from 1974. Back then this kit was considered the best of the then three available 1/76 T34 kits: Airfix, Matchbox and Fujimi. And it still holds its ground, although nowadays in 1/72 much better kits are available. Please also note the dramatic box art, on which a Soviet tank commander shoots a German infantry man attempting to attack his tank with a bundle of grenades.
What's in the box? Two sprues, of which the first one contains the upper hull and the turret parts.
An the second one contains the lower hull and the wheels.
Rubber band tracks and a small decalsheet. That's all.
But what to do with this kit?
-
huib
- Posts: 978
- Member since:
12 Dec 2015, 15:57
T34-76 model 1940
The problem with this kit is that OOB it contains almost exactly the T34/76 model 1941 that I made from the Matchbox kit. And building almost the same is a bit boring. First I intended to build this one into a later version, using the full metal road wheels included in the kit. But now I also have an Esci/Italeri kit to fill this gap. So now I decided to backdate this kit to the first operation model of the the T34, the model 1940.
This is what it looks like:
The most important external difference is the shorter gun and the different gun mantlet. But it also differs in a lot of details like periscopes, tool boxes, etc. Now these early T34's were plagued by mechanical breakdown, among others because the gear box and differential were too weak. As you can see on this picture the temporary solution was to tie a spare gearbox on the engine deck, so a repair could be done in the field in Soviet improvised style.

Here another T34 model 1940 with the extra gearbox on the engine deck. So you will find this gearbox on my model too in the end.
Only one problem: I used the wheels I need for this version already for the Matchbox kit. So now I have to source wheels from elsewhere.... Hm, maybe from the Airfix kit..... (Keep on kitbashing
 )
)
OK, let's start!
The problem with this kit is that OOB it contains almost exactly the T34/76 model 1941 that I made from the Matchbox kit. And building almost the same is a bit boring. First I intended to build this one into a later version, using the full metal road wheels included in the kit. But now I also have an Esci/Italeri kit to fill this gap. So now I decided to backdate this kit to the first operation model of the the T34, the model 1940.
This is what it looks like:
The most important external difference is the shorter gun and the different gun mantlet. But it also differs in a lot of details like periscopes, tool boxes, etc. Now these early T34's were plagued by mechanical breakdown, among others because the gear box and differential were too weak. As you can see on this picture the temporary solution was to tie a spare gearbox on the engine deck, so a repair could be done in the field in Soviet improvised style.
Here another T34 model 1940 with the extra gearbox on the engine deck. So you will find this gearbox on my model too in the end.
Only one problem: I used the wheels I need for this version already for the Matchbox kit. So now I have to source wheels from elsewhere.... Hm, maybe from the Airfix kit..... (Keep on kitbashing
)OK, let's start!
-
huib
- Posts: 978
- Member since:
12 Dec 2015, 15:57

Help keep the forum online!
or become a supporting member


-

Pocho Azul
- Posts: 72
- Member since:
23 Jan 2021, 02:11
-
MABO
- Supporting Member (Gold)
- Posts: 9166
- Member since:
12 May 2008, 18:01
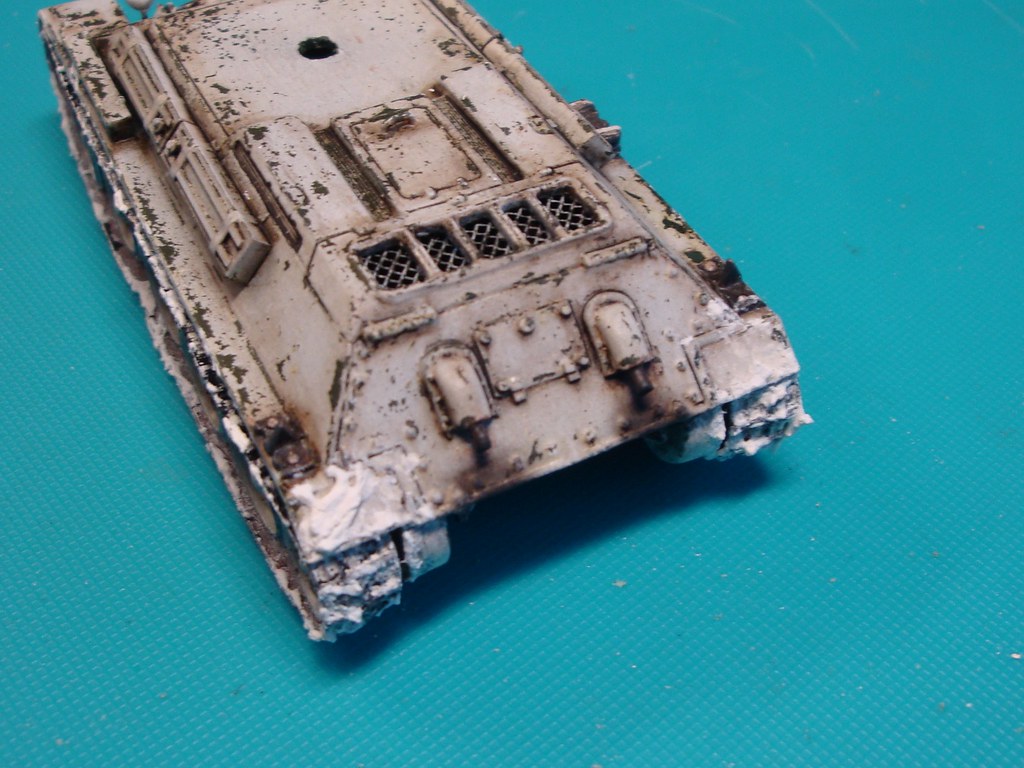
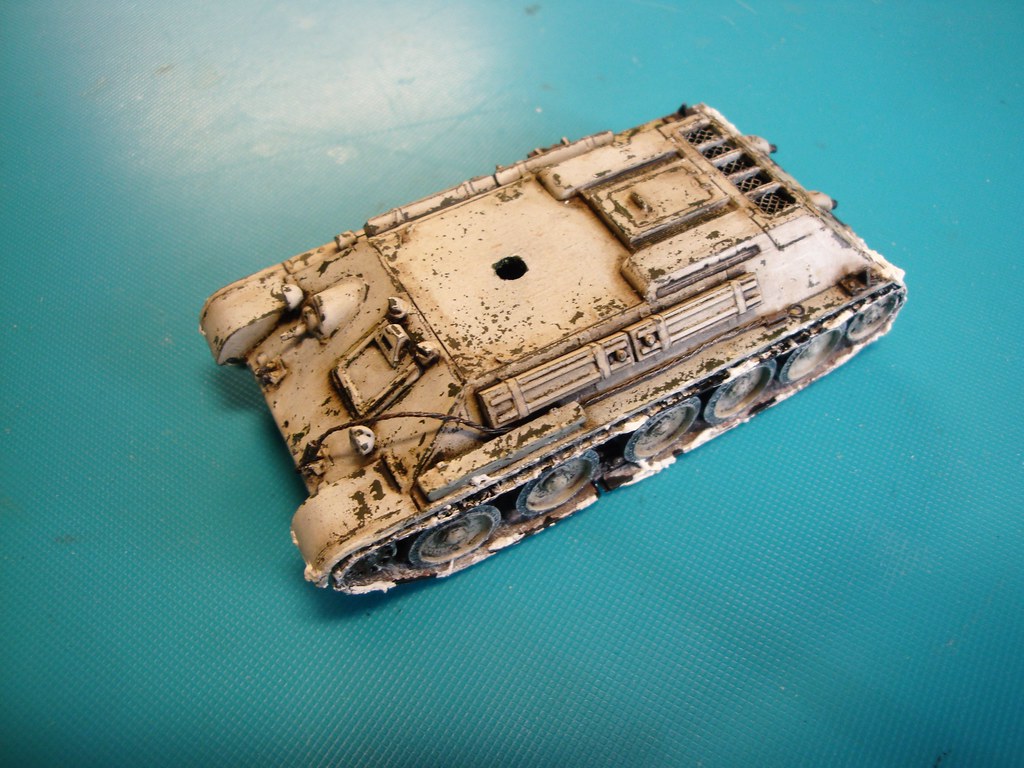
Hull
Work is started on the hull.
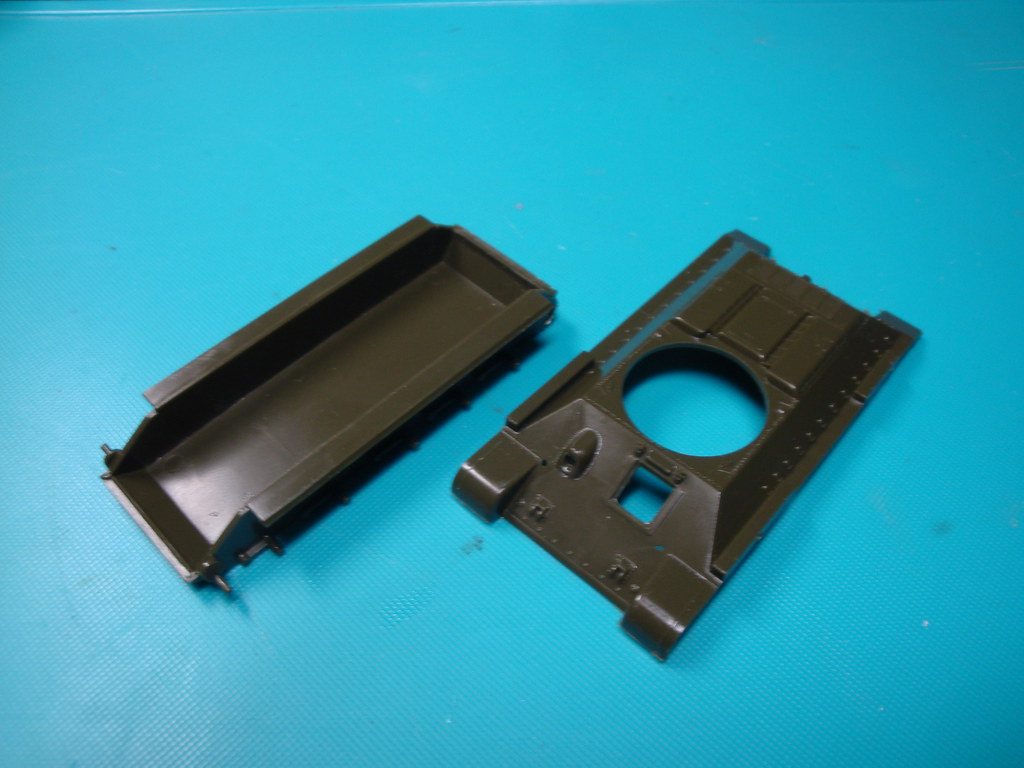
Upper and lower hull parts.

Some toolboxes were filed and sanded away, as the positioning of the boxes on this specific type is different.
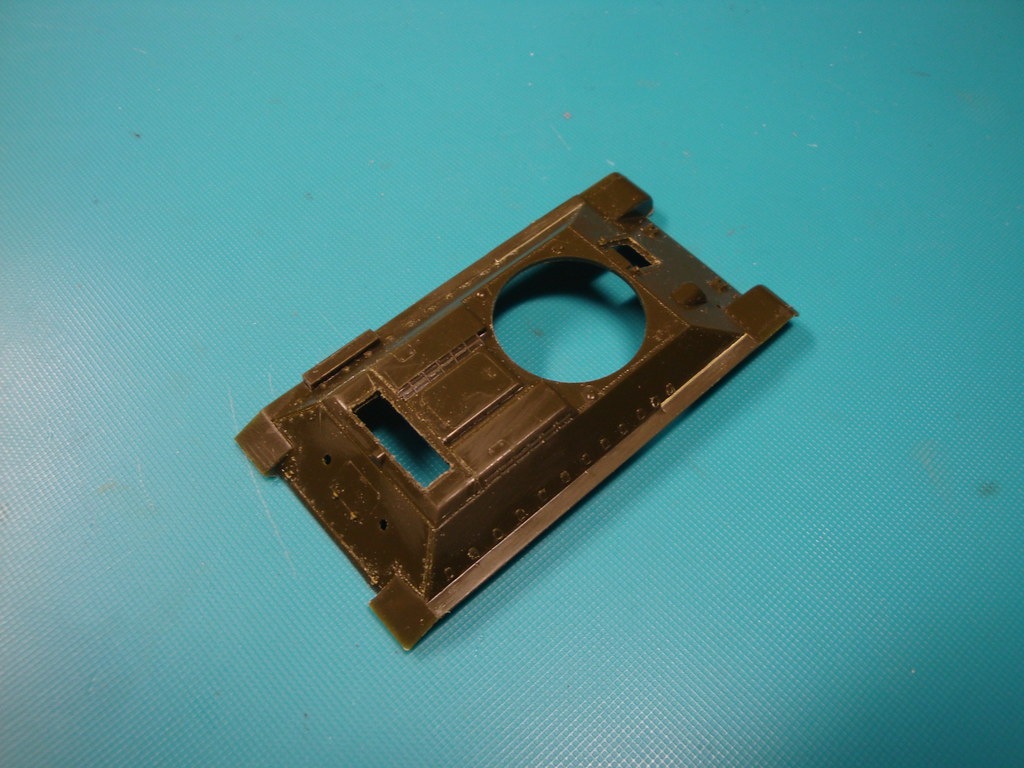
Engine ventilation grille opened up.
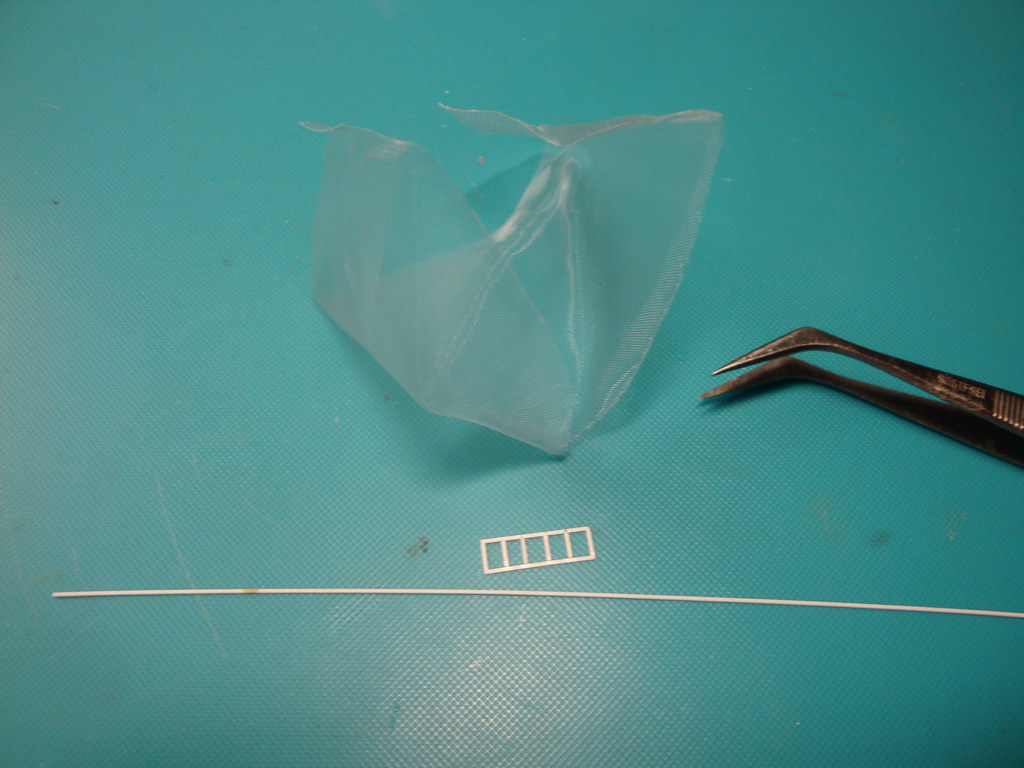
Made a new frame from plastic strip, and found some very fine mesh from a tea bag.
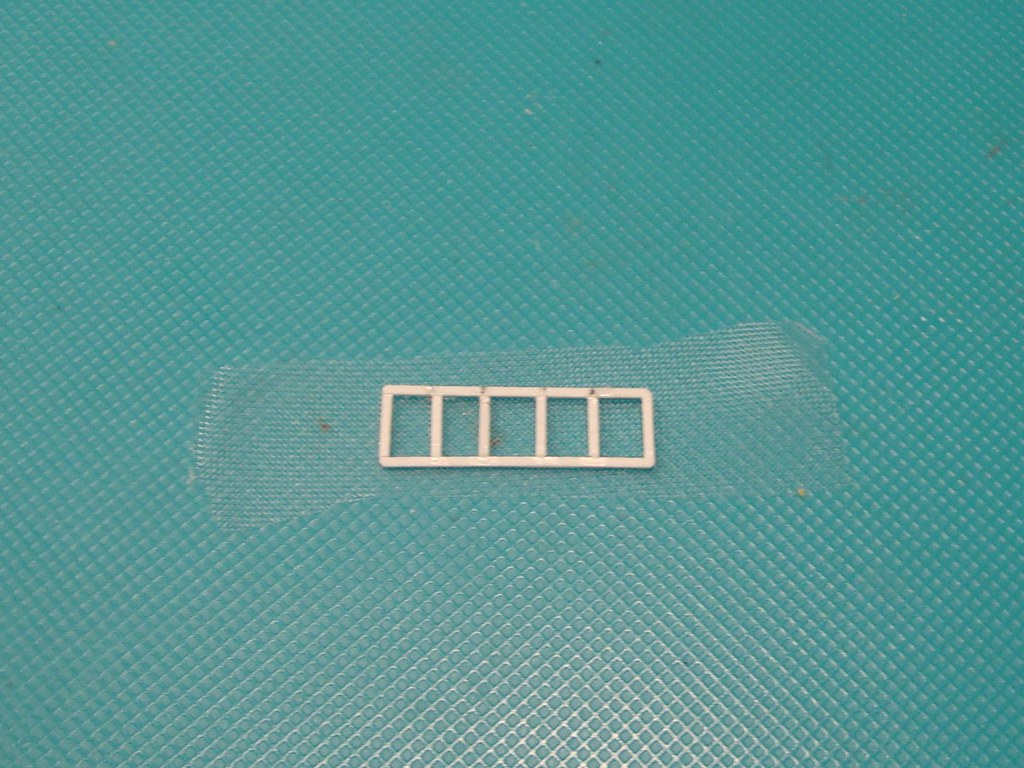
Frame and mesh

Glued in place.
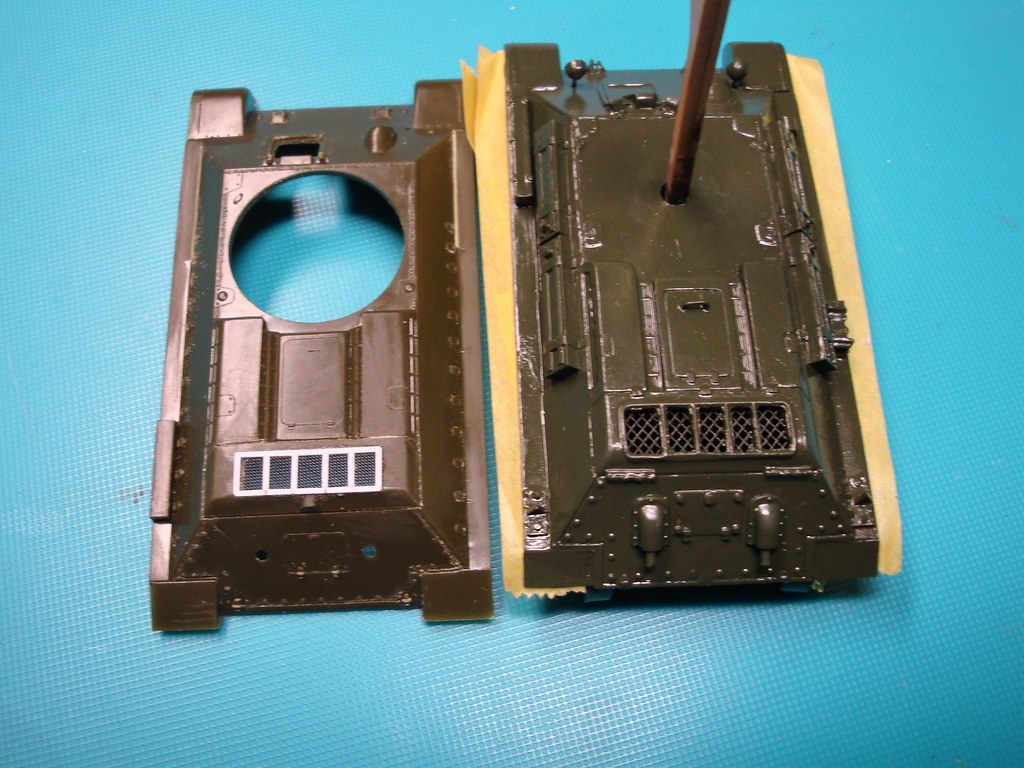
Here in comparison with my earlier T34. Scalewise this fine mesh is much better. But the challenge wil be preventing it getting cluttered by paint. From a modelling point of view it could turn out in the end that the coarser mesh is a better way to go. We will see.
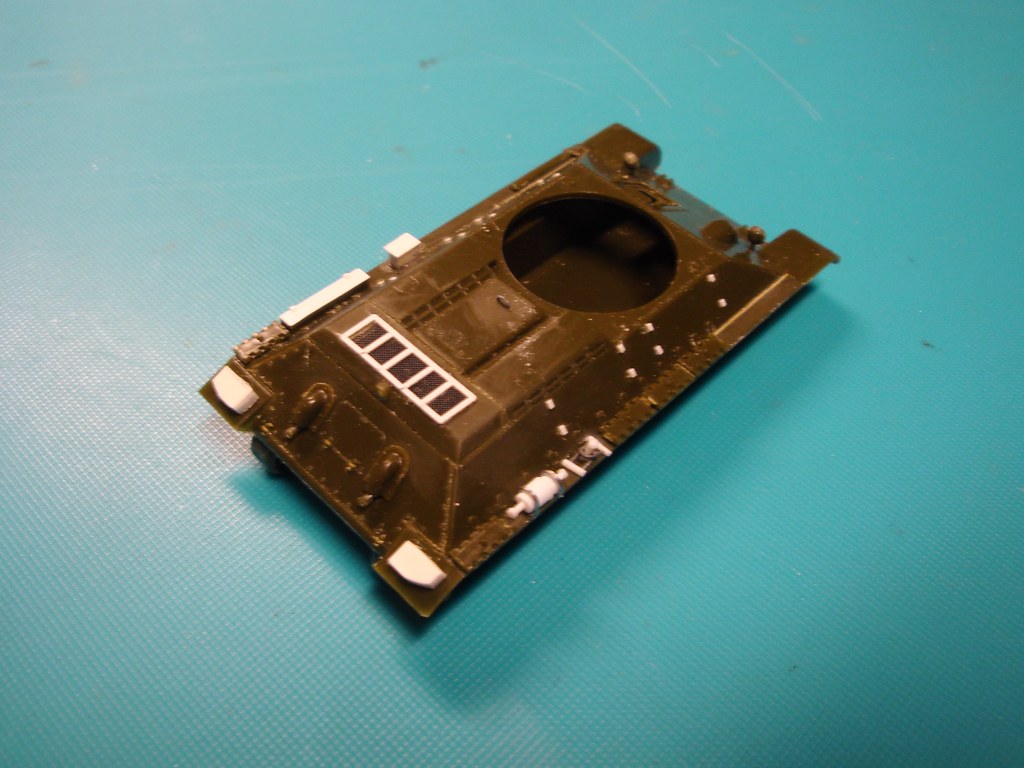
Then some additional detail was added to the hull, including a jack, towing buckles, jackblocks and toolboxes.

The drivershatch is detailed on the inside so I can glue it in the open position.
Now to continue with the turret.
Work is started on the hull.
Upper and lower hull parts.
Some toolboxes were filed and sanded away, as the positioning of the boxes on this specific type is different.
Engine ventilation grille opened up.
Made a new frame from plastic strip, and found some very fine mesh from a tea bag.
Frame and mesh
Glued in place.
Here in comparison with my earlier T34. Scalewise this fine mesh is much better. But the challenge wil be preventing it getting cluttered by paint. From a modelling point of view it could turn out in the end that the coarser mesh is a better way to go. We will see.
Then some additional detail was added to the hull, including a jack, towing buckles, jackblocks and toolboxes.
The drivershatch is detailed on the inside so I can glue it in the open position.
Now to continue with the turret.
-
huib
- Posts: 978
- Member since:
12 Dec 2015, 15:57