How to Draw The Impossible Triangle? [Draw Along Video For Beginners]
How to Draw The
Impossible Triangle? [Draw Along Video For Beginners]
Is it possible to draw the Impossible Triangle in under 5 minutes?
In this article, I will walk you through a step-by-step process so that you can follow along and draw your own Impossible Triangle in no time. Let’s get started!
What is the Impossible Triangle?
The Impossible Triangle, also known as the Penrose triangle, is actually an optical illusion.
It was first painted by Swedish painter Oscar Reutersvärd who is sometimes reffered to as ‘the father of impossible figures’. Two decades later, Roger Penrose, an English Mathematician drew it in perspective view and further added the effect of impossibility.

It was believed that an impossible triangle doesn’t exist in real life, but can only be depicted in a perspective drawing. (That’s how it gets the name, right?) But, look at this sculpture in Perth:

Source: Google Images
Yes, it is actually possible to recreate it in real life. Except that it can only look impossible from one point of view, while the from other angles it would look just like any other real & ordinary sculpture.
However, it is very easy to draw on paper or tablet. So if you are a beginner in drawing and looking for some fun, this is a great start. At the same time, you can also draw along with me by watching this Youtube video below.
In the video, I use Morpholio Trace on iPad which offers assisted drawing along certain grid or increments of angles. You can follow the same steps with analog tools like pencil, ruler, and paper, though.
Step 1: PREPARATION
Start by clicking on the wrench tool, then set the grid. Choose the middle option, which is the axonometric grid. Change the angle of the grid to 30°. Then adjust its size and opacity.
Next, choose the dashed line, a drawing brush of choice, and color for drawing the initial underlying structure.

Step 2: Drawing The Base
Activate the smart ruler and change its setting to either 15° or 30°. This will assist you with drawing along the grid. Now you can use the grid to outline an equilateral triangle with cut corners. Follow the grid to draw inner lines suggesting the thickness of the triangle.
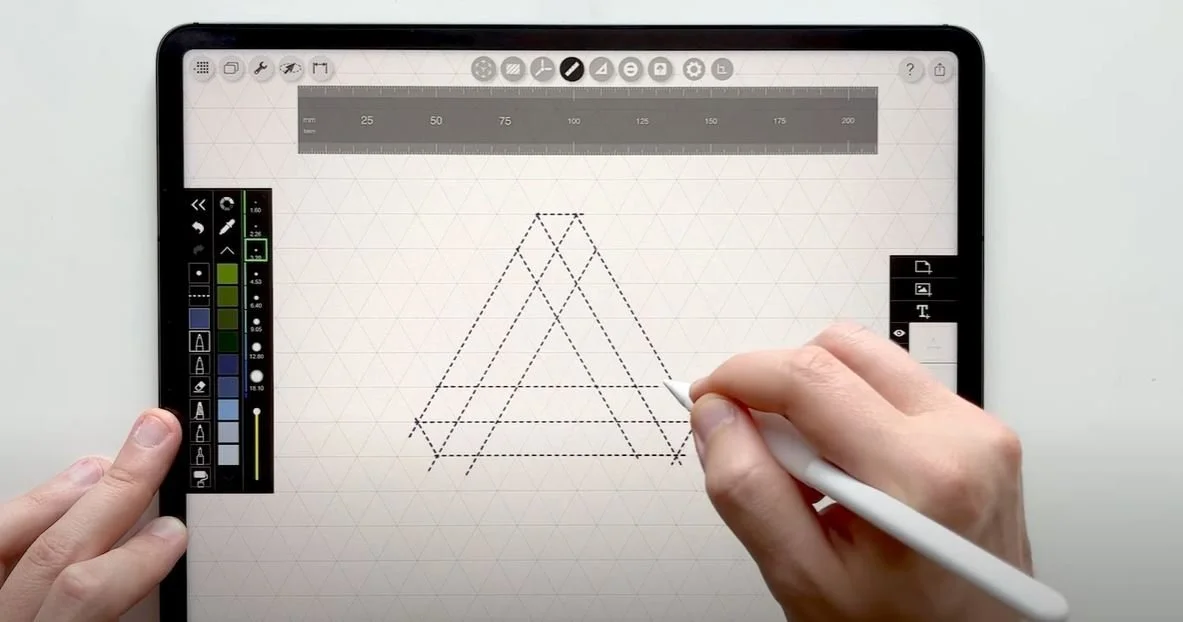
Step 3: Tracing
Then, lower the opacity of this drawing, create a new layer and trace the dashed lines to draw the optical illusion. Once completed, turn off both the grid and the underlying drawing. The drawing can be seen clearly now.

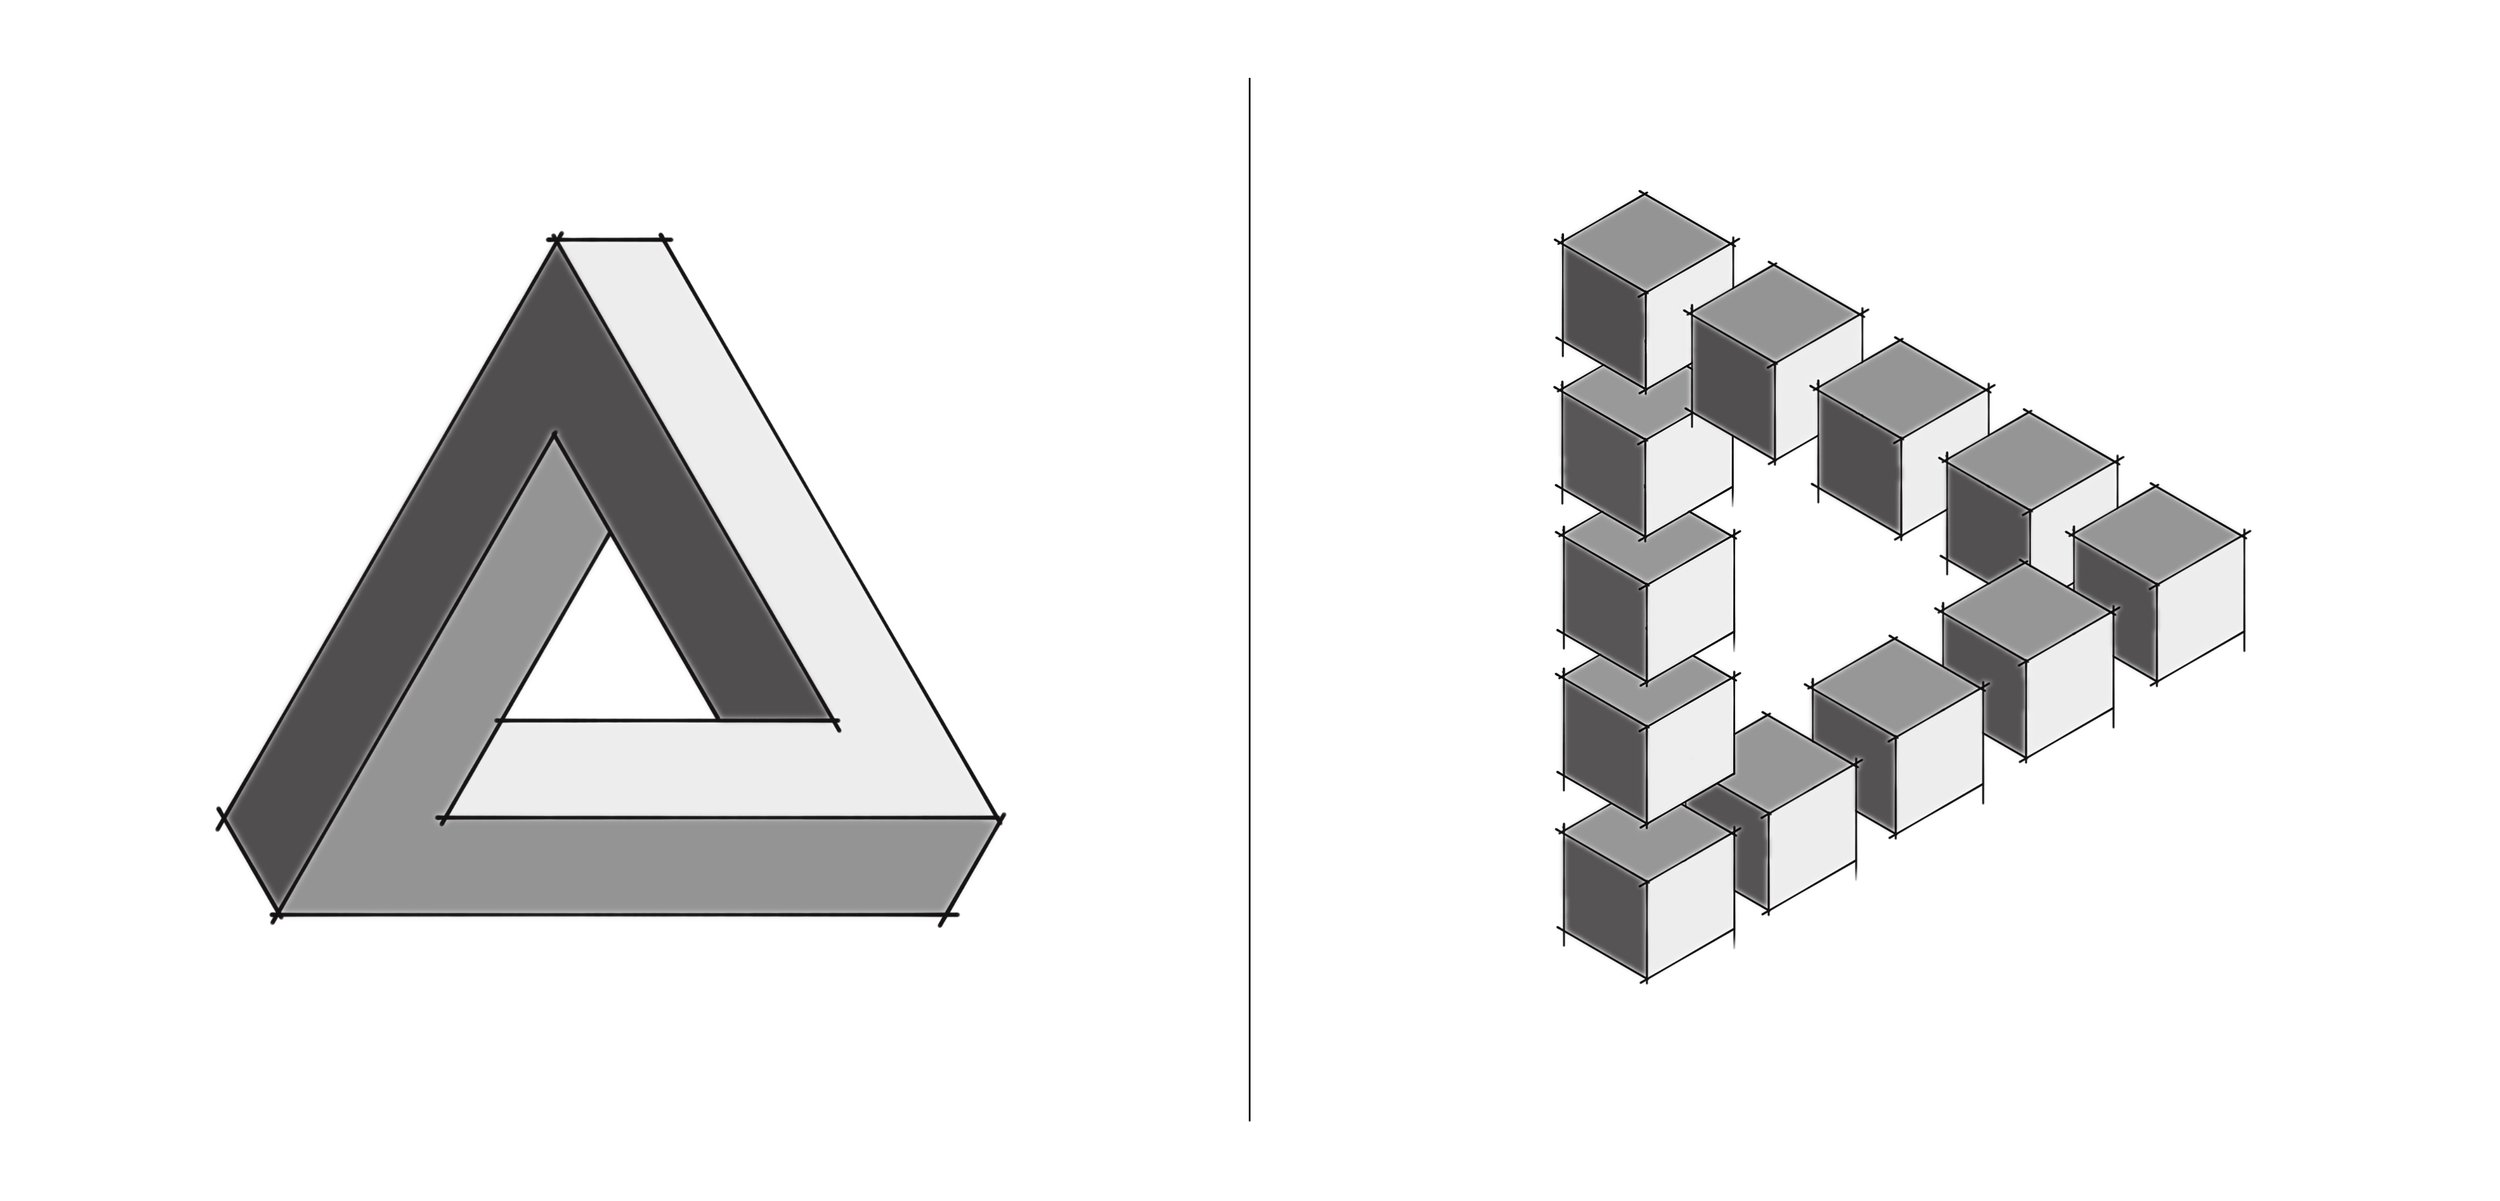
Step 4: Shading
Finally, it’s time to add shading for depth and dimension. Activate the smart hatch tool and choose a solid color. Use 3 different tones - light, medium, and dark - of the same color to suggest the shading.

If your hatch spills outside of the drawn borders, simply adjust the threshold slider. And then…. Voilà, you are done!
Your final drawing will look something like the one below - or you can try to recreate the original idea with 3D cubes in isometric view.
If you are a regular reader, you know how much I love to use it. Whether for developing a design concept, or drawing an interior perspective, Morpholio Trace is easy to use especially for beginners. Interested? Click this link to download the app and try it out.
Have fun!
Save this pin for future reference! 👇
