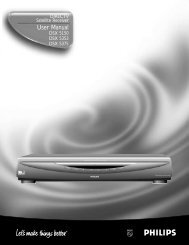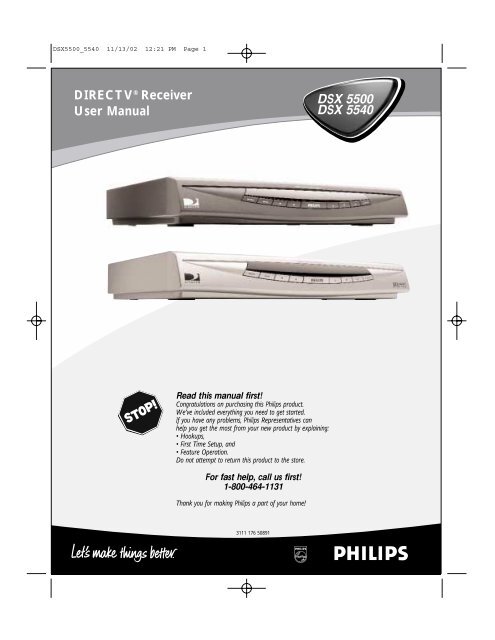
DSX 5500 DSX 5540 DIRECTV® Receiver User Manual
DSX 5500 DSX 5540 DIRECTV® Receiver User Manual
DSX 5500 DSX 5540 DIRECTV® Receiver User Manual

Create successful ePaper yourself
Turn your PDF publications into a flip-book with our unique Google optimized e-Paper software.
<strong>DSX</strong><strong>5500</strong>_<strong>5540</strong> 11/13/02 12:21 PM Page 1<br />
DIRECTV ® <strong>Receiver</strong><br />
<strong>User</strong> <strong>Manual</strong><br />
Read this manual first!<br />
Congratulations on purchasing this Philips product.<br />
We’ve included everything you need to get started.<br />
If you have any problems, Philips Representatives can<br />
help you get the most from your new product by explaining:<br />
• Hookups,<br />
• First Time Setup, and<br />
• Feature Operation.<br />
Do not attempt to return this product to the store.<br />
For fast help, call us first!<br />
1-800-464-1131<br />
Thank you for making Philips a part of your home!<br />
3111 176 50891<br />
<strong>DSX</strong> <strong>5500</strong><br />
<strong>DSX</strong> <strong>5540</strong>
<strong>DSX</strong><strong>5500</strong>_<strong>5540</strong> 11/13/02 12:21 PM Page 2<br />
Congratulations on your purchase, and welcome to the “family!”<br />
Dear PHILIPS product owner:<br />
Thank you for your confidence in PHILIPS. You’ve selected one of the best-built, best-backed products available today.<br />
And we’ll do everything in our power to keep you happy with your purchase for many years to come.<br />
As a member of the PHILIPS “family,” you’re entitled to protection by one of the most comprehensive warranties and<br />
outstanding service networks in the industry.<br />
What’s more, your purchase guarantees you’ll receive all the information and special offers for which you qualify, plus<br />
easy access to accessories from our convenient home shopping network.<br />
And most importantly you can count on our uncompromising commitment to your total satisfaction.<br />
All of this is our way of saying welcome-and thanks for investing in a PHILIPS product.<br />
Sincerely,<br />
Know these<br />
safety symbols<br />
t<br />
CAUTION<br />
RISK OF ELECTRIC SHOCK<br />
DO NOT OPEN<br />
CAUTION: TO REDUCE THE RISK OF ELECTRIC SHOCK, DO NOT<br />
REMOVE COVER (OR BACK). NO USER-SERVICEABLE PARTS<br />
INSIDE. REFER SERVICING TO QUALIFIED SERVICE PERSONNEL.<br />
Visit our World Wide Web Site at http://www.philips.com<br />
Lawrence J. Blanford<br />
President and Chief Executive Officer<br />
This “bolt of lightning” indicates uninsulated material<br />
within your unit may cause an electrical shock. For the<br />
safety of everyone in your household, please do not remove<br />
product covering.<br />
The “exclamation point” calls attention to features for<br />
s which you should read the enclosed literature closely<br />
to prevent operating and maintenance problems.<br />
WARNING: TO PREVENT FIRE OR SHOCK HAZARD,<br />
DO NOT EXPOSE THIS EQUIPMENT TO RAIN OR<br />
MOISTURE.<br />
CAUTION: To prevent electric shock, match wide blade of<br />
plug to wide slot of the outlet and fully insert.<br />
ATTENTION: Pour éviter les choc électriques, introduire<br />
la lame la plus large de la fiche dans la borne correspondante<br />
de la prise et pousser jusqu’au fond.<br />
For Customer Use<br />
Enter below the Model, Serial and Access Card Number<br />
and <strong>Receiver</strong> ID located on the rear panel of the<br />
<strong>DIRECTV®</strong> <strong>Receiver</strong>. Retain this information for future<br />
reference.<br />
Model No. ________________________________________<br />
Serial No. ________________________________________<br />
Access Card No. __________________________________<br />
<strong>Receiver</strong> ID ______________________________________
<strong>DSX</strong><strong>5500</strong>_<strong>5540</strong> 11/13/02 12:21 PM Page 3<br />
Safety Instructions - Read Before Operating Equipment<br />
WARNING: TO PREVENT FIRE OR SHOCK HAZARD, DO NOT<br />
EXPOSE ANY ELECTRICAL EQUIPMENT TO RAIN OR MOISTURE.<br />
1. Read Instructions – All the safety and operating instructions<br />
should be read before the appliance is operated.<br />
2. Retain Instructions – The safety and operating instructions<br />
should be retained for future reference.<br />
3. Heed Warnings – All warnings on the appliance and in the operating<br />
instructions should be adhered to.<br />
4. Follow Instructions – All operating and use instructions should<br />
be followed.<br />
5. Attachments – Do not use attachments not recommended by the<br />
manufacturer as they may cause hazards.<br />
6. Water and Moisture – Do not use this product near water –<br />
for example, near a bath tub, wash bowl, kitchen sink, or laundry<br />
tub, in a wet basement, near a swimming pool, etc.<br />
7. Accessories – Do not place this product on an unstable cart,<br />
stand, tripod, bracket, or table. The product may fall, causing serious<br />
injury to a child or adult, and serious damage to the appliance.<br />
Use only with a cart, stand, tripod, bracket, or table recommended<br />
by the manufacturer or sold with the product. Any mounting of the<br />
appliance should follow the manufacturer's instructions, and should<br />
use a mounting accessory recommended by the manufacturer.<br />
7A. An appliance and cart combination should be moved with<br />
care. Quick stops, excessive force, and uneven surfaces may<br />
cause the appliance and cart combination to overturn.<br />
8. Ventilation – Slots and openings on the cabinet are provided for<br />
ventilation and to ensure reliable operation of the product and to<br />
protect it from overheating. These openings must not be blocked<br />
or covered. The openings should never be blocked by placing the<br />
product on a bed, sofa, rug, or other similar surface. This product<br />
should not be placed near or over a radiator or heat register. This<br />
product should not be placed in a built-in installation such as a<br />
bookcase or rack unless proper ventilation is provided or the manufacturer’s<br />
instructions have been adhered to.<br />
9. Power Sources – This product should be operated only from the<br />
type of power source indicated on the marking label. If you are not<br />
sure of the type of power supply to your home, consult your appliance<br />
dealer or local power company.<br />
10. Grounding or Polarization – This product is equipped with a<br />
polarized alternating-current line plug (a plug having one blade<br />
wider than the other). This plug will fit into the power outlet only<br />
one way. This is a safety feature. If you are unable to insert the plug<br />
fully into the outlet, try reversing the plug. If the plug should still fail<br />
to fit, contact your electrician to replace your obsolete outlet. Do<br />
not defeat the safety purpose of the polarized plug.<br />
11. Power Cord Protection – Route power supply cords so that<br />
they are not likely to be walked on or pinched by items placed<br />
upon or against them. Pay particular attention to cords at plugs,<br />
convenience receptacles, and the point where they exit from the<br />
appliance.<br />
12. Outdoor Antenna Grounding – If an outside antenna or cable<br />
system is connected to the product, be sure the antenna or cable<br />
system is grounded to provide protection against voltage surges<br />
and built-up static charges.<br />
Section 810 of the National Electrical Code, ANSI/NFPA 70, provides<br />
information with regard to proper grounding of the mast and<br />
supporting structure, grounding of the lead-in wire to an antenna<br />
discharge unit, size of grounding conductors, location of antennadischarge<br />
unit, connection to grounding electrodes, and requirements<br />
for the grounding electrode. See Figure A.<br />
13. Phone Line Use – Avoid using a telephone (other than a cordless<br />
type) during an electrical storm. There may be a remote risk of<br />
electric shock from lightning. Do not use the telephone to report a<br />
gas leak in the vicinity of the leak.<br />
14. Lightning – For added protection for this product during a lightning<br />
storm or when it is left unattended and unused for long periods<br />
of time, unplug it from the wall outlet and disconnect the<br />
antenna or cable system. This will prevent damage to the product<br />
from lightning and power line surges.<br />
3<br />
15. Power Lines – An outside antenna system should not be located<br />
in the vicinity of overhead power lines or other electric light or<br />
power circuits, or where it can fall onto such power lines or circuits.<br />
When installing an outside antenna system, extreme care<br />
should be taken to keep from touching such power lines or circuits<br />
as contact with them might be fatal. Refer to Satellite Dish Antenna<br />
Assembly & Alignment Guide.<br />
16. Overloading – Do not overload wall outlets and extension cords<br />
as this can result in a risk of fire or electric shock.<br />
17. Object and Liquid Entry – Never push objects of any kind into<br />
this product through openings as they may touch dangerous voltage<br />
points or short-out parts that could result in a fire or electric<br />
shock. Never spill liquid of any kind on the product.<br />
18. Servicing – Do not attempt to service this product yourself, as<br />
opening or removing covers may expose you to dangerous voltage<br />
or other hazards. Refer all servicing to qualified service personnel.<br />
19. Damage Requiring Service – Unplug this product from the wall<br />
outlet and refer servicing to qualified service personnel under the<br />
following conditions:<br />
a. When the power supply cord or plug is damaged.<br />
b. If liquid has been spilled, or objects have fallen into the product.<br />
c. If the product has been exposed to rain or water.<br />
d. If the product does not operate normally when following the operating<br />
instructions. Adjust only those controls that are covered by the<br />
operating instructions, as an improper adjustment of other controls<br />
may result in damage and will often require extensive work by a<br />
qualified technician to restore the product to its normal operation.<br />
e. If the product has been dropped or the cabinet has been damaged<br />
in any way.<br />
f. When the product exhibits a distinct change in performance –<br />
this indicates a need for service.<br />
20. Replacement Parts – When replacement parts are required, be<br />
sure the service technician has used replacement parts specified by<br />
the manufacturer or which have the same characteristics as the<br />
original part. Unauthorized substitutions may result in fire, electric<br />
shock or other hazards.<br />
21. Safety Check – Upon completion of any service or repairs to this<br />
product, ask the service technician to perform safety checks to<br />
determine that the product is in proper operating condition.<br />
22. Carts and Stands – The appliance should be used only with a<br />
cart or stand recommended by the manufacturer.<br />
23. Heat – The product should be situated away from heat sources<br />
such as radiators, heat registers, stoves, or other products that<br />
produce heat.<br />
Operating Temperature: 40 to 110°F<br />
Storage Temperature: 15 to 155°F<br />
Figure A
<strong>DSX</strong><strong>5500</strong>_<strong>5540</strong> 11/13/02 12:21 PM Page 4<br />
Safety Instructions (cont’d), General Information<br />
This device incorporates an anticopy process technology that is protected by U.S. patents and other intellectual property rights. The<br />
anticopy process is licensed for non-commercial, home use only. Reverse engineering or disassembly is prohibited.<br />
NOTE TO CATV SYSTEM INSTALLER<br />
Article 820-40 of the NEC (National Electrical Code) provides guidelines for proper grounding and, in particular, specifies that the<br />
cable ground shall be connected to the grounding system of the building, as close to the point cable entry as practical.<br />
WARNING<br />
This device complies with Part 15 of the FCC (U. S. A.) Rules.<br />
Operation is subject to the following two conditions:<br />
(1) This device may not cause harmful interference, and<br />
(2) This device must accept any interference received, including interference that may cause undesired operation.<br />
FCC Regulations and Information<br />
This equipment has been tested and found to comply with the limits for a Class B digital device, pursuant to Part 15 of the FCC<br />
Rules. These limits are designed to provide reasonable protection against harmful interference in a residential installation. This<br />
equipment generates, uses and can radiate radio frequency energy and, if not installed and used in accordance with the<br />
instructions, may cause harmful interference to radio communications.<br />
However, there is no guarantee that interference will not occur in a particular installation. If this equipment does cause interference<br />
to radio or television reception (which you can determine by turning the equipment off and on), you are encouraged to try to correct<br />
the interference by one or more of the following measures:<br />
1. Change the position of the DIRECTV ® <strong>Receiver</strong> with respect to the radio or television equipment that is receiving the interference.<br />
2. Move the DIRECTV <strong>Receiver</strong> away from the equipment that is receiving the interference.<br />
3. Plug the DIRECTV <strong>Receiver</strong> into a different outlet so that the DIRECTV <strong>Receiver</strong> and the equipment receiving the interference are<br />
on different branch circuits.<br />
4. Use shielded cables and I/O cords with this equipment to comply with the relevant FCC regulations.<br />
5. If these measures do not eliminate the interference, you should consult your dealer or an experienced radio/television technician<br />
for help.<br />
IMPORTANT<br />
Any change or modifications to the equipment by the user not expressly approved by the warranty or manufacturer could void the<br />
user’s authority to operate the equipment.<br />
Domestic use U. S. A – For units used at 110V, use only the power supply cord which is supplied with the product.<br />
ANALOG DEVICE WARNINGS<br />
Federal Communication Commission (FCC) Part 68 and Administrative Council for Terminal Attachments (ACTA)<br />
This device complies with Part 68 of the FCC rules and the requirements adopted by the ACTA. A label on the rear panel of this<br />
equipment contains, among other information, a product identifier in the format US:AAAEQ##TXXXX. If requested, this information<br />
must be provided to the telephone company. The REN is used to determine the number of devices that may be connected to the<br />
telephone line. Excessive RENs on the telephone line may result in the devices not ringing in response to an incoming call. In<br />
most, but not all areas, the sum of RENs should not exceed five (5.0). To be certain of the number of devices that may be<br />
connected to a line, as determined by the total RENs, contact the local telephone company.The REN for this product is part of the<br />
product identifier that has the format US:AAAEQ##TXXXX. The digits represented by ## are the REN without a decimal point. For<br />
the <strong>DSX</strong> <strong>5500</strong> or <strong>DSX</strong> <strong>5540</strong>, 01 means a REN of 0.1.<br />
Note: RENs are associated with loop-start and ground-start ports. Do not use for E & M or digital ports.<br />
This equipment uses the following USOC jack: RJ-11C.<br />
No modular plug is provided with this equipment.<br />
If the <strong>DSX</strong> <strong>5500</strong> or <strong>DSX</strong> <strong>5540</strong> causes harm to the telephone network, the telephone company will notify you in advance that temporary<br />
interruption of service may be required. But if advance notice isn't practical, the telephone company will notify the customer as<br />
soon as possible. Also, you will be advised of your right to file a complaint with the FCC if you believe it is necessary.<br />
The telephone company may make changes in its facilities, equipment, operations or procedures that could affect the operation of<br />
the equipment. If this happens, the telephone company will provide advance notice in order for you to make necessary<br />
modifications to maintain uninterrupted service.<br />
If the equipment is causing harm to the telephone network, the telephone company may request that you disconnect the<br />
equipment until the problem is resolved.<br />
This equipment cannot be used on public coin phone service provided by the telephone company. Connection to party line service<br />
is subject to state tariffs (Contact the state public utility commission, public service commission or corporation commission for<br />
information).<br />
If your home has specially wired alarm equipment connected to the telephone line, ensure the installation of this <strong>DSX</strong> <strong>5500</strong> or<br />
<strong>DSX</strong> <strong>5540</strong> does not disable your alarm equipment. If you have questions about what will disable alarm equipment, consult your telephone<br />
company or a qualified installer.<br />
For repair or warranty information on hardware service only, please call: 1-800-464-1131.<br />
4
<strong>DSX</strong><strong>5500</strong>_<strong>5540</strong> 11/13/02 12:21 PM Page 5<br />
Package Contents ......................................................6<br />
Front and Rear Panels ..............................................7<br />
Access Card ................................................................8<br />
Connections<br />
Antenna and Phone ................................................9<br />
Video ......................................................................10<br />
Audio ......................................................................11<br />
A/V Matrix ..............................................................12<br />
Preparing your Remote Control..........................13<br />
Remote Control Use........................................13-17<br />
Setup Wizard ................................................................18<br />
Watching TV ................................................................19<br />
Enhanced <strong>User</strong> Features<br />
EZ Search PPV ......................................................20<br />
SmartSurf ..............................................................20<br />
Favorite Channels..................................................21<br />
Program Guide<br />
DIRECTV ADVANCED PROGRAM GUIDE<br />
............................................................................22-23<br />
Reminders ..............................................................23<br />
PPV (Pay Per View) ..............................................23<br />
Guide Menu ........................................................24-25<br />
Contents<br />
Main Menu<br />
Using the Main Menu ............................................26<br />
Interactive services................................................26<br />
Preferences ......................................................27-29<br />
Preferred Language ............................................27<br />
Screen Format ....................................................27<br />
Banner Duration..................................................28<br />
Set Favorite Channels ........................................28<br />
A/V Matrix............................................................28<br />
Remote Control ID ............................................28<br />
Digital Audio (<strong>DSX</strong> <strong>5540</strong> only) ..........................29<br />
Parental Controls ............................................29-30<br />
Lock the System..................................................29<br />
Channel Locks......................................................29<br />
Set Spending Limit..............................................30<br />
Set Rating Limit ..................................................30<br />
Replace Access Card ..........................................30<br />
Purchases ..............................................................31<br />
Setup..................................................................32-33<br />
System Upgrades ..................................................33<br />
Messages ................................................................34<br />
Caller ID ................................................................34<br />
Troubleshooting ......................................................35<br />
Limited Warranty ....................................................36<br />
NOTE: This owner's manual may be used with several different models. Not all features (or drawings) discussed<br />
in this manual will necessarily match those found with your system. This is normal and does not<br />
require you contacting your dealer or requesting service.<br />
DIRECTV programming sold separately. ACTIVATION OF PROGRAMMING MAY BE SUBJECT TO CREDIT APPROVAL AND<br />
REQUIRES VALID SERVICE ADDRESS, SOCIAL SECURITY NUMBER AND/OR MAJOR CREDIT CARD. DEPOSIT OR PREPAY-<br />
MENT MAY BE REQUIRED. Programming subject to change. DIRECTV service not available outside the U.S. DIRECTV programming is<br />
sold separately and independently of DIRECTV System hardware. A valid programming subscription is required to operate DIRECTV<br />
System hardware. Activate your DIRECTV programming today at 1-800-DIRECTV (1-800-347-3288)<br />
DIRECTV and the Cyclone Design logo, ADVANCED PROGRAM GUIDE and DIRECTV INTERACTIVE are trademarks of DIRECTV,<br />
Inc., a unit of Hughes Electronics Corp., and are used with permission.<br />
Philips is a registered trademark of Koninklijke Philips Electronics, NV.<br />
This product includes software developed by the University of California, Berkeley and its contributors.<br />
Copyright (c) 1982, 1986, 1988, 1990, 1993<br />
The Regents of the University of California. All rights reserved.<br />
Redistribution and use in source and binary forms, with or without modification, are permitted provided that the following conditions<br />
are met:<br />
1. Redistribution of source code must retain the above copyright notice, this list of conditions and the following disclaimer.<br />
2. Redistribution in binary form must reproduce the above copyright notice, this list of conditions and the following disclaimer in the<br />
documentation and/or other materials provided with the distribution.<br />
3. All advertising materials mentioning features or use of this software must display the following acknowledgment: This product<br />
includes software developed by the University of California, Berkeley and its contributors.<br />
4. Neither the name of the University nor the names of its contributors may be used to endorse or promote products derived from<br />
this software without specific prior written permission.<br />
THIS SOFTWARE IS PROVIDED BY THE REGENTS AND CONTRIBUTORS "AS IS" AND ANY EXPRESS OR IMPLIED WARRANTIES,<br />
INCLUDING, BUT NOT LIMITED TO, THE IMPLIED WARRANTIES OF MERCHANTABILITY AND FITNESS FOR A PARTICULAR PUR-<br />
POSE ARE DISCLAIMED. IN NO EVENT SHALL THE REGENTS OR CONTRIBUTORS BE LIABLE FOR ANY DIRECT, INDIRECT, INCI-<br />
DENTAL, SPECIAL, EXEMPLARY, OR CONSEQUENTIAL DAMAGES (INCLUDING, BUT NOT LIMITED TO, PROCUREMENT OF SUB-<br />
STITUTE GOODS OR SERVICES; LOSS OF USE, DATA, OR PROFITS; OR BUSINESS INTERRUPTION) HOWEVER CAUSED AND ON<br />
ANY THEORY OF LIABILITY, WHETHER IN CONTRACT, STRICT LIABILITY, OR TORT (INCLUDING NEGLIGENCE OR OTHER-<br />
WISE) ARISING IN ANY WAY OUT OF THE USE OF THIS SOFTWARE, EVEN IF ADVISED OF THE POSSIBILITY OF SUCH DAMAGE.<br />
The software included in this product is based in part on the work of the Independent JPEG-Group and on the PNG Reference Library<br />
which is copyright © 1998-2001 Glenn Randers-Pehrson, copyright © 1996, 1997 Andreas Dilger, and copyright © 1995, 1996 Guy Eric<br />
Schalnat, Group 42, Inc.<br />
For the software in this product no license under Philips IPR is granted, except for the use of the software in combination with this<br />
product.<br />
5
<strong>DSX</strong><strong>5500</strong>_<strong>5540</strong> 11/13/02 12:21 PM Page 6<br />
Power Supply Cord<br />
Infrared (IR) Universal<br />
Remote Control with<br />
Two AA Batteries<br />
TO TV/VCR<br />
Package Contents<br />
DIRECTV ® <strong>Receiver</strong><br />
RJ-11 Telephone Cord<br />
6<br />
DIRECTV ® <strong>Receiver</strong><br />
<strong>User</strong> <strong>Manual</strong><br />
L R<br />
VIDEO AUDIO<br />
RF Coaxial Cable RCA Type Audio/Video<br />
Connecting Cable<br />
10/16/02 1:26 PM Page 1<br />
Read this manual first!<br />
Congratulations on purchasing this Philips product.<br />
We’ve included everything you need to get started.<br />
If you have any problems, Philips Representatives can<br />
help you get the most from your new product by explaining:<br />
• Hookups,<br />
• First Time Setup, and<br />
• Feature Operation.<br />
Do not attempt to return this product to the store.<br />
For fast help, call us first!<br />
1-800-464-1131<br />
Thank you for making Philips a part of your home!<br />
3111 176 50891<br />
<strong>User</strong> <strong>Manual</strong><br />
PHONE<br />
Important!<br />
Return your<br />
Warranty<br />
Registration Card<br />
within 10 days.<br />
See why inside.<br />
<strong>DSX</strong> <strong>5500</strong><br />
<strong>DSX</strong> <strong>5540</strong><br />
Access Card<br />
S-VIDEO<br />
S-Video Connecting Cable<br />
(not included with all products)
<strong>DSX</strong><strong>5500</strong>_<strong>5540</strong> 11/13/02 12:21 PM Page 7<br />
MENU<br />
MENU button<br />
Displays the Main Menu.<br />
INFO button<br />
Switches between program information in the<br />
banner and the program details screen.<br />
Arrow buttons (� ���)<br />
Use to navigate through the Guide and menus.<br />
While watching Satellite programming, use the<br />
�� arrows to channel up or down.<br />
Power indicator<br />
Lights when the DIRECTV <strong>Receiver</strong> is on.<br />
Card Access<br />
Install Access Card here.<br />
Details are on page 8.<br />
<strong>Receiver</strong> ID Number<br />
AC power input<br />
Connect the supplied power<br />
cord here.<br />
Serial Number<br />
Model Number<br />
MODEL NUMBER: <strong>DSX</strong> <strong>5540</strong><br />
Serial No : 81476039<strong>DSX</strong> <strong>5540</strong>C <strong>Receiver</strong> ID No : 1234 5678 9012<br />
Phone jack<br />
Connect the supplied phone cord here and<br />
to a wall phone jack in your home.<br />
Dolby Digital outputs* (optical and coaxial)<br />
* <strong>DSX</strong> <strong>5540</strong> only<br />
A/V Matrix (refer to page 12)<br />
Left/Right Audio/Video Inputs 1 and 2<br />
Video output 1<br />
Left/right Audio output 1<br />
Secondary Audio/Video Outputs<br />
INFO<br />
Front and Rear Panels<br />
Front Panel<br />
Digital Multi-Satellite <strong>Receiver</strong><br />
Rear Panel<br />
7<br />
OK<br />
POWER<br />
POWER button<br />
Press to turn the DIRECTV ®<br />
<strong>Receiver</strong> on or press to place<br />
the DIRECTV <strong>Receiver</strong> in<br />
Standby.<br />
OK button<br />
Confirms a selection in the<br />
menus or Program Guide.<br />
Sat In<br />
Connect the coaxial cable<br />
from the Satellite Dish<br />
antenna here. Details are<br />
on page 9.<br />
Antenna Input<br />
Connect to an off-air<br />
antenna or analog<br />
cable system.<br />
Channel 3/4 switch<br />
Details on page 10.<br />
TV/VCR Output<br />
S-Video Output<br />
Component Video<br />
Output*<br />
* <strong>DSX</strong> <strong>5540</strong> only
<strong>DSX</strong><strong>5500</strong>_<strong>5540</strong> 11/13/02 12:21 PM Page 8<br />
MODEL NUMBER: <strong>DSX</strong> <strong>5540</strong><br />
Serial No : 81476039<strong>DSX</strong> <strong>5540</strong>C <strong>Receiver</strong> ID No : 1234 5678 9012<br />
Access Card<br />
The access card provided with your system includes information about your purchase<br />
authorization and other data. To watch channels, your viewing access card<br />
needs to be inserted in the access card slot on the rear of your DIRECTV ®<br />
<strong>Receiver</strong>.<br />
The access card needs to be inserted during system setup and generally does not<br />
need to be removed. Each access card has a unique number. Be sure to record<br />
this number in the space provided on the second page of this manual in the “For<br />
Customer Use” section for future reference.<br />
1. Hold the card with the arrow facing upwards and pointing toward the slot in<br />
the DIRECTV <strong>Receiver</strong> rear panel.<br />
2. Gently push the card into the slot until it meets the stop. Do not use undue<br />
force when inserting. The end will be visible outside of the slot.<br />
3. Keep your access card permanently inserted in your DIRECTV <strong>Receiver</strong>.<br />
If you have to reinsert the card, you should have the arrow facing forward<br />
into the box and the gold chip facing down.<br />
8<br />
s<br />
Caution<br />
• YOUR ACCESS CARD IS<br />
FRAGILE.<br />
• ALWAYS INSERT CORRECTLY<br />
AND CAREFULLY.<br />
• DO NOT BEND.<br />
• DO NOT REMOVE AND<br />
RE-INSERT UNNECESSARILY.<br />
• NEVER SUBMERGE IN LIQUID<br />
OR APPLY CLEANING FLUIDS.
<strong>DSX</strong><strong>5500</strong>_<strong>5540</strong> 11/13/02 12:21 PM Page 9<br />
Antenna and Phone<br />
RJ11 Modular<br />
Phone Jack<br />
MODEL NUMBER: <strong>DSX</strong> <strong>5540</strong><br />
Serial No : 81476039<strong>DSX</strong> <strong>5540</strong>C <strong>Receiver</strong> ID No : 1234 5678 9012<br />
Connections<br />
Rear of DIRECTV ® <strong>Receiver</strong><br />
<strong>DSX</strong> <strong>5540</strong> Only<br />
9<br />
<strong>DSX</strong> <strong>5540</strong> Only<br />
Satellite<br />
Dish Antenna<br />
Cable or Off-air Antenna<br />
Unplug all equipment from the AC outlet before making connections.<br />
1. Connect the RF coaxial cable from the satellite dish to the SAT IN jack.<br />
2. If you have cable (CATV) or an off-air antenna, connect its RF coaxial cable to the ANTENNA IN jack.<br />
3. Using the telephone cord (supplied), connect one end of it to a phone jack in your home. Connect the other end to<br />
the PHONE JACK input on the rear of the <strong>Receiver</strong>. To enjoy uninterrupted programming and to order pay per view<br />
programs, the DIRECTV ® <strong>Receiver</strong> must be continuously connected to a land-based phone line.<br />
4. Connect one end of the AC power cord (supplied) to the <strong>Receiver</strong>’s AC IN jack.
<strong>DSX</strong><strong>5500</strong>_<strong>5540</strong> 11/13/02 12:21 PM Page 10<br />
Video<br />
MODEL NUMBER: <strong>DSX</strong> <strong>5540</strong><br />
Serial No : 81476039<strong>DSX</strong> <strong>5540</strong>C <strong>Receiver</strong> ID No : 1234 5678 9012<br />
Connections (cont’d)<br />
Unplug all equipment from the AC outlet before making connections.<br />
There are several options for connecting the video and audio outputs of your <strong>DIRECTV®</strong> <strong>Receiver</strong>, depending on the<br />
type of equipment you want to connect and the quality of signal you want to achieve. The following chart summarizes<br />
your options for video connections. Select either A, B, C or D and refer to the illustration and steps below to connect.<br />
Option Video Signal Quality Video Output<br />
A Excellent Component * (Y, PB, PR)<br />
B Very Good S-VIDEO OUT<br />
C Good VIDEO OUT1<br />
D Standard TO TV/VCR<br />
* <strong>DSX</strong> <strong>5540</strong> Only<br />
B<br />
D<br />
S-VIDEO IN<br />
VHF/UHF<br />
IN<br />
VIDEO<br />
AUDIO<br />
<strong>DSX</strong> <strong>5540</strong> Only<br />
A<br />
COMPONENT<br />
IN<br />
Y<br />
PB<br />
PR<br />
10<br />
C<br />
<strong>DSX</strong> <strong>5540</strong> Only<br />
Rear of TV<br />
COMPONENT<br />
IN<br />
IN<br />
S-VIDEO IN<br />
VIDEO Y<br />
VHF/UHF<br />
PB<br />
AUDIO<br />
PR<br />
Rear of<br />
DIRECTV ® <strong>Receiver</strong><br />
Note: The TV rear jack panel shown above has jacks for all possible connections. Your TV’s rear jack panel may differ.<br />
A. (For model <strong>DSX</strong> <strong>5540</strong> only.) Using a component cable (not included), connect the jacks on one end to the component<br />
Y (green), PB (blue), PR (red) jacks on the rear of the <strong>Receiver</strong>. Connect the other ends to the TV’s COMPONENT<br />
IN jacks. Select the proper input on your TV.<br />
B. Using a S-VIDEO cable, connect one end to the S-VIDEO OUT jack on the <strong>Receiver</strong> to the S-VIDEO IN on the TV.<br />
Select the proper input on your TV.<br />
C. Using the RCA type connector (supplied), connect one end to the OUT 1 VIDEO jack (yellow) on the <strong>Receiver</strong> to the<br />
VIDEO IN on the TV. Select the proper input on your TV.<br />
D. Using the RF coaxial cable (supplied), connect one end to the TO TV/VCR jack on the <strong>Receiver</strong> to the RF IN jack on<br />
the TV. Turn the TV on and select channel 3 or 4, whichever is not used or least used in your area. Set the<br />
CHANNEL switch on the back of the <strong>Receiver</strong> to the same channel.
<strong>DSX</strong><strong>5500</strong>_<strong>5540</strong> 11/13/02 12:21 PM Page 11<br />
Audio<br />
MODEL NUMBER: <strong>DSX</strong> <strong>5540</strong><br />
Serial No : 81476039<strong>DSX</strong> <strong>5540</strong>C <strong>Receiver</strong> ID No : 1234 5678 9012<br />
<strong>DSX</strong> <strong>5540</strong> Only<br />
Connections (cont’d)<br />
Unplug all equipment from the AC outlet before making connections.<br />
There are several options for connecting the audio outputs of your <strong>DIRECTV®</strong> <strong>Receiver</strong>, depending on the type of<br />
equipment you want to connect. If you connected video with option D on page 10, you will get audio from your TV<br />
when using that input. The following chart summarizes your additional options for audio connections. Select either A, B,<br />
or C and refer to the illustration and steps below to connect.<br />
Option Audio Signal Audio Output<br />
A Dolby Digital* OPTICAL<br />
B Dolby Digital* COAXIAL<br />
C Stereo AUDIO LEFT/RIGHT OUT1<br />
* <strong>DSX</strong> <strong>5540</strong> Only<br />
Rear of DIRECTV ® <strong>Receiver</strong><br />
A B C<br />
Rear of Home Theater Stereo <strong>Receiver</strong> or TV<br />
Note: This illustration shows a home theater stereo receiver and TV rear jack panel for possible connections. Your<br />
home theater system stereo receiver or TV rear jack panel may differ.<br />
A. (For model <strong>DSX</strong> <strong>5540</strong> only.) Using an OPTICAL cable (not included), connect one end to the OPTICAL DIGITAL<br />
AUDIO OUT on the <strong>Receiver</strong> to the home theater stereo receiver or TV’s OPTICAL IN jack.<br />
B. (For model <strong>DSX</strong> <strong>5540</strong> only.) Using a COAXIAL cable (not included), connect one end to the COAXIAL DIGITAL<br />
AUDIO OUT on the <strong>Receiver</strong> to the home theater stereo receiver or TV’s COAXIAL DIGITAL IN jack.<br />
C. Using the RCA type connectors (supplied), connect the left (white) and right (red) jacks of one end of the cables to<br />
the OUT 1 AUDIO LEFT and RIGHT jacks on the <strong>Receiver</strong> and the other ends to the left and right AUDIO IN on<br />
the home theater stereo receiver or TV. Select the proper input on the home theater stereo receiver or TV.<br />
11<br />
Pr/Cr Pb/Cb Y
<strong>DSX</strong><strong>5500</strong>_<strong>5540</strong> 11/13/02 12:21 PM Page 12<br />
A/V Matrix<br />
MODEL NUMBER: <strong>DSX</strong> <strong>5540</strong><br />
Serial No : 81476039<strong>DSX</strong> <strong>5540</strong>C <strong>Receiver</strong> ID No : 1234 5678 9012<br />
Rear of VCR<br />
Connections (cont’d)<br />
Unplug all equipment from the AC outlet before making connections.<br />
Does your TV have only one video or RF input but you own a VCR, DVD player or other video equipment? Philips<br />
offers the industry’s first A/V Matrix that allows you to command and control other video devices such as a DVD player<br />
or a VCR without additional equipment. You can use this <strong>DIRECTV®</strong> <strong>Receiver</strong> as the video gateway of your entertainment<br />
center.<br />
ANT<br />
IN<br />
OUT<br />
CH3 CH4<br />
V OUT<br />
L OUT<br />
R OUT<br />
Video<br />
cable<br />
Video cable<br />
ANT<br />
IN V IN<br />
OUT L IN<br />
R IN<br />
CH3 CH4<br />
Audio cables<br />
Video cable<br />
Pr Pb<br />
12V<br />
Y<br />
S-VIDEO<br />
COAXIAL OPTICAL VIDEO<br />
Rear of DVD<br />
12<br />
Audio<br />
cables<br />
FL SL CENTER MULTI-5.1 LEFT OUT<br />
FR SR SUBW.<br />
LEFT OUT<br />
RIGHT OUT<br />
Rear of DIRECTV ® <strong>Receiver</strong><br />
VIDEO<br />
RIGHT OUT<br />
Output options for<br />
VCR recording<br />
Note: For additional hookups and operation information, refer to the owner’s manuals for the devices you are<br />
connecting to the DIRECTV <strong>Receiver</strong>.<br />
1. Connect the outputs of your other devices (such as a DVD player or VCR) to the corresponding VIDEO and AUDIO<br />
LEFT/RIGHT inputs (IN1 or IN2) of the A/V Matrix on the rear of the DIRECTV <strong>Receiver</strong>.<br />
2. To record satellite programming, connect the VIDEO and AUDIO LEFT/RIGHT outputs of OUT2 on the rear of the<br />
DIRECTV <strong>Receiver</strong> to the corresponding video and audio inputs on the VCR. These outputs always output satellite<br />
programming and are not affected by the A/V Matrix. Alternatively, you can connect the TO TV/VCR RF output to<br />
the RF input on the VCR but this output will output the selected video source of the A/V Matrix when this feature is<br />
enabled.<br />
3. To use the A/V Matrix, you must use video output option C (VIDEO OUT1) or D (TO TV/VCR) from page 10 and<br />
you must first enable it in the Main Menu (refer to page 28).
<strong>DSX</strong><strong>5500</strong>_<strong>5540</strong> 11/13/02 12:21 PM Page 13<br />
Preparing Your Remote Control<br />
Battery Installation<br />
1. Remove the battery compartment<br />
cover. Insert the two batteries<br />
(type/AA) supplied.<br />
2. Position them in the battery compartment,<br />
as shown in the diagram.<br />
3. Replace the cover.<br />
Satellite Functions<br />
SAT<br />
Press SAT to control the <strong>DIRECTV®</strong><br />
<strong>Receiver</strong>. LED will blink when other<br />
buttons are pressed while in satellite<br />
mode.<br />
PPV<br />
Use the EZ Search PPV function to<br />
view list of PPV programs and events<br />
for purchasing.<br />
SOURCE<br />
Switches between the inputs of the<br />
A/V Matrix (refer to page 12 and 28).<br />
MENU<br />
Displays the Main Menu.<br />
EXIT<br />
Returns to video and cancels the<br />
transaction.<br />
INFO<br />
Displays program or channel<br />
information.<br />
� ���<br />
Navigates through the Guide and<br />
menus.<br />
0-9<br />
Lets you enter numeric values or<br />
channel numbers.<br />
Remote Control<br />
13<br />
POWER<br />
Switches the <strong>DIRECTV®</strong> <strong>Receiver</strong><br />
between active and standby modes.<br />
MOVIES, SPORTS, NEWS, KIDS<br />
Predefined SmartSurf buttons (refer to<br />
page 20).<br />
SmartSurf<br />
Displays categories you can use for<br />
Guide and channel surfing.<br />
FAVORITES<br />
Allows you to select one of four custom<br />
lists to view or edit.<br />
GUIDE<br />
Switches between the “DIRECTV<br />
ADVANCED PROGRAM GUIDE”<br />
and the “Guide Menu”.<br />
OK<br />
Confirms a selection.<br />
CHANNEL<br />
Displays the next or previous channel.<br />
While in the guide or menu, allows you<br />
to page up and down.<br />
BACK<br />
While in the menu or guide, returns<br />
you to the previous screen. While<br />
watching TV, pressing BACK will jump<br />
you to the previous channel.<br />
DIRECTV INTERACTIVE powered<br />
by Wink Communications.<br />
Press this button when the<br />
DIRECTV INTERACTIVE icon appears<br />
on the screen to access interactive<br />
services.
<strong>DSX</strong><strong>5500</strong>_<strong>5540</strong> 11/13/02 12:21 PM Page 14<br />
Remote Control (cont’d)<br />
Programming the Universal Remote control<br />
Your remote control may already operate your TV, VCR or DVD player. If the remote control does not properly operate<br />
your TV, VCR or DVD player, follow the steps below. These instructions guide you through setting the remote control to<br />
operate your TV. For VCR and DVD player, follow the same steps, but press the VCR or DVD button at step 3.<br />
1. Point the remote control at your TV and press the TV button. Then, press the POWER button. If your TV turns on<br />
or off, try the other TV function buttons (see page 16). If the other functions work, the remote is ready to operate<br />
the TV without any more steps. If your TV does not turn on or off, or if the other buttons do not work, go to step 2.<br />
2. Find the brand and code number(s) of your TV on page 15.<br />
3. Press the TV button.<br />
4. Press and hold the number 1 & number 3 buttons simultaneously for 3 seconds. The LED will blink twice and remain on.<br />
5. Enter the 4-digit code from step 2 within one minute. The LED will blink after each button press. Note: If the 4-digit code is<br />
not entered within one minute, the LED will turn off and the remote control will return to the previously programmed<br />
code.<br />
6. After a valid 4-digit code has been entered, the LED will turn off and blink twice to confirm the new 4-digit code has<br />
been programmed. The LED will then turn off.<br />
7. If an invalid 4-digit code has been entered, the LED will turn off.<br />
8. Press the POWER button. If the remote control operates your TV, you’re finished.<br />
9. If the remote control doesn’t operate your TV and if there is more than 1 code for your TV brand, repeat steps 2-8.<br />
10.For future reference, list the 4 digit code numbers you program into your remote:<br />
TV code: __ __ __ __<br />
VCR code: __ __ __ __<br />
DVD code: __ __ __ __<br />
11.If you cannot find a code that operates your TV, If the remote still does not operate your TV, follow the Automatic<br />
Search steps below.<br />
Automatic Search<br />
To automatically program your remote control to operate your TV, VCR or DVD player, follow the steps below. For a VCR<br />
and DVD player, follow the same steps but substitute that component for the TV.<br />
1. Turn on your TV. Stand close to your TV (within 5 to 10 feet) and point your remote control towards the remote<br />
sensor on your TV. Press the TV button. Press and hold the number 1 and the number 3 buttons simultaneously for 3<br />
seconds. The TV LED will blink twice and remain on.<br />
2. Press the POWER button. The LED will turn off. If the POWER button is not pressed within 1 minute, the remote<br />
will return to the previously programmed code. The automatic search will begin after the POWER button has been<br />
released.<br />
3. Each time a code is transmitted, the LED will blink. This process could take several minutes.<br />
4. When the correct code is found, the TV should turn off. Immediately press the POWER button. The LED will blink twice,<br />
then turn off. If all codes have been tried and the TV has not turned on or off the LED will stay on briefly, then turn off.<br />
Note: To stop the search process at any time, press any button other than the POWER button. The LED will give a long<br />
blink and turn off. There is no guarantee that the remote control will work with your TV, VCR or DVD player.<br />
14
<strong>DSX</strong><strong>5500</strong>_<strong>5540</strong> 11/13/02 12:21 PM Page 15<br />
TV Codes<br />
AOC..............................................0046, 0057<br />
Admiral ........................................0120, 0490<br />
Aiko ........................................................ 0119<br />
Akai.......................................................... 0057<br />
Alaron ......................................................0206<br />
Ambassador ............................................0204<br />
America Action......................................0207<br />
Ampro......................................................0778<br />
Anam ...................................................... 0207<br />
Audiovox..........................0119, 0207, 0478<br />
Baysonic ..................................................0207<br />
Belcor ......................................................0046<br />
Bell & Howell..............................0043, 0181<br />
Bradford ..................................................0207<br />
Brockwood ............................................0046<br />
Broksonic ....................................0263, 0490<br />
CXC ........................................................0207<br />
Candle ..........................................0057, 0083<br />
Carnivale..................................................0057<br />
Carver ......................................................0081<br />
Celebrity..................................................0027<br />
Cineral ..........................................0478, 0119<br />
Citizen........0083, 0057, 0066, 0087, 0119<br />
Concerto ................................................0083<br />
Contec ....................................................0207<br />
Craig ........................................................0207<br />
Crosley ....................................................0081<br />
Crown ..........................................0066, 0207<br />
Curtis Mathes ................0087, 0057, 0043,<br />
........0066, 0074, 0078, 0081, 0083, 0120,<br />
....................0172, 0181, 0193, 0478, 0774<br />
Daewoo ................0119, 0046, 0478, 0066<br />
Daytron....................................................0046<br />
Denon ......................................................0172<br />
Dumont........................................0044, 0046<br />
Dwin..............................................0747, 0801<br />
Electroband ............................................0027<br />
Emerson ..............0263, 0207, 0205, 0206,<br />
VCR Codes<br />
Admiral ........................................0075, 0236<br />
Adventura................................................0027<br />
Aiko ..........................................................0305<br />
Aiwa ..................................0334, 0027, 0064<br />
Akai ..............................................0133, 0068<br />
America Action......................................0305<br />
American High ......................................0062<br />
Asha..........................................................0267<br />
Audiovox ................................................0064<br />
Beaumark ................................................0267<br />
Bell & Howell ........................................0131<br />
Broksonic..............0148, 0211, 0029, 0236<br />
CCE ..............................................0099, 0305<br />
Calix..........................................................0064<br />
Canon ......................................................0062<br />
Capehart..................................................0047<br />
Carver ......................................................0108<br />
Cineral......................................................0305<br />
Citizen ..........................................0305, 0064<br />
Colt ..........................................................0099<br />
Craig ..........0064, 0099, 0074, 0267, 0298<br />
Curtis Mathes ....0062, 0068, 0087, 0189,<br />
..................................................................0787<br />
Cybernex ................................................0267<br />
Daewoo ................0305, 0588, 0047, 0072<br />
Daytron....................................................0047<br />
Denon ......................................................0069<br />
Dynatech ................................................0027<br />
Electrohome ..........................................0064<br />
Electrophonic ........................................0064<br />
Emerex ....................................................0059<br />
Emerson....0211, 0029, 0236, 0305, 0148,<br />
................................0588, 0027, 0064, 0070<br />
Fisher ............................................0074, 0131<br />
Fuji ................................................0060, 0062<br />
DVD Codes<br />
Aiwa..........................................................0668<br />
Apex ........................................................0699<br />
Arcam ......................................................0759<br />
B & K ............................................0682, 0689<br />
Denon ..........................................0517, 0661<br />
Fisher........................................................0697<br />
GE ............................................................0549<br />
Go Video ................................................0742<br />
Gradiente ................................................0678<br />
Harman/Kardon..........................0609, 0729<br />
Remote Control (cont’d)<br />
..........0490, 0204, 0309,0066, 0046, 0181<br />
Envision....................................................0057<br />
Fisher........................................................0181<br />
Fujitsu............................................0206, 0710<br />
Funai ..................................0207, 0198, 0206<br />
Futuretech ..............................................0207<br />
GE ............ 0048, 0074, 0078, 0205, 0478,<br />
................................0120, 0162, 0309, 0774<br />
Gibralter ..........................0044, 0046, 0057<br />
GoldStar................0205, 0046, 0057, 0083<br />
Gradiente ....................................0083, 0080<br />
Grunpy..........................................0206, 0207<br />
Hallmark ..................................................0205<br />
Harley Davidson ....................................0206<br />
Harman/Kardon.................................... 0081<br />
Harvard....................................................0207<br />
Hitachi ..................0172, 0178, 0083, 0043<br />
Infinity ......................................................0081<br />
Inteq..........................................................0044<br />
JBL ............................................................0081<br />
JCB ............................................................0027<br />
JVC............................................................0080<br />
KEC ..........................................................0207<br />
KTV....................................0207, 0057, 0066<br />
Kenwood ....................................0057, 0046<br />
LG............................................................ 0083<br />
LXI......0181, 0074, 0081, 0183, 0205, 0774<br />
Logik ........................................................0043<br />
Luxman ....................................................0083<br />
MGA ......................0177, 0046, 0057, 0205<br />
MTC ......................0087, 0057, 0046, 0083<br />
Magnavox..........................0081, 0057, 0206<br />
Majestic ....................................................0043<br />
Marantz ........................................0081, 0057<br />
Matsushita ..............................................0277<br />
Megatron......................................0172, 0205<br />
Memorex ............0205, 0043, 0083, 0177,<br />
............................................0181, 0277, 0490<br />
Funai ........................................................0027<br />
GE.............. 0062, 0087, 0075, 0267, 0787<br />
Garrard....................................................0027<br />
Go Video ................................................0553<br />
GoldStar ......................................0064, 0065<br />
Gradiente ................................................0027<br />
HI-Q ........................................................0074<br />
Harley Davidson ....................................0027<br />
Harman/Kardon ........................ 0065, 0108<br />
Harwood ................................................0099<br />
Headquarter ..........................................0073<br />
Hitachi ..............................0069, 0027, 0068<br />
Hughes Network Systems......................0069<br />
JVC ................................................0094, 0068<br />
Jensen ......................................................0068<br />
KEC ..............................................0064, 0305<br />
KLH ..........................................................0099<br />
Kenwood..........................0068, 0094, 0065<br />
Kodak............................................0062, 0064<br />
LXI ............................................................0064<br />
Lloyd’s ......................................................0027<br />
Logik ........................................................0099<br />
MEI ............................................................0062<br />
MGA..............................................0070, 0267<br />
MGN Technology..................................0267<br />
MTC..............................................0027, 0267<br />
Magnasonic..............................................0305<br />
Magnavox ....0062, 0108, 0027, 0066, 0176<br />
Magnin......................................................0267<br />
Marantz ........................................0108, 0062<br />
Marta ........................................................0064<br />
Matsushita....................................0062, 0189<br />
Memorex ............0131, 0074, 0027, 0064,<br />
........0075, 0062, 0073, 0267, 0334, 0066,<br />
........................................................0189, 0236<br />
Hitachi ..........................................0600, 0691<br />
Hiteker ....................................................0699<br />
JVC ................................................0650, 0585<br />
Kenwood..........................0764, 0709, 0561<br />
Konka ....................0746, 0738, 0747, 0748<br />
Magnavox ....................................0530, 0702<br />
Marantz ....................................................0566<br />
Mitsubishi ................................................0548<br />
Onkyo ..........................................0654, 0530<br />
Optimus ..................................................0598<br />
15<br />
Midland ..0044, 0066, 0074, 0078,0162, 0774<br />
Minutz ......................................................0048<br />
Mitsubishi..............0177, 0205, 0046, 0120<br />
Motorola..................................................0120<br />
Multitech..................................................0207<br />
NAD..................................0183, 0193, 0205<br />
NEC ..................................0057, 0046, 0083<br />
NTC..........................................................0119<br />
Nikko ................................0205, 0057, 0119<br />
Onwa........................................................0207<br />
Optimus............................0277, 0193, 0181<br />
Optonica ......................................0120, 0192<br />
Orion ................................0490, 0206, 0263<br />
Panasonic ....................................0078, 0277<br />
Penney ........0074, 0087, 0057, 0048, 0162,<br />
0205, 0078, 0066, 0046, 0083, 0183, 0774<br />
Philco..........0172, 0046, 0057, 0081, 0490<br />
Philips ......................................................0081<br />
Pilot....................................0046, 0057, 0066<br />
Pioneer ....................................................0193<br />
Portland ............................0046, 0066, 0119<br />
Prism ........................................................0078<br />
Proscan ........................................0074, 0774<br />
Proton ......................................................0205<br />
Pulsar ............................................0044, 0046<br />
Quasar ..............................0078, 0277, 0192<br />
RCA ..........0074, 0162, 0046, 0078, 0117,<br />
........................................................0120, 0774<br />
Radio Shack ........0192, 0207, 0057, 0205,<br />
........0066, 0181, 0046, 0074, 0083, 0774<br />
Realistic ....0192, 0207, 0181, 0057, 0066,<br />
............................................0205, 0046, 0083<br />
Runco............................................0044, 0057<br />
SSS ................................................0046, 0207<br />
Sampo ..........................................0057, 0066<br />
Samsung ....0087, 0046, 0205, 0057, 0083<br />
Samsux ....................................................0066<br />
Sansei........................................................0478<br />
Minolta ....................................................0069<br />
Mitsubishi..........................0070, 0075, 0094<br />
Motorola ......................................0062, 0075<br />
Multitech ......................................0027, 0099<br />
NEC ......................0065, 0068, 0094, 0131<br />
Nikko........................................................0064<br />
Noblex ....................................................0267<br />
Olympus ..................................................0062<br />
Optimus......................0189, 0075, 0064, 0131<br />
Orion ................................0029, 0211, 0236<br />
Panasonic ..............0062, 0189, 0252, 0643<br />
Penney........0062, 0267, 0064, 0069, 0065<br />
Pentax ......................................................0069<br />
Philco ............................................0062, 0236<br />
Philips ................................0108, 0062, 0645<br />
Pilot ..........................................................0064<br />
Pioneer ....................................................0094<br />
Portland ..................................................0047<br />
Profitronic ..............................................0267<br />
Proscan ........................................0087, 0787<br />
Protec ......................................................0099<br />
Pulsar........................................................0066<br />
Quarter....................................................0073<br />
Quartz......................................................0073<br />
Quasar..........................................0062, 0189<br />
RCA ..........0087, 0176, 0069, 0062, 0075,<br />
............................................0133, 0267, 0787<br />
Radio Shack ............................................0027<br />
Radix ........................................................0064<br />
Randex ....................................................0064<br />
Realistic ................0027, 0131, 0074, 0075,<br />
............................................0064, 0062, 0073<br />
ReplayTV......................................0641, 0643<br />
Runco ......................................................0066<br />
STS ............................................................0069<br />
Oritron ....................................................0678<br />
Panasonic..........................0517, 0704, 0659<br />
Pelican Accessories ..............................0758<br />
Philips............................................0566, 0530<br />
Pioneer..............................0598, 0552, 0659<br />
Princeton ................................................0701<br />
Proscan ....................................................0549<br />
RCA ..................................0549, 0598, 0731<br />
Saitek ........................................................0758<br />
Samsung ..................................................0600<br />
Sansui........................................................0490<br />
Sanyo ........................................................0181<br />
Scimitsu....................................................0046<br />
Scotch ......................................................0205<br />
Scott ..........0263, 0046, 0205, 0206, 0207<br />
Sears ..........0181, 0083, 0183, 0074, 0081,<br />
................................0198, 0205, 0206, 0774<br />
Semivox ..................................................0207<br />
Semp ........................................................0183<br />
Sharp..................................0120, 0192, 0066<br />
Shogun......................................................0046<br />
Signature..................................................0043<br />
Sony ..........................................................0027<br />
Soundesign ......................0205, 0206, 0207<br />
Squareview..............................................0198<br />
Starlite......................................................0207<br />
Supreme ..................................................0027<br />
Sylvania ........................................0081, 0057<br />
Symphonic ..............................................0198<br />
TMK ..................................0083, 0204, 0205<br />
Tandy........................................................0120<br />
Technics ......................................0078, 0277<br />
Technol Ace ..........................................0206<br />
Techwood....................................0078, 0083<br />
Teknika ................0043, 0081, 0206, 0207,<br />
........0046, 0066, 0119, 0083, 0087, 0177<br />
Telefunken ..............................................0083<br />
Toshiba ............................0183, 0087, 0181<br />
Totevision................................................0066<br />
Vector Research....................................0057<br />
Victor ......................................................0080<br />
Vidikron ..................................................0081<br />
Vidtech ........................................0046, 0205<br />
Wards ..................0081, 0192, 0205, 0043,<br />
....................0046, 0048, 0057, 0083, 0206<br />
White Westinghouse ...................... 0490<br />
Yamaha ........................................0046, 0057<br />
Zenith ....................0044, 0043, 0119, 0490<br />
Samsung........................................0072, 0267<br />
Sanky ............................................0066, 0075<br />
Sansui..........0068, 0027, 0094, 0236, 0298<br />
Sanyo......................0074, 0073, 0131, 0267<br />
Scott ......................0211, 0148, 0070, 0072<br />
Sears ..........0064, 0069, 0027, 0062, 0073,<br />
........................................................0074, 0131<br />
Semp ........................................................0072<br />
Sharp ........................................................0075<br />
Shintom....................................................0099<br />
Shogun......................................................0267<br />
Singer........................................................0099<br />
Sony........................0060, 0059, 0027, 0062<br />
Sylvania ..................0062, 0108, 0027, 0070<br />
Symphonic ..............................................0027<br />
TMK..........................................................0267<br />
Tatung ......................................................0068<br />
Teac ..............................................0027, 0068<br />
Technics ......................................0062, 0189<br />
Teknika ............................0027, 0062, 0064<br />
Thomas ....................................................0027<br />
Tivo ..........................................................0645<br />
Toshiba ........................................0072, 0070<br />
Totevision....................................0064, 0267<br />
Unitech ....................................................0267<br />
Vector ......................................................0072<br />
Vector Research....................................0065<br />
Video Concepts ....................................0072<br />
Videosonic ..............................................0267<br />
Wards ......0062, 0087, 0027, 0074, 0267,<br />
........0069, 0075, 0099, 0108, 0176, 0787<br />
White Westinghouse................0305, 0236<br />
XR-1000 ..........................0099, 0027, 0062<br />
Yamaha ....................................................0065<br />
Zenith ....................0066, 0027, 0060, 0236<br />
Sharp ........................................................0657<br />
Sherwood................................................0660<br />
Sony ..........................................................0560<br />
Technics ..................................................0517<br />
Techwood ..............................................0719<br />
Theta Digital ..........................................0598<br />
Toshiba ....................................................0530<br />
Yamaha ........................................0517, 0572<br />
Zenith ..........................................0618, 0530
<strong>DSX</strong><strong>5500</strong>_<strong>5540</strong> 11/13/02 12:21 PM Page 16<br />
TV Functions<br />
TV<br />
Press to put the remote control in TV<br />
mode. LED will blink when other buttons<br />
are pressed while in TV mode.<br />
VOL +/-<br />
Increases and decreases volume.<br />
0-9<br />
Allows direct number entry for tuning to<br />
a channel.<br />
TV INPUT<br />
Switch through TV inputs (if applicable).<br />
Remote Control (cont’d)<br />
Once programmed (refer to page 14), your DIRECTV ® Remote Control should control certain functions of your TV.<br />
Be sure to press the TV button before operating your TV.<br />
Note: All features on your TV may not be supported by this remote.<br />
16<br />
POWER<br />
Press to turn TV on or off.<br />
CH+/CH-<br />
Change channel up or down<br />
MUTE<br />
Switches audio on and off.
<strong>DSX</strong><strong>5500</strong>_<strong>5540</strong> 11/13/02 12:21 PM Page 17<br />
VCR/DVD Functions<br />
VCR<br />
Press to put the remote control in VCR<br />
mode. LED will blink when other buttons<br />
are pressed while in VCR mode.<br />
REWIND<br />
VCR - When tape playback is stopped,<br />
press to rewind at high speed. During tape<br />
playback, press to rewind the tape while<br />
the picture stays on the screen.<br />
DVD - Press and release to select previous<br />
chapter. Press and hold to scan<br />
backwards.<br />
STOP<br />
Press to stop the tape or disc.<br />
RECORD (VCR only)<br />
Press once to start a recording.<br />
0-9<br />
Allows direct number entry for tuning to<br />
a channel or chapter.<br />
Remote Control (cont’d)<br />
Once programmed (refer to page 14), your DIRECTV ® Remote Control should control certain functions of your VCR<br />
or DVD. Be sure to press the VCR or DVD button before operating each unit.<br />
Note: All features on your VCR or DVD player may not be supported by this remote.<br />
17<br />
POWER<br />
Press to turn VCR or DVD player on<br />
or off.<br />
DVD<br />
Press to put the remote control in<br />
DVD mode. LED will blink when other<br />
buttons are pressed while in DVD<br />
mode.<br />
FF<br />
VCR - When tape playback is stopped,<br />
press to advance the tape at high speed.<br />
During tape playback, press to advance<br />
the tape while the picture stays on the<br />
screen.<br />
DVD - Press and release to select next<br />
chapter. Press and hold to scan<br />
forward.<br />
PLAY<br />
Press to play a tape or disc.<br />
PAUSE<br />
Press to pause a tape or disc.<br />
CH+/CH- (VCR only)<br />
Change channel up or down
<strong>DSX</strong><strong>5500</strong>_<strong>5540</strong> 11/13/02 12:21 PM Page 18<br />
If your equipment has been professionally installed, skip this first<br />
time setup section and go to page 19.<br />
Setup Wizard<br />
After the <strong>DIRECTV®</strong> <strong>Receiver</strong> has been connected to your components,<br />
it is time to turn the DIRECTV <strong>Receiver</strong> on.<br />
1. Press the SAT button on the remote control. The LED will<br />
blink.<br />
2. Press the POWER button on the remote control.<br />
3. Use the ▲▼ buttons to select your preferred language of the<br />
on screen menus and guide and press OK.<br />
4. When the Welcome screen displays, press the OK button on<br />
the remote control to start the Setup Wizard. The Setup<br />
Wizard is a first time setup that automatically steps you through<br />
the installation process. This screen will ONLY appear the very<br />
first time your DIRECTV <strong>Receiver</strong> is turned on.<br />
a. Enter the ZIP code.<br />
Note: The ZIP code is critical to point your dish accurately<br />
(refer to page 32).<br />
b. Configure the dish (refer to page 32).<br />
c. Point the dish (refer to page 32).<br />
d. Test the System (refer to page 33).<br />
5. After you have installed your DIRECTV System, you should<br />
contact DIRECTV to order <strong>DIRECTV®</strong> programming at<br />
1-800 DIRECTV (1-800-347-3288).<br />
18<br />
Select a preferred language for the<br />
text display in the menus and<br />
program guide.<br />
Seleccione un idioma para ver el<br />
texto de los menúes y la guía<br />
de programa.<br />
English<br />
Spanish<br />
Welcome<br />
Follow these 4 easy steps and<br />
be on your way to enjoying a<br />
new viewing experience.<br />
Select OK to go the<br />
Setup Wizard.<br />
Skip the Setup Wizard<br />
by pressing down then OK.<br />
Go to Setup Wizard<br />
Skip Setup Wizard
<strong>DSX</strong><strong>5500</strong>_<strong>5540</strong> 11/13/02 12:21 PM Page 19<br />
All Day Ticket (Pay Per View)<br />
Alternate Audio Track<br />
Closed Captioning<br />
Dolby Digital (<strong>DSX</strong> <strong>5540</strong> only)<br />
New Incoming Messages<br />
Watching TV<br />
The Info Banner shows information on the currently tuned program such as the rating, title, start and end time, program<br />
description, and channel number. It also displays the current time and date and indicates if any special features are currently<br />
enabled, such as Favorite Channels (page 21) or SmartSurf (page 20).<br />
Channel Number<br />
& Name<br />
Start/End Time<br />
& Date<br />
Channel Icon<br />
Program Name<br />
& Description<br />
On screen<br />
Display (OSD)<br />
message space<br />
indicates error<br />
messages or<br />
status or song ID<br />
information<br />
(when you select<br />
a channel that<br />
contains audio<br />
only).<br />
Letterbox format<br />
System Locked<br />
System Temporarily Unlocked<br />
Pay Per View<br />
DIRECTV Interactive Service<br />
106 PPV<br />
5:22PM Jun 14<br />
5:30PM-7:15PM Jun 14, PG-13<br />
Spanish<br />
Young Father<br />
Movies, Horror (2001) Seth Hill stars in this tale of a young father<br />
facing otherworldly intruders in a secluded mansion during the<br />
waning days of World War II.<br />
Press OK to purchase<br />
Watching TV<br />
To do this…. Do this….<br />
19<br />
News List 1<br />
Rating<br />
Current Time<br />
& Date<br />
Current Alternate<br />
Audio Track<br />
- The alternate<br />
audio icon indicates<br />
an alternate<br />
audio track is<br />
available. To<br />
change audio<br />
tracks, press the<br />
� or � button<br />
on the remote.<br />
Favorites (page<br />
21) status<br />
SmartSurf (page<br />
20) statue<br />
Display the banner Press INFO button on the remote<br />
View program details 1. Press INFO to display the banner<br />
2. Press INFO again to display program details<br />
View other channels with You can see or “browse” what is on other channels without tuning away from the<br />
the Browse Banner currently viewed program with the Browse Banner.<br />
1. While watching a program, press the INFO button on the remote to display the<br />
banner.<br />
2. While the banner is displayed. press the ▲▼ buttons to see what is showing on<br />
other channels.<br />
3. Press OK to switch to the new channel displayed in the Banner or exit to remove<br />
the banner.<br />
Note: When Favorite Channels (page 21) or SmartSurf (page 20) is in use, the<br />
Browse Banner will only show programs from those lists.
<strong>DSX</strong><strong>5500</strong>_<strong>5540</strong> 11/13/02 12:21 PM Page 20<br />
EZ Search Pay Per View (PPV)<br />
Philips offers a unique feature for searching pay per views. By<br />
pressing the PPV button on the remote, a listing of all pay per<br />
view programs starting within a chosen time period will be displayed<br />
alphabetically.<br />
1. Press the PPV button on the remote.<br />
2. Use the ▲▼ to select a time period to search in (Note: The<br />
full 3.5 day search takes about 10 seconds and cannot be<br />
interrupted) and press OK.<br />
3. Use the ▲▼ to select a pay per view program and press OK.<br />
View details about your selected pay per view program,<br />
purchase it or display other showings of your selection.<br />
SmartSurf<br />
Choosing SmartSurf is an easy way to highlight the<br />
programs whose categories or themes match your<br />
choice in the guide. Also, when changing channels, you will go only<br />
to the channels containing programs that have the selected category.<br />
When SmartSurf is active, the SmartSurf icon displays in the lower<br />
right hand corner of the banner.<br />
There are four pre-defined SmartSurf categories. Refer to the<br />
buttons on the remote.<br />
Pre-defined Smartsurf icons:<br />
Movies Sports News Kids<br />
Enhanced <strong>User</strong> Features<br />
To select specific SmartSurf category:<br />
1. Press SmartSurf on the remote control. You have a choice to<br />
clear an existing setting (if active already), cancel, or continue with<br />
setting the SmartSurf.<br />
2. Press the ▲▼ buttons to highlight the desired category or subcategory.<br />
The presence of subcategories is indicated by an arrow<br />
to the right of the category. To view the subcategories, press the<br />
� button.<br />
3. Press OK to select the category or subcategory.<br />
Note: To turn off SmartSurf, press any of the SmartSurf keys, select<br />
“Clear SmartSurf” and press OK. When the POWER button is<br />
pressed and the receiver goes into standby, SmartSurf is automatically<br />
turned off.<br />
20<br />
PPV startng in next:<br />
3 Hours<br />
12 Hours<br />
3.5 Days<br />
SmartSurf<br />
Continue<br />
Clear SmartSurf<br />
Cancel<br />
Main<br />
Movies<br />
Sports<br />
Interests<br />
Lifestyles<br />
News<br />
Themes<br />
Show Types<br />
Age Appropriate<br />
Pay Per View<br />
Arrow up/down to scroll.<br />
Press OK to select.<br />
BACK to previous.<br />
Pay Per View<br />
Arrow up/down to scroll.<br />
Press OK to select.<br />
BACK to previous menu.<br />
Movie 1 12:30p - 2:47p Mon, Cct 14<br />
Movie 2 Noon - 2:35p Mon, Oct 14<br />
Movie 3 2:00p - 3:33p Mon, Oct 14<br />
Movie 4 1:30p - 3:22p Mon, Oct 14<br />
Movie 5 3:00a - 4:23a Mon, Oct 14<br />
MOVIES SPORTS NEWS KIDS<br />
D C F E<br />
SmartSurf by Category<br />
Arrow up/down to scroll.<br />
Press OK to select.<br />
BACK to previous menu.<br />
SMARTSURF<br />
- To choose a category for channel surfing<br />
and for highlighting in the guide.<br />
- To deactivate any SmartSurf settings.<br />
- To keep current settings.<br />
View a list of pay per<br />
view programs and<br />
events that start<br />
within the predefined<br />
times on the left.<br />
Note: searching the<br />
entire 3.5 days will<br />
take about 10 seconds<br />
and cannot be<br />
interrupted<br />
Select time period for pay per view search<br />
List of pay per views starting within chosen time period<br />
SmartSurf options<br />
List of categories for SmartSurf<br />
- indicates<br />
subcategories. View<br />
them by pressing the<br />
right arrow. Press OK<br />
to select one category<br />
or subcategory.
<strong>DSX</strong><strong>5500</strong>_<strong>5540</strong> 11/13/02 12:21 PM Page 21<br />
Favorite Channels<br />
Favorite Channels is an easy way to customize the listing<br />
of channels. Once Favorites is configured, the Favorites<br />
icon displays in the banner and programs displayed in the<br />
Program Guide are only those in the selected list. When using<br />
the CH+ and CH- buttons, you are limited to channels in<br />
the Favorites list; however, you can access any channel by entering<br />
its number directly on the remote control. You can save up to<br />
four different favorite channel lists. This way, members of a<br />
household can each set their own favorite channel list.<br />
To access Favorite Channels:<br />
1. Press FAVORITES (FAV) on the remote.<br />
Or from the Main menu:<br />
1. Press MENU.<br />
2. Use the ▼ button to select “Preferences” and press OK.<br />
3. Use the ▼ button to select “Set Favorite Channels” and press<br />
OK.<br />
Then, to select or edit a Favorite channel list:<br />
1. Press the ▲▼ buttons to highlight the desired list, and press<br />
OK. Or, to turn off any previously selected Favorites list,<br />
highlight “All Channels”, and press OK<br />
2. Then, use the ▲▼ buttons to highlight “Select” to activate<br />
your Favorite list and press OK. Or, to edit the name or customize<br />
a Favorite channel list, select “Select and Edit” and<br />
press OK.<br />
Select & Edit: Change List Name:<br />
1. Select “Change List Name” and press OK.<br />
2. Use the � ��� buttons to scroll through the alphabet.<br />
When the letter you want is selected, press OK. Repeat until<br />
you have spelled the list name..<br />
3. When finished, select “Done” on the on-screen keyboard and<br />
press OK.<br />
Select & Edit: Customize Favorites:<br />
1. Select “Customize Favorites” and press OK.<br />
2. You can manually select/deselect channels by highlighting a<br />
channel and pressing OK. Use the ▲▼ buttons to navigate<br />
through the list, or use the PAGE +/- buttons to scroll the list<br />
up or down by a complete page.<br />
“Select All” selects all channels in the list. You can then manually<br />
deselect any channel.<br />
“Deselect All” deselects all the channels in the list. You can then<br />
manually select any channel.<br />
3. When customization is complete, Select “Save Changes” and press<br />
OK. Press BACK to return to the previous menu without saving<br />
your changes.<br />
Enhanced <strong>User</strong> Features (cont’d)<br />
21<br />
Main Menu<br />
Arrow up/down to scroll.<br />
Press OK to select.<br />
BACK to exit.<br />
Guide<br />
Interactive Services<br />
Preferences<br />
Parental Controls<br />
Purchases<br />
Setup<br />
System Upgrades<br />
Messages<br />
Caller ID<br />
To access Favorites from the Main Menu, press MENU<br />
and select “Preferences”<br />
Preferences: Set Favorite Channels<br />
Arrow up/down to scroll.<br />
Press OK to select.<br />
BACK to exit.<br />
Preferred Language<br />
Screen Format<br />
Banner Duration<br />
Set Favorite Channels<br />
A/V Matrix<br />
Remote Control ID<br />
Dolby Digital<br />
List 1: Customize Favorites<br />
Arrow up/down to scroll.<br />
Press OK to select.<br />
BACK to previous menu.<br />
Select All<br />
Deselect All<br />
Save Changes<br />
All Channels<br />
List 1<br />
List 2<br />
List 3<br />
List 4<br />
100 DTV<br />
101 PPV<br />
102 PPV<br />
103 FREE<br />
104 PPV<br />
105 DTV<br />
106 PPV<br />
107 PPV<br />
Select<br />
Select & Edit<br />
Select “Set Favorite Channels” in the “Preferences” menu<br />
Set Favorite Channels: Change List Name<br />
Press OK to select.<br />
Up/down or left/right to highlight.<br />
Press EXIT to cancel.<br />
Change List Name<br />
Customize Favorites<br />
List 2<br />
A B C D E F G H I<br />
J K L M N O P Q R<br />
S T U V W X Y Z 0<br />
1 2 3 4 5 6 7 8 9<br />
Space<br />
Clear<br />
Change List Name<br />
Customize Favorites<br />
Backspace<br />
Done
<strong>DSX</strong><strong>5500</strong>_<strong>5540</strong> 11/13/02 12:21 PM Page 22<br />
DIRECTV ADVANCED PROGRAM GUIDE<br />
DIRECTV ADVANCED PROGRAM GUIDE<br />
The DIRECTV ADVANCED PROGRAM GUIDE offers complete TV listings for up to 3 1/2 days plus access to much more.<br />
The Guide lists programs according to their time slot and channel. With it, you can tune to a program, be notified when a<br />
program is about to start, order pay per view programs, search through listings by the type of program you’re looking for,<br />
and set reminders for future viewing.<br />
The Channel Scroll Bar shows the position of the channel relative to the total number of channels.<br />
The Channel List shows the channels available.<br />
Arrows indicate that the program extends beyond the time slot shown.<br />
The Clock indicates that a Reminder for the program has been set for future viewing. If a Reminder is set, it will always display<br />
in the Guide cell. You will get notification before the program starts so that you can tune to it.<br />
The Program List shows all the programs airing in a given time slot. If program names are too long to fit into a guide cell,<br />
they may be shortened. When a program is selected, its full name appears in the banner.<br />
The Banner in the guide shows information on the highlighted program such as the rating, title, start and end time, program<br />
description, and channel number. It also displays the current time and date and indicates if any special features are<br />
currently enabled, such as Favorite Channels (page 21) or SmartSurf (page 20).<br />
Channel Number<br />
& Name<br />
Currently Tuned<br />
Channel<br />
Picture in Guide<br />
Time Slot<br />
Selected Date<br />
Channel Scroll<br />
Bar<br />
Channel List<br />
Program List<br />
All Channels<br />
Default<br />
Using the Guide<br />
To do this…. Do this….<br />
106 PPV 5:22PM Jun 14<br />
5:30PM-7:15PM Jun 14<br />
Young Father<br />
Movies, Horror (2001) Seth Hill stars in this<br />
tale of a young father facing otherworldly<br />
intruders in a secluded mansion during the<br />
waning days of World War II.<br />
Rating: PG-13<br />
Fri Jun 14 5:00P 5:30P<br />
106 PPV G The... Young Father<br />
107 PPV G Young Father<br />
108 PPV G Young Father<br />
109 PPV G ALLDAY<br />
ALLDAY<br />
All ALLDAY<br />
110 PPV G All ALLDAY<br />
111 PPV All ALLDAY<br />
Press Guide View Search Help<br />
Display the Guide Press the GUIDE button on the remote control or select “Guide” from the Main<br />
Menu.<br />
Scroll through the Press the ▲▼ buttons. You can use the PAGE+/- buttons to scroll a full page at<br />
Program List a time.<br />
Scroll to another time slot Press the � � buttons. Program information displays in the banner.<br />
Choose a program to view Press the arrow buttons until the program you want to view is highlighted in the<br />
Guide. If the program is in the current time slot, pressing OK tunes to the selected<br />
channel and displays the information for the program in the banner.<br />
If the program is in a future time slot, you are given the option to set a Reminder<br />
(refer to page 23). If the selected future program is pay per view, you are also given<br />
the option to purchase the program.<br />
View program details You can toggle between the guide and program details by pressing the<br />
INFO button on the remote.<br />
22<br />
Current<br />
Time and<br />
Date<br />
Icons<br />
Refer to page 19.<br />
Start/End Time<br />
& Date<br />
Banner<br />
Rating<br />
Highlighted<br />
Program<br />
Arrows<br />
Guide Menu<br />
Buttons
<strong>DSX</strong><strong>5500</strong>_<strong>5540</strong> 11/13/02 12:21 PM Page 23<br />
DIRECTV ADVANCED PROGRAM GUIDE (cont’d)<br />
Using the Guide (cont’d)<br />
To do this…. Do this….<br />
Set a Reminder for future You can set up your viewing schedule ahead of time, so that you will be automatically<br />
viewing<br />
notified of the shows you want to see. In the Guide, Reminders display as a clock to<br />
the right of the program title.<br />
If you wish to record a program using your VCR, set the VCR’s timer recording also.<br />
Refer to your VCR’s owner’s manual for timer recording instructions. The<br />
<strong>DIRECTV®</strong> <strong>Receiver</strong> will turn on at the correct time and tune to the channel if a<br />
Reminder is set.<br />
To set a Reminder for a 1. Highlight a future program in the guide and press OK. In the Reminder screen,<br />
non-pay per view program choose whether you want to select this program once, daily, weekly, or Monday-<br />
Friday. Remember, you are actually setting the Reminder by the time slot, so if<br />
the program moves to a different time slot, you will need to reset the Reminder.<br />
2. Press OK.<br />
If the program is in the same time slot as another Reminder, the system will prompt<br />
you that a conflict exists.<br />
To set a Reminder for a 1. When a future pay per view is purchased, you are given the option to set a<br />
pay per view program<br />
Reminder in the purchase details screen. If you set the Reminder for a purchased<br />
pay per view, you will be charged when the event airs.<br />
To cancel a Reminder for a 1. Highlight the program in the guide and press OK.<br />
program<br />
2. Choose “Once” if you want to cancel a Reminder program for one<br />
time slot only, or “Always” if a program has been set as a Reminder more than<br />
once, for example, a program that airs every day. Then, press OK.<br />
PPV (Pay Per View)<br />
Pay per view programs include special programming, movies, and sporting programs and are indicated by a "$" in the banner.<br />
In the Guide, you can preview currently airing PPV programs, purchase current and future PPV programs, and cancel<br />
a purchase. From the Main Menu, you can view the purchase history, cancel purchases, and restrict this feature by setting<br />
rating and spending limits.<br />
To purchase a PPV program:<br />
1. Highlight the program in the Guide and press OK.<br />
2. Select "Buy" and press OK. The price will display on the button. If you have locked your DIRECTV <strong>Receiver</strong> and the rating<br />
or spending limit is exceeded, you must enter your access code to temporarily unlock the receiver (refer to page 29)<br />
before you can purchase it.<br />
3. Select “Showings” to see a list of alternate show times. Press the ▲▼ buttons to move to the next selectable showing (if<br />
available), then press the OK button to select it.<br />
4. Press OK to confirm your purchase.<br />
Note: To order PPV, the DIRECTV <strong>Receiver</strong> must be continuously connected to a land-based phone line.<br />
23
<strong>DSX</strong><strong>5500</strong>_<strong>5540</strong> 11/13/02 12:21 PM Page 24<br />
Guide Menu<br />
Guide Menu<br />
The bottom of the Guide screen (refer to page 22) contains three<br />
buttons that can be accessed by pressing the GUIDE button on<br />
the remote control when the Guide is already displayed.<br />
• Use the � �buttons to highlight a button and press OK to<br />
view its list of options.<br />
• To close the list of options and select another Guide Menu button,<br />
press BACK.<br />
• To return to the Guide press BACK again or GUIDE.<br />
• To exit to watch TV, press Exit.<br />
Guide Menu: View<br />
Selecting “View” displays “Go To Time, Pay Per View, Reminder<br />
List and Time Reminder.” Use the ▲▼ buttons to select from<br />
the View options. Press OK or � to select an option.<br />
Jump to specific time slot in guide<br />
EZ Search Pay Per View (see page 20)<br />
List of Reminders set (see page 23)<br />
Set a Reminder by specific date, time<br />
and duration<br />
Guide Menu: Search<br />
Selecting “Search” allows you to search programs based on<br />
Category, Title, Actor and Director. Use the ▲▼ buttons to<br />
select from the Search options, and press OK or � to select a<br />
search option.<br />
Category<br />
Title, Actor, Director<br />
Guide Menu: Help<br />
Displays help information on screen. Use the ▲▼ arrows to<br />
select a topic and press OK. Press the PAGE+/- to scroll<br />
through help information.<br />
24<br />
All Channels<br />
Default<br />
All Channels<br />
Default<br />
All Channels<br />
Default<br />
106 PPV 5:22PM Jun 14<br />
5:30PM-7:15PM Jun 14<br />
Young Father<br />
Movies, Horror (2001) Seth Hill stars in this<br />
tale of a young father facing otherworldly<br />
intruders in a secluded mansion during the<br />
waning days of World War II.<br />
Rating: PG-13<br />
Fri Jun 14 5:00P 5:30P<br />
106 PPV G The... Young Father<br />
107 PPV G Young Father ALLDAY<br />
108 PPV G Young Father ALLDAY<br />
109 PPV G All ALLDAY<br />
110 PPV G All ALLDAY<br />
111 PPV All ALLDAY<br />
Press Guide View Search Help<br />
Access the Guide Menu by pressing the GUIDE button<br />
while in the Guide<br />
106 PPV 5:22PM Jun 14<br />
5:30PM-7:15PM Jun 14<br />
Young Father<br />
Movies, Horror (2001) Seth Hill stars in this<br />
tale of a young father facing otherworldly<br />
intruders in a secluded mansion during the<br />
waning days of World War II.<br />
Rating: PG-13<br />
Fri Jun 14 5:00P 5:30P<br />
106 PPV G The... Young Father<br />
107 PPV G Young Father ALLDAY<br />
108 PPV G Young Father ALLDAY<br />
109<br />
110<br />
PPV GGo All<br />
To ALLDAY Time<br />
Pay Per View<br />
PPV G All ALLDAY<br />
Reminder List<br />
111 PPV Time All ALLDAY Reminder<br />
Press Guide View Search Help<br />
“View” menu options<br />
106 PPV 5:22PM Jun 14<br />
5:30PM-7:15PM Jun 14<br />
Young Father<br />
Movies, Horror (2001) Seth Hill stars in this<br />
tale of a young father facing otherworldly<br />
intruders in a secluded mansion during the<br />
waning days of World War II.<br />
Rating: PG-13<br />
Fri Jun 14 5:00P 5:30P<br />
106 PPV G The... Young Father<br />
107 PPV G Young Fathers ALLDAY<br />
108 PPV G Young Fathers ALLDAY<br />
109 PPV G All ALLDAY<br />
Category<br />
Title<br />
110 PPV G All ALLDAY Actor<br />
111 PPV All ALLDAY Director<br />
Press Guide View Search Help<br />
“Search” menu options. “Help” menu available by<br />
selecting “Help” and pressing OK
<strong>DSX</strong><strong>5500</strong>_<strong>5540</strong> 11/13/02 12:21 PM Page 25<br />
Guide Menu: Search: Category<br />
Guide Menu (cont’d)<br />
A category search allows you to choose from a predefined list of<br />
categories and subcategories. The � arrow indicates the category<br />
has subcategories.<br />
1. Use the ▲▼ buttons to highlight a category or the � arrow<br />
to view a list of subcategories.<br />
2. Press OK to select one category or subcategory to search.<br />
Guide Menu: Search: Title/Actor/Director<br />
To search for a specific title, actor or director:<br />
1. Use the � ��� buttons to scroll through the alphabet.<br />
Highlight the letter you want, and press OK. Repeat until you<br />
have spelled part or all of the title, actor or director’s name.<br />
2. When finished, highlight “Done” on the on-screen keyboard<br />
and press OK.<br />
Note: Ignore punctuation and accents. For example, enter<br />
JOHN’S as JOHNS and DAY-TO-DAY as DAYTODAY. When<br />
entering a full name, enter FIRST LAST.<br />
Guide Menu: Search Results<br />
Once your search is completed you will see a list of results on<br />
the screen. Use the �� buttons to highlight a program and<br />
press INFO to view the program details or OK to view a list of<br />
program showing times.<br />
In addition to the icons on page 19, the list of program showing<br />
times includes additional icons to reflect the available alternate<br />
audio tracks.<br />
English<br />
Spanish<br />
French<br />
German<br />
Italian<br />
Japenese<br />
Korean<br />
Chinese<br />
25<br />
Main<br />
Movies<br />
Sports<br />
Interests<br />
Lifestyles<br />
News<br />
Themes<br />
Show Types<br />
Age Appropriate<br />
A B C D E F G H I<br />
J K L M N O P R Q<br />
S T U V W X Y Z 0<br />
1 2 3 4 5 6 7 8 9<br />
Space<br />
Clear<br />
PROGRAMS:<br />
News1<br />
News2<br />
News3<br />
News4<br />
News5<br />
News6<br />
News7<br />
News8<br />
News9<br />
Search for a Category<br />
Arrow up/down to scroll.<br />
Press OK to select.<br />
BACK to previous menu.<br />
Choose a category to search<br />
Search for an Actor<br />
Press OK to select.<br />
Arrow up/down to scroll.<br />
Press EXIT to cancel.<br />
Backspace<br />
Done<br />
Search Results: NEWS<br />
Arrow up/down to scroll.<br />
Press OK to select.<br />
BACK to previous menu.<br />
- indicates<br />
subcategories. View<br />
them by pressing the<br />
right arrow. Press OK<br />
to select one category<br />
or subcategory.<br />
Note: Ignore<br />
punctuation and<br />
accents. For example,<br />
enter JOHN'S as JOHNS<br />
and DAY-TO-DAY as<br />
DAYTODAY. For<br />
entering a full name,<br />
enter FIRST <br />
LAST.<br />
Enter the name of the title, actor or director with the<br />
on-screen keyboard<br />
“Search Results” screen<br />
Showings: Young Father<br />
Arrow up/down to scroll.<br />
Press OK to select.<br />
BACK to previous menu.<br />
11:30a-1:22p Tue, Nov 05 109 PPV<br />
Noon-1:52p Tue, Nov 05 106 PPV<br />
12:30p-2:22p Tue, Nov 05 107 PPV<br />
1:00p-2:52p Tue, Nov 05 108 PPV<br />
1:30p-3:22p Tue, Nov 05 109 PPV<br />
“Showings” screen
<strong>DSX</strong><strong>5500</strong>_<strong>5540</strong> 11/13/02 12:21 PM Page 26<br />
Using the Main Menu<br />
Main Menu<br />
The Main Menu lets you customize the features of your<br />
DIRECTV ® <strong>Receiver</strong>.<br />
To access the Main Menu from the Guide or TV:<br />
Press the MENU button on the remote control.<br />
To exit the menu:<br />
Press the MENU button or EXIT.<br />
To navigate through the menus:<br />
Use the ▲▼ buttons to highlight an option. Then press OK or<br />
� to confirm the selection and display a sub-menu. Selecting<br />
items in a sub-menu displays options in which you can change or<br />
review settings.<br />
Interactive Services<br />
DIRECTV INTERACTIVE powered by Wink Communications®<br />
offers an interactive television service that lets you use your<br />
remote control to access up-to-the-minute news, sports and<br />
weather, get program trivia, respond to free offers and shop, all<br />
while you watch TV. Look for the flashing and press OK to<br />
open the interactive window.<br />
To learn more about the DIRECTV INTERACTIVE services:<br />
1. Press MENU.<br />
2. Use ▼ to highlight “Interactive Services” and press OK.<br />
3. Press the OK button to tune directly to the DIRECTV INTER-<br />
ACTIVE Center (channel 499) to get more information<br />
about: Getting Started, Interactive Channels, Shopping Sign<br />
Up, Order History, Messages, Help & Settings, and About<br />
DIRECTV.<br />
DIRECTV INTERACTIVE service only available on select<br />
model receivers. <strong>Receiver</strong> must be connected to a phone line.<br />
Wink and Wink Logo are registered trademarks of Wink<br />
Communications Inc.<br />
26<br />
Main Menu<br />
Arrow up/down to scroll.<br />
Press OK to select.<br />
BACK to exit.<br />
Guide<br />
Interactive Services<br />
Preferences<br />
Parental Controls<br />
Purchases<br />
Setup<br />
System Upgrades<br />
Messages<br />
Caller ID<br />
Press MENU button to view Main Menu
<strong>DSX</strong><strong>5500</strong>_<strong>5540</strong> 11/13/02 12:21 PM Page 27<br />
Main Menu: Preferences<br />
Main Menu (cont’d)<br />
The Preferences option in the Main Menu lets you change the “Preferred Language”, screen format, or banner duration,<br />
set or edit the favorite channels list, enable/disable the A/V Matrix and set the remote control ID. To change your preferences,<br />
select “Preferences” in the Main Menu and press OK. In the sub-menus that display, use the ▲▼ buttons to highlight<br />
your selection. Press BACK to return to the Main Menu.<br />
Preferences: Preferred Language<br />
Many programs are broadcast with program information and<br />
audio tracks in different languages. You can choose the preferred<br />
language for the text in the Menu and Guide and for the audio<br />
tracks of programs.<br />
Note: Not all programs offer multiple languages. If the selected<br />
program is not available in the language you prefer, it defaults to<br />
English.<br />
To choose a language:<br />
1. Press MENU. The Guide option will be highlighted. Press ▼ to<br />
select “Preferences” and press OK.<br />
2. Select “Preferred Language” and press OK.<br />
3. Use the ▲▼ buttons to choose either “Menu & Guide” or “Audio<br />
Track” and press OK. The currently selected language has a checkmark<br />
to its right.<br />
4. Use the ▲▼ buttons to choose a language from the list.<br />
Press OK.<br />
If desired, repeat steps 3-4 to change the other option.<br />
Note: Once the language of the “Menu & Guide” menu is changed,<br />
the <strong>Receiver</strong> will reset and the new language will be used.<br />
Preferences: Screen Format<br />
To select a screen format:<br />
1. Press MENU.<br />
2. Press ▼ to select “Preferences” and press OK.<br />
3. Press ▼ to select the “Screen Format” and press OK.<br />
4. Use the ▲▼ buttons to choose from the options.<br />
5. Once you have made your selection, press OK.<br />
Note: Most standard TVs are 4:3 and that is the recommended setting.<br />
If you have a widescreen TV, select 16:9.<br />
27<br />
Preferred Language: Menu & Guide<br />
Arrow up/down to scroll.<br />
Press OK to select.<br />
BACK to previous menu.<br />
Menu & Guide<br />
Audio Track<br />
Select preferred language of text in the Menus and<br />
Guide in the “Menu & Guide” menu<br />
Preferred Language: Audio Track<br />
Arrow up/down to scroll.<br />
Press OK to select.<br />
BACK to previous menu.<br />
Menu & Guide<br />
Audio Track<br />
English<br />
Spanish<br />
English<br />
Spanish<br />
French<br />
German<br />
Italian<br />
Japenese<br />
Korean<br />
Chinese<br />
Select preferred language of every program in the<br />
“Audio Track” menu<br />
Preferences: Screen Format<br />
Arrow up/down to scroll.<br />
Press OK to select.<br />
BACK to previous menu.<br />
Preferred Language<br />
Screen Format<br />
Banner Duration<br />
Set Favorite Channels<br />
A/V Matrix<br />
Remote Control ID<br />
Full screen (4:3)<br />
Wide (16:9)<br />
“Screen Format” menu
<strong>DSX</strong><strong>5500</strong>_<strong>5540</strong> 11/13/02 12:21 PM Page 28<br />
Preferences: Banner Duration<br />
Banner durations define how long the banner remains on the<br />
screen after you press INFO. Options are 5, 10, 15, or 20<br />
seconds. The default value is 10 seconds.<br />
To select the banner duration:<br />
1. Press MENU.<br />
2. Press ▼ to select “Preferences” and press OK.<br />
3. Press ▼ to select “Banner Duration” and press OK.<br />
4. Use the ▲▼ buttons to choose from the options.<br />
5. Once you have made your selection, press OK.<br />
Preferences: Set Favorite Channels<br />
Refer to Enhanced <strong>User</strong> Features section, page 21.<br />
Preferences: A/V Matrix<br />
If you connected the A/V matrix as described in the<br />
Connections portion of the user manual (refer to page 12), then<br />
you must enable the A/V Matrix in the DIRECTV ® <strong>Receiver</strong><br />
before you can use it.<br />
To enable/disable the A/V Matrix:<br />
1. Press MENU.<br />
2. Press ▼ to select “Preferences” and press OK.<br />
3. Press ▼ to select “A/V Matrix” and press OK.<br />
4. Select “Enable” and press OK.<br />
Once enabled and connected, pressing the SOURCE button on<br />
the remote will switch between the video source(s) connected<br />
to Video IN1 and Video IN2 and satellite programming.<br />
Note: If a video source is not connected or turned on and the<br />
A/V Matrix is enabled, pressing the SOURCE button will still<br />
point to that video input. Your TV will go blank. Hit the<br />
SOURCE button to cycle to the next video input or to satellite<br />
programming.<br />
Preferences: Remote Control ID<br />
If you purchase two <strong>DSX</strong> <strong>5500</strong> or <strong>DSX</strong> <strong>5540</strong> receivers and use<br />
them in close proximity of each other, control them independently<br />
by assigning a separate ID number to each remote.<br />
To change the ID number of the remote control:<br />
1. Press MENU.<br />
2. Press ▼ to select “Preferences” and press OK.<br />
3. Press ▼ to select “Remote Control ID” and press OK.<br />
4. The only option available is the alternate ID. Select and press OK.<br />
5. Press and hold down the SAT and MUTE buttons on the<br />
remote until the SAT light stays on.<br />
6. To set the ID number to 1, enter “111” or to set the ID to 0,<br />
enter “000”. The SAT button will blink twice to confirm the<br />
entry.<br />
7. Point the remote at the <strong>Receiver</strong> and press OK to complete<br />
the process.<br />
Note: It is important at the end of the procedure to point the<br />
remote at the corresponding DIRECTV <strong>Receiver</strong> and press OK.<br />
Otherwise, the remote control will change its ID but the <strong>Receiver</strong><br />
will not and communication will be lost between the two.<br />
Main Menu (cont’d)<br />
28<br />
Preferences: Banner Duration<br />
Arrow up/down to scroll.<br />
Press OK to select.<br />
BACK to previous menu.<br />
Preferred Language<br />
Screen Format<br />
Banner Duration<br />
Set Favorite Channels<br />
A/V Matrix<br />
Remote Control ID<br />
Preferences: A/V Matrix<br />
Arrow up/down to scroll.<br />
Press OK to select.<br />
BACK to previous menu.<br />
Preferred Language<br />
Screen Format<br />
Banner Duration<br />
Set Favorite Channels<br />
A/V Matrix<br />
Remote Control ID<br />
5 Seconds<br />
10 seconds<br />
15 Seconds<br />
20 seconds<br />
“Banner Duration” menu options<br />
Enable<br />
Disable<br />
Preferences: Remote Control ID<br />
Arrow up/down to scroll.<br />
Press OK to select.<br />
BACK to previous menu.<br />
Preferred Language<br />
Screen Format<br />
Banner Duration<br />
Set Favorite Channels<br />
A/V Matrix<br />
Remote Control ID<br />
“A/V Matrix” menu<br />
Independently control 2 receivers<br />
in range of each other by setting<br />
a separate ID to each remote.<br />
Set Remote Control ID to 1<br />
“Remote Control ID” menu
<strong>DSX</strong><strong>5500</strong>_<strong>5540</strong> 11/13/02 12:21 PM Page 29<br />
Main Menu (cont’d)<br />
Preferences: Digital Audio (<strong>DSX</strong> <strong>5540</strong> only)<br />
To get the full theater experience with Dolby Digital surround sound<br />
(when available), connect one or both of your digital audio outputs<br />
(refer to page 11) to your home theater equipment.<br />
To access this feature:<br />
1. Press MENU.<br />
2. Press ▼ arrow to select “Preferences” and press OK.<br />
3. Press ▼ arrow to select “Digital Audio” and press OK.<br />
4. Use the ▲▼ arrows to select whether you want the outputs to only<br />
output Dolby Digital or PCM audio or if you want the DIRECTV ®<br />
<strong>Receiver</strong> to auto-detect the type of audio stream present.<br />
Note: The Dolby Digital audio track will always be the default<br />
audio track when enabled. If an alternate audio track is desired as<br />
the default selection, you must select the “PCM only” option.<br />
“Dolby” and the double-D symbol are trademarks of Dolby Laboratories.<br />
Options in the “Digital Audio” menu<br />
Manufactured under license from Dolby Laboratories.<br />
Main Menu: Parental Controls<br />
If you want to control what channels and programs are being watched or how much is being spent on each pay per view<br />
purchase, Parental Controls allows you to do this with channel locks, spending limits, and rating limits. Parental Controls<br />
are protected by a 4-digit numeric password that you set.<br />
To access this feature:<br />
1. Press MENU.<br />
2. Press ▼ to select “Parental Controls” and press OK.<br />
3. Use the ▲▼ buttons to choose from the options and press OK.<br />
Parental Controls: Lock The System<br />
(Lock/Unlock The DIRECTV ® <strong>Receiver</strong>)<br />
Once any Parental Control setting has been configured, the<br />
DIRECTV <strong>Receiver</strong> must be locked in order for those<br />
changes to take effect. Your DIRECTV <strong>Receiver</strong> can be locked<br />
or unlocked. When it is locked, the system will prompt you to enter<br />
the password whenever you want to change settings in the following<br />
menus: “Channel Locks”, ”Set Rating Limits”, or “Set Spending<br />
Limits”. The lock icon in the banner indicates a locked system.<br />
To lock or unlock the system:<br />
1. Choose “Lock The System” or “Unlock The System” from the<br />
“Parental Controls” menu.<br />
2. When the system prompts you for a password, enter it using the<br />
numeric buttons on the remote control. If locking the system,<br />
you will need to confirm it before it takes effect. If you have forgotten<br />
or lost your password, contact your service provider.<br />
Parental Controls: Channel Locks<br />
Locking channels prevents a viewer from accessing the channels<br />
by requiring a password. You must lock the DIRECTV <strong>Receiver</strong> to<br />
enforce these settings (see above).<br />
To set Channel Locks:<br />
1. Choose “Channel Locks” from the “Parental Controls” menu<br />
and press OK.<br />
2. To lock /unlock all channels, use the ▲▼ buttons to select<br />
“Lock All”, or “Unlock All” and press OK.<br />
3. To manually lock/unlock individual channels, press �. Then, use<br />
the ▲▼ buttons to select a channel and press OK to toggle<br />
between lock and unlock.<br />
4. Use the PAGE +/- buttons to scroll the channel list by a full page.<br />
5. To store your new settings, select “Save Changes” and press OK.<br />
29<br />
Preferences: Digital Audio<br />
Arrow up/down to scroll.<br />
Press OK to select.<br />
BACK to previous menu.<br />
Preferred Language<br />
Screen Format<br />
Banner Duration<br />
Set Favorite Channels<br />
A/V Matrix<br />
Remote Control ID<br />
Digital Audio<br />
Setting for optical and coaxial<br />
audio outputs.<br />
Dolby Digital only<br />
PCM only<br />
Auto Selection<br />
Off<br />
Parental Controls: Lock The System<br />
Arrow up/down to scroll.<br />
Press OK to select.<br />
Changes will take effect only after you lock the<br />
system in the Parental Controls menu<br />
Lock The System<br />
Channel Locks<br />
Set Spending Limit<br />
Set Rating Limits<br />
Replace Access Card<br />
Parental Controls: Channel Locks<br />
Arrow up/down to scroll.<br />
Press OK to select.<br />
Changes will take effect only after you lock the<br />
system in the Parental Controls menu<br />
Lock All<br />
Unlock All<br />
Save Changes<br />
“Parental Controls” menu<br />
100 DTV<br />
101 PPV<br />
102 PPV<br />
103 FREE<br />
104 PPV<br />
105 DTV<br />
106 PPV<br />
107 PPV<br />
“Channel Locks” menu
<strong>DSX</strong><strong>5500</strong>_<strong>5540</strong> 11/13/02 12:21 PM Page 30<br />
Main Menu (cont’d)<br />
Parental Controls: Set Spending Limit<br />
You can set a per purchase spending limit on pay per view programs.<br />
It is not a cumulative limit. You must lock the DIRECTV ®<br />
<strong>Receiver</strong> to enforce this setting (refer to page 29).<br />
To set the Spending Limit:<br />
1. Choose “Set Spending Limit” from the “Parental Controls”<br />
menu and press OK. The current purchase limit displays.<br />
2. Enter the spending limit using the numeric buttons on the<br />
remote. Or, use the ��buttons to move from one digit to<br />
another, then use the ▲▼ buttons to set the value for each<br />
digit.<br />
Parental Controls: Set Rating Limit<br />
You can restrict viewing by setting the rating limits to certain<br />
levels. Ratings help you determine programming content, similar<br />
to the way films are rated. For example, a rating of "G" is a program<br />
suitable for general audiences, while a rating of "R" might<br />
be suitable for adults only. You must lock the system to enforce<br />
these settings. To view a locked program, you must first enter a<br />
password.<br />
To set the Rating Limits:<br />
1. Choose “Set Rating Limits” from “Parental Controls” menu<br />
and press OK.<br />
2. There are three rating systems to set: Children-TV, Entire<br />
Audience-TV, and MPAA-Movies. You can lock or unlock all<br />
ratings in each system. When you lock a particular rating, all<br />
ratings exceeding the locked rating are automatically locked as<br />
well. For example, if you lock "R", "NC-17” and “X”" will be<br />
automatically locked. Press ▲▼ to select the desired limit and<br />
press OK to lock or unlock it. The Children-TV and Entire<br />
Audience-TV options contain sublevel ratings that can further<br />
identify the programming content.<br />
Parental Controls: Replace Access Card<br />
Use this menu to replace your current card with a new one, sent<br />
by your service provider. Be sure to follow the on-screen instructions.<br />
For information on inserting access cards, see page 8.<br />
To replace your access card:<br />
1. Press MENU.<br />
2. Use the �� buttons on the remote control to highlight<br />
“Parental Controls”. Press OK.<br />
3. Choose “Replace Access Card”, then press OK. Be sure the<br />
current access card is inserted in the DIRECTV <strong>Receiver</strong>.<br />
"Copying OLD access card information" will appear on the<br />
screen.<br />
4 When prompted, remove the old card, insert the new card,<br />
then press OK.<br />
5. When this process is completed, press OK to return to the<br />
previous menu.<br />
6. Discard the old card since it no longer works.<br />
30<br />
Parental Controls: Set Spending Limit<br />
Arrow up/down or #0-9 to enter number<br />
Press OK to accept and go to next number.<br />
Changes made will take effect only after you<br />
lock the system in the Parental Controls menu.<br />
Lock The System<br />
Channel Locks<br />
Set Spending Limit<br />
Set Rating Limits<br />
Replace Access Card<br />
Spending limit per program:<br />
$ 0 1 0 . 0 0<br />
Set Rating Limits: Children - TV<br />
Up/down or left/right to highlight.<br />
Press OK to lock a rating level or content.<br />
Fantasy violence is present in this program.<br />
Lock All<br />
Unlock All<br />
Save Changes<br />
TV-Y<br />
TV-Y7<br />
Set Rating Limits: Entire Audience - TV<br />
Press OK to lock a rating level.<br />
Dialogue cautions are present.<br />
Lock All<br />
Unlock All<br />
Save Changes<br />
TV-G<br />
TV-PG<br />
TV-14<br />
TV-MA Ç<br />
Set Rating Limits: MPAA - Movies<br />
Press OK to lock a rating level or content.<br />
This material is intended to be viewed<br />
only by adults.<br />
Lock All<br />
Unlock All<br />
Save Changes<br />
“Set Spending Limit” menu<br />
“Children-TV” rating system<br />
“Entire Audience” rating system<br />
TV-Y7<br />
F.Violence<br />
TV-PG<br />
Dialogue<br />
Language<br />
Sex<br />
Violence<br />
G<br />
PG<br />
PG-13<br />
R<br />
NC-17 Ç<br />
X Ç<br />
“MPAA-Movies” rating system
<strong>DSX</strong><strong>5500</strong>_<strong>5540</strong> 11/13/02 12:21 PM Page 31<br />
Main Menu: Purchases<br />
Purchases: Past Purchases<br />
The Past Purchases menu displays a summary of your past pay per<br />
view purchases. It includes the program name and channel number,<br />
program date, start and end time, price, and whether the program<br />
was viewed or cancelled. Information for all past purchases is stored<br />
on the access card and displayed with the most recent purchase first.<br />
To view past purchases:<br />
1. Press MENU.<br />
2. Choose “Purchases” from the main menu and press OK.<br />
3. Use the ▲▼ buttons to choose “Past Purchases” and press OK.<br />
4. A list of past purchases displays indicating whether they were<br />
viewed or cancelled. You can scroll through the list using the ▲▼<br />
buttons or using the PAGE+/- buttons to scroll by a full page.<br />
Main Menu (cont’d)<br />
Purchases: Upcoming Purchases<br />
The Upcoming Purchases menu displays all future pay per view<br />
programs that you have purchased but not cancelled. You may<br />
cancel any pay per view program you have not yet watched that<br />
was purchased through the DIRECTV <strong>Receiver</strong>.<br />
Note: You cannot cancel a PPV purchase if you have already tuned to<br />
the program.<br />
To cancel purchases:<br />
1. Press MENU.<br />
2. Choose “Purchases” from the main menu and press OK.<br />
3. Choose “Upcoming Purchases” and press OK.<br />
4. A list displays of upcoming purchases that were ordered but<br />
not viewed. You can scroll through the list using the ▲▼ buttons<br />
or using the PAGE+/- buttons to scroll by a full page.<br />
5. To delete a pending purchase, highlight it and press OK. A<br />
checkmark will appear.<br />
6. Select “Save Changes” and press OK to cancel all checked<br />
programs from the upcoming purchases list.<br />
7. You can verify the purchase was cancelled by checking in the<br />
“Past Purchases” menu.<br />
31<br />
Purchases: Past Purchases<br />
Arrow up/down to scroll.<br />
Press OK to select for deletion.<br />
BACK to previous menu.<br />
Past Purchases<br />
Upcoming Purchases<br />
Purchases: Upcoming Purchases<br />
Arrow up/down to scroll.<br />
Press OK to select for deletion.<br />
BACK to previous menu.<br />
Delete All<br />
Undelete All<br />
Save changes<br />
Jun 14, 2002 5:30 - 7:15 pm 106<br />
Young Father<br />
$3.95 PG<br />
“Past Purchases” menu<br />
Jun 14, 2002 5:30 - 7:15 pm 106<br />
Young Father<br />
$3.95 PG<br />
“Upcoming Purchases” menu
<strong>DSX</strong><strong>5500</strong>_<strong>5540</strong> 11/13/02 12:21 PM Page 32<br />
Main Menu (cont’d)<br />
Main Menu: Setup<br />
Use this menu to run through the setup process (professional installation is highly recommended). Configure each setting<br />
within “Enter ZIP Code” and “Dish Configuration.” Use “Point Dish” and “System Test” to confirm your setup.<br />
To view Setup options:<br />
1. Press MENU.<br />
2. Select “Setup” and press OK.<br />
3. Use the 89 buttons to select one of the “Setup” menu<br />
options.<br />
Setup: Enter ZIP Code<br />
Use this function to correctly position the satellite antenna.<br />
To enter your ZIP code:<br />
1. At the “Setup” menu, select “Enter ZIP Code” and press OK.<br />
2. Enter the ZIP code using the numeric buttons on the remote,<br />
or use the 89 buttons to select each digit in the ZIP code<br />
field. Press the : button to move to the next field.<br />
Helpful Hint<br />
• Your ZIP code is critical to the<br />
installation process.<br />
Setup: Dish Type<br />
Use this function to identify your type of satellite antenna dish.<br />
To select your dish type:<br />
1. At the “Setup” menu, select “Dish Type” and press OK.<br />
2. Use the 89 buttons to select “<strong>Manual</strong> Selection” if you know<br />
the type of dish you have. Otherwise, contact your installer or<br />
select “Auto Selection” and press OK.<br />
3. Use the 89 buttons to manually select your dish type and<br />
press OK.<br />
Setup: Point Dish<br />
Use this function to manually point the dish and correctly align it<br />
with the satellite(s). You may want to have a helper to read the<br />
onscreen displays for you during this procedure. Signal strength<br />
readings change approximately 2 seconds after each adjustment is<br />
made.<br />
Note: Single dish installations often show higher signal strength<br />
than installations that receive signals from two or three satellites.<br />
The onscreen display will tell you how to align your dish based on<br />
your ZIP code.<br />
To point your dish:<br />
1. At the Setup menu, select “Point Dish” and press OK.<br />
2. A signal strength meter displays. Adjust the dish until the signal<br />
strength meter stabilizes at a maximum reading. The range is 0 to<br />
100. It is recommended to obtain a signal strength of at least 60.<br />
An audible tone will help with this procedure. The tones or beeps<br />
get faster as the signal strength increases until it becomes a continuous<br />
sound. If you have problems getting a signal, refer to the<br />
troubleshooting section of the user manual (page 35).<br />
32<br />
Setup: Enter ZIP Code<br />
Arrow up/down or #0-9 to enter number<br />
Press OK to accept and go to next number.<br />
Press BACK to previous menu.<br />
Enter ZIP Code<br />
Dish Type<br />
Point Dish<br />
System Test<br />
System Information<br />
Dish Type: <strong>Manual</strong> Selection<br />
Arrow up/down to scroll.<br />
Press OK to select.<br />
BACK to previous menu.<br />
<strong>Manual</strong> Selection<br />
Auto Selection<br />
Round dish configured for<br />
1 satellite location<br />
Oval dish configured for<br />
2 satellite locations<br />
Oval dish configured for<br />
3 satellite locations<br />
“<strong>Manual</strong> Selection” menu options<br />
Setup: Point Dish<br />
<strong>Manual</strong>ly point your dish to the direction below.<br />
Change satellite with arrow up/down.<br />
Arrow left/right changes transponder.<br />
BACK to previous menu.<br />
Enter Zip Code<br />
Dish Type<br />
Point Dish<br />
System Test<br />
System Information<br />
Please enter your zip code.<br />
9 2 1 2 7<br />
“Enter ZIP Code” menu<br />
Point dish at 154 degrees azlmuth,<br />
51 degrees elevation and 101 degrees<br />
tilt based on zip code 91914.<br />
101"(A) 100 2<br />
119"(B) 0<br />
110"(C) 0<br />
Note: Use the 8 or 9 buttons to switch between<br />
satellites. Use the ; or : buttons to switch between<br />
transponders for the selected satellite.
<strong>DSX</strong><strong>5500</strong>_<strong>5540</strong> 11/13/02 12:21 PM Page 33<br />
Main Menu (cont’d)<br />
Setup: System Test<br />
This option performs a test of the system. This information is useful<br />
in troubleshooting if you need to contact customer service.<br />
To run a system test:<br />
1. At the Setup menu, select “System Test” and press OK. A message<br />
“Test in progress, Please Wait . . .” may appear. After a<br />
few seconds, the test results will display.<br />
Setup: System Information<br />
This option shows information about your hardware and software<br />
that will be useful in troubleshooting if you need to contact customer<br />
service.<br />
To view system information:<br />
1. At the Setup menu, select “System Information” and press OK.<br />
2. Use the PAGE +/- buttons to scroll the information.<br />
Main Menu: System Upgrades<br />
Your DIRECTV ® <strong>Receiver</strong> is able to receive upgrades or modifications to some of its features and functions. These modifications<br />
will occur automatically, usually at times when the DIRECTV <strong>Receiver</strong> is not likely to be in use. If your DIRECTV<br />
<strong>Receiver</strong> is on when an upgrade or modification is sent, reception may be interrupted for a minute or two. Reception<br />
should return to normal after the modification is complete. Your DIRECTV <strong>Receiver</strong> must be plugged in to receive an<br />
upgrade. Do not unplug your DIRECTV <strong>Receiver</strong> while an upgrade is in progress. Consult the System Upgrades Menu to<br />
find a schedule of upgrades or modifications planned by DIRECTV.<br />
To view past or future upgrades:<br />
1. Press MENU.<br />
2. Select “System Upgrades” in the Main Menu and press OK.<br />
3. Use the 89 buttons to select “Past Upgrades” or “Future Upgrades” and press OK.<br />
33<br />
Setup: System Test<br />
BACK to previous menu.<br />
Enter ZIP Code<br />
Dish Type<br />
Point Dish<br />
System Test<br />
System Information<br />
Setup: System Information<br />
Page +/- for more information.<br />
BACK to previous menu.<br />
Enter ZIP Code<br />
Dish Type<br />
Point Dish<br />
System Test<br />
System Information<br />
Tunung: OK<br />
Signal Strength: 0<br />
Access Card status: OK<br />
Valid card<br />
Access Card ID: 395015639<br />
Modem status:<br />
Line is in use<br />
“System Test” menu<br />
Jan 1, 1980 12:01:06 am<br />
Daylight Savings:<br />
Inactive<br />
Manufacturer Brand: PHILIPS<br />
IRD Model:<br />
<strong>DSX</strong><strong>5500</strong><br />
IRD Serial #: 12345678<br />
IRD <strong>Receiver</strong> ID #:<br />
9999-9999-9999<br />
“System Information” menu
<strong>DSX</strong><strong>5500</strong>_<strong>5540</strong> 11/13/02 12:21 PM Page 34<br />
Main Menu (cont’d)<br />
Main Menu: Messages<br />
When you receive a new message, the New Incoming<br />
Messages icon appears in the banner. You can view and<br />
delete messages. Each message includes the date and<br />
time it was sent. When new messages are received, the<br />
oldest message is automatically deleted if the maximum amount<br />
of messages (30) is exceeded. The banner on the Message screen<br />
indicates how many messages you have.<br />
To view messages:<br />
1. Press MENU.<br />
2. Use the ▲▼ buttons to choose “Messages” and press OK.<br />
3. Use the ▲▼ buttons to select and view a message.<br />
4. When a message is displayed, press OK to delete a message<br />
(the torn envelope icon indicates a deleted message).<br />
5. When you press BACK or EXIT, all deleted messages are<br />
removed permanently and will not display the next time you<br />
view messages.<br />
Main Menu: Caller ID<br />
Note: You must have phone line connected to your <strong>Receiver</strong> and<br />
be subscribed to Caller ID service from your phone service<br />
provider.<br />
When a phone call comes in, a display will appear containing call<br />
information.<br />
To enable or disable Caller ID:<br />
1. Press the MENU button. Use the ▲▼ buttons to select “Caller<br />
ID”and press OK.<br />
2. Use the ▲▼ buttons to select “Enable/Disable” and press OK.<br />
3. Use the ▲▼ buttons to select either “Enable” or “Disable”<br />
and press OK.<br />
To view Caller ID history:<br />
At the Caller ID screen, use the ▲▼ buttons to select “Call<br />
History” and press OK. The history information will be displayed.<br />
34<br />
Messages:Message 1 of 18<br />
Arrow up/down to highlight and see messages.<br />
Page +/- to view entire message.<br />
Press Ok to select for deletion.<br />
DIRECTV offers great programming!<br />
Caller ID: Enable/Disable<br />
Arrow up/down to scroll.<br />
Press OK to select.<br />
BACK to previous menu.<br />
Enable/Disable<br />
Call History<br />
“Messages” menu<br />
Enable<br />
Disable<br />
“Caller ID” options
<strong>DSX</strong><strong>5500</strong>_<strong>5540</strong> 11/13/02 12:21 PM Page 35<br />
Troubleshooting<br />
Where To Find Help<br />
General help is available by highlighting the "HELP" button in the Guide menu and pressing OK.<br />
No picture / poor<br />
picture<br />
No sound<br />
Remote does not<br />
work<br />
Ordering or cancelling<br />
pay per view<br />
Parental Controls<br />
Favorites /<br />
SmartSurf<br />
Audio track<br />
incorrect<br />
Cannot access<br />
channel(s)<br />
1. Press the POWER button on the front panel of the <strong>DIRECTV®</strong> <strong>Receiver</strong> if the power indicator<br />
LED is not on.<br />
2. Make sure TV power is on.<br />
3. Check TV connection from the DIRECTV <strong>Receiver</strong>.<br />
a. If using RF output, tune TV to channel 3 or 4 to match the channel switch on the rear<br />
panel of the DIRECTV <strong>Receiver</strong>.<br />
b. If using composite, S-Video, or component outputs, select the proper input on your TV.<br />
4. Make sure the SAT IN coaxial cable is properly connected to the antenna's LNB or multiswitch.<br />
Check the cable for kinks.<br />
5. Check the satellite antenna's signal strength (see page 32). To ensure a quality picture, make sure<br />
the output signal is coming directly from the DIRECTV <strong>Receiver</strong> and not through your VCR.<br />
6. If the A/V Matrix is enabled, press the SOURCE button on the remote to select from satellite<br />
programming, VIDEO IN1, or VIDEO IN2.<br />
7. Turn DIRECTV <strong>Receiver</strong> off, unplug, wait 10 to 15 seconds, and plug back in.<br />
Note: Adverse weather conditions may affect picture quality.<br />
1. Make sure that the TV volume is not set to mute.<br />
2. Check audio connections from the DIRECTV <strong>Receiver</strong> to the TV.<br />
a. If using AUDIO LEFT/RIGHT OUT1, select the proper inputs on your TV.<br />
b. If using DIGITAL AUDIO OUT (optical or coaxial – <strong>DSX</strong> <strong>5540</strong> only), select the proper<br />
input(s) on your home theater receiver.<br />
3. Check if the problem exists on other channels. If so, turn DIRECTV <strong>Receiver</strong> off, unplug,<br />
wait 10 to 15 seconds, and plug back in.<br />
1. Make sure the batteries are inserted correctly (see page 13) and are not dead.<br />
2. Be sure you are within operating range of the DIRECTV <strong>Receiver</strong>.<br />
3. Make sure no objects obstruct the line of sight between the remote and the DIRECTV<br />
<strong>Receiver</strong>.<br />
4. Press the SAT button on the remote.<br />
5. If remote control ID was changed so the DIRECTV <strong>Receiver</strong> and the remote no longer communicate,<br />
change the ID number back to the previous ID number (see page 28).<br />
1. Cannot order -<br />
a. It may be too late to purchase the program. Check for other show times.<br />
b. Check phone cord connection on rear panel of the DIRECTV <strong>Receiver</strong> and at the wall<br />
jack. Keep phone cord connected.<br />
2. Cannot cancel - you cannot cancel pay per view orders that you've watched or tuned to, or<br />
ones not ordered through your DIRECTV <strong>Receiver</strong>.<br />
• The system must be locked before your Parental Controls settings will take effect<br />
(see page 29).<br />
• The system must be unlocked before you can make changes to the Parental Controls<br />
settings.<br />
Cannot disable – press the POWER button to go into standby and press the POWER again to<br />
bring DIRECTV <strong>Receiver</strong> out of standby.<br />
1. Check the default language settings (see page 27).<br />
2. The program provider may not provide audio in all the languages listed in the “Preferred<br />
Language” menu.<br />
3. If using a <strong>DSX</strong> <strong>5540</strong>, a Dolby audio track will always be the default audio track for the<br />
“Dobly Digital Only” setting. If an alternate audio track is desired as the default selection,<br />
change the Digital Audio setting to “PCM only” in the “Preferences” menu.<br />
1. Check that you are subscribing to the station to which you want to tune to.<br />
2. Be sure the system is not locked as indicated by a lock icon in the banner.<br />
3. Make sure SmartSurf and/or Favorites is not turned on. See “Favorites/SmartSurf” above for<br />
instructions to cancel either feature.<br />
35
<strong>DSX</strong><strong>5500</strong>_<strong>5540</strong> 11/13/02 12:21 PM Page 36<br />
Limited Warranty<br />
Digital Satellite <strong>Receiver</strong><br />
90 Days Free Exchange / 91 Days-One Year Nominal Fee Exchange<br />
This product must be carried in for repair.<br />
WHO IS COVERED?<br />
You must have proof of purchase to receive warranty service.<br />
A sales receipt or other document showing that you purchased<br />
the product is considered proof of purchase.<br />
WHAT IS COVERED?<br />
Warranty coverage begins the day you buy your product. For<br />
90 days from the date of purchase, the Digital Satellite <strong>Receiver</strong><br />
will be replaced with a new, repaired, renewed, or comparable<br />
product (whichever is deemed necessary) if it becomes defective<br />
or inoperative. This exchange is done at no charge to you.<br />
From 91 days to one year from the date of purchase, you must pay<br />
a nominal fee for a new or renewed product. This exchange<br />
offer ends one year after the date of purchase.<br />
All products, including replacement products, are covered only<br />
for the original warranty period. When the warranty on the<br />
original product expires, the warranty on the replacement<br />
product also expires.<br />
WHAT IS EXCLUDED?<br />
Your warranty does not cover:<br />
• labor charges for installation or setup of the product.<br />
• installation, performance of, or repair of audio/video cabling,<br />
telephone line, or accessory attachments used in accessory<br />
ports outside of the product.<br />
• product replacement because of misuse, accident, lightning<br />
damage, unauthorized repair, or other cause not within the<br />
control of Philips.<br />
• incidental or consequential damages resulting from the product.<br />
(Some states do not allow the exclusion of incidental or<br />
consequential damages, so the above exclusion may not apply<br />
to you.)<br />
• reception transmission problems caused by signal conditions,<br />
telephone line, or cable or antenna systems outside the unit.<br />
• a product that requires modification or adaptation to enable<br />
it to operate in any country other than the country for<br />
which it was designed, manufactured, approved and/or<br />
authorized, or repair of products damaged by these<br />
modifications.<br />
• a product used for commercial or institutional purposes.<br />
• DIRECTV service is separate and distinct from this product<br />
(hardware) warranty.<br />
This warranty gives you specific legal rights. You may have other rights which vary from state/province to state/province.<br />
Philips, P. O. Box 520890, Miami, FL 33152 (402) 536-4171<br />
EL6471E002 / 8-02<br />
WHERE IS EXCHANGE AVAILABLE?<br />
You may exchange the product in all countries where the product<br />
is officially distributed by Philips. In countries where Philips<br />
does not distribute the product, the local Philips service organization<br />
will attempt to provide a replacement product (although<br />
there may be a delay if the appropriate product is not readily<br />
available).<br />
MAKE SURE YOU KEEP...<br />
Please keep your sales receipt or other document showing<br />
proof of purchase. Attach it to this owner’s manual and keep<br />
both nearby. Also keep the original box and packing material in<br />
case you need to return your product.<br />
BEFORE REQUESTING EXCHANGE...<br />
Please check your owner’s manual before requesting exchange.<br />
Adjustments of the controls discussed there may save you a<br />
call.<br />
TO EXCHANGE YOUR PRODUCT...<br />
An exchange will be managed by Philips. If you believe you need<br />
to exchange your Digital Satellite <strong>Receiver</strong>, contact Philips at<br />
1-800-464-1131. A representative will go through a diagnostic<br />
checklist with you. If it is determined that the product needs to<br />
be exchanged, you will receive a return authorization number.<br />
The representative will give you complete shipping details.<br />
TO GET OUT-OF-WARRANTY EXCHANGE...<br />
To exchange your product after the warranty expires, contact<br />
Philips at 1-800-464-1131 to determine the cost of out-of-warranty<br />
exchange for your product.<br />
All implied warranties, including implied warranties of merchantability<br />
and fitness for a particular purpose, are limited in duration to the<br />
duration of this express warranty. Some states do not allow limitations<br />
on how long an implied warranty lasts, so the above limitation<br />
may not apply to you.<br />
3111 176 50891 Printed in Mexico