Clock Radio Mini Alarm for iPod® Manual - Memorex
Clock Radio Mini Alarm for iPod® Manual - Memorex
Clock Radio Mini Alarm for iPod® Manual - Memorex

Create successful ePaper yourself
Turn your PDF publications into a flip-book with our unique Google optimized e-Paper software.
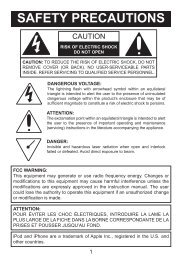
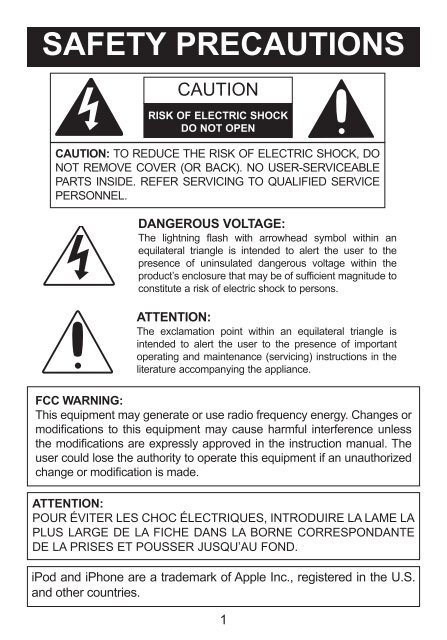
SAFETY PRECAUTIONSCAUTIONRISK OF ELECTRIC SHOCKDO NOT OPENCAUTION: TO REDUCE THE RISK OF ELECTRIC SHOCK, DONOT REMOVE COVER (OR BACK). NO USER-SERVICEABLEPARTS INSIDE. REFER SERVICING TO QUALIFIED SERVICEPERSONNEL.DANGEROUS VOLTAGE:The lightning flash with arrowhead symbol within anequilateral triangle is intended to alert the user to thepresence of uninsulated dangerous voltage within theproduct’s enclosure that may be of sufficient magnitude toconstitute a risk of electric shock to persons.ATTENTION:The exclamation point within an equilateral triangle isintended to alert the user to the presence of importantoperating and maintenance (servicing) instructions in theliterature accompanying the appliance.FCC WARNING:This equipment may generate or use radio frequency energy. Changes ormodifications to this equipment may cause harmful interference unlessthe modifications are expressly approved in the instruction manual. Theuser could lose the authority to operate this equipment if an unauthorizedchange or modification is made.ATTENTION:POUR ÉVITER LES CHOC ÉLECTRIQUES, INTRODUIRE LA LAME LAPLUS LARGE DE LA FICHE DANS LA BORNE CORRESPONDANTEDE LA PRISES ET POUSSER JUSQU’AU FOND.iPod and iPhone are a trademark of Apple Inc., registered in the U.S.and other countries.1
SAFETY PRECAUTIONSNOTE: This equipment has been tested and found to comply with the limits<strong>for</strong> a Class B digital device, pursuant to part 15 of the FCC Rules. Theselimits are designed to provide reasonable protection against harmfulinterference in a residential installation.This equipment generates, uses and can radiate radio frequency energyand, if not installed and used in accordance with the instructions, may causeharmful interference to radio communications. However, there is noguarantee that interference will not occur in a particular installation. If thisequipment does cause harmful interference to radio or television reception,which can be determined by turning the equipment off and on, the user isencouraged to try to correct the interference by one or more of the followingmeasures:• Reorient or relocate the receiving antenna.• Increase the separation between the equipment and receiver.• Connect the equipment into an outlet on a circuit different from that towhich the receiver is connected.• Consult the dealer or an experienced radio/TV technician <strong>for</strong> help.• The rating in<strong>for</strong>mation is located at the bottom of the apparatus.WARNING: TO PREVENT FIRE OR SHOCK HAZARD, DONOT EXPOSE THIS UNIT TO RAIN OR MOISTURE.SURGE PROTECTORS: It is recommended to use a surge protector<strong>for</strong> AC connection. Lightning and power surges ARE NOT coveredunder warranty <strong>for</strong> this product.This Class B digital apparatus complies with Canadian ICES-003.Cet appareil numérique de la classe B est con<strong>for</strong>me à la normeNMB-003 du Canada.Only use attachments/accessories specified by the manufacturer.To be completely disconnected from the power input, the main plug of theAC/DC adapter shall be disconnected from the electrical outlet. The mainplug of the AC/DC adapter should not be obstructed OR should be easilyaccessed during intended use.Do not expose the product to dripping or splashing. Do not place liquidfilled objects such as vases on the product.2
LOCATION OF CONTROLSFRONT/TOP1 2 3 4 5 6 7 8 9 10 11 1213 14 15 1617 18 19 201. iPod Support Knob2. iPod/iPhone Compartmentwith Connector3 Source Button4. Set <strong>Alarm</strong> Button5. Preset 1 Button6. Tune Down/Skip/Searcho Button7. Play/Pause ®p Button8. Preset 2 Button9. Power Button10. Tune Up/Skip/Search nButton11. Preset 3 Button12. Set Time (Sync) Button13. Left Speaker (side of unit)14. Battery Compartment(on bottom of unit)(bATTERY COVER PARTNO. bLK: 21.4.017.0023*,WHT: 21.4.017.0023*)15. Snooze Button16. LCD Display17. Sleep Button18. Volume/Time Control19. <strong>Alarm</strong> On/Off Button20. Right Speaker (side of unit)*Consumer Replaceable Part(See page 19 to order.)4
LOCATION OF CONTROLS (CONTINUED)REAR PANEL123 4 51. Dimmer Button2. 24/12 Hour Button3. Line In Jack4. DC In Jack(AC ADAPTER PART NO. bLK: 11.2.007.0034*, WHT:11.2.007.0030*)5. FM In Jack(FM WIRE PART NO. bLK: 11.1.290.0005*, WHT:11.1.290.0004*)*Consumer Replaceable Part (See page 19 to order.)5
POWER SOURCEAC CONNECTIONInsert the small end of the AC adapterinto the DC In jack (located on the rearof the unit). Connect the other end to awall outlet having 120V AC, 60 Hz.AC Adapter, DC 5.9V ZNOTES:• Remove both the DC plug and the AC-IN plug to disconnect the ACadapter when not in use.• Only use the supplied AC adapter which has the following specs:DC 5.9V ZbATTERY INSTALLATIONTwo (2) “AAA” size batteries can also be used to provide a back-up <strong>for</strong> the clockand alarm times and radio presets <strong>for</strong> this unit as follows:1. Open the battery door by pushing in on the tab, then removing the door.2. Insert two (2) “AAA” batteries asshown. Alkaline batteries arerecommended <strong>for</strong> the longestplaying time.3. Place the battery door back on thecompartment.NOTES:left sideof unit• The batteries are used to back-up the clock and alarm times and radio presetswhen the AC adapter is disconnected or there is a power failure.• The battery indicator will blink in the display when there are no batteries, or thebatteries are low and need replacing.IMPORTANT! See BATTERy PRECAUTIONS on the next page.6
POWER SOURCE (CONTINUED)bATTERY PRECAUTIONSFollow these precautions when using batteries in this device:1. Warning – Danger of explosion if battery is incorrectly replaced.Replace only with the same or equivalent type.2. Use only the size and type of batteries specified.3. Be sure to follow the correct polarity when installing the batteries asindicated in the Battery Compartment. A reversed battery may causedamage to the device.4. Do not mix different types of batteries together (e.g. Alkaline,Rechargeable and Carbon-zinc) or old batteries with fresh ones.5. If the device is not to be used <strong>for</strong> a long period of time, remove thebatteries to prevent damage or injury from possible battery leakage.6. Do not try to recharge a battery not intended to be recharged; it canoverheat and rupture. (Follow battery manufacturer’s directions.)7. Remove batteries promptly if consumed.8. Clean the battery contacts and also those of the device prior to batteryinstallation.CONNECTIONSLINE IN JACK (REAR OF UNIT)Insert one end of the audio cable (not included) into the LINE OUT jack on yourexternal audio unit and the other end into the LINE IN jack on the rear of this unit.To listen to the external audio unit, turn this unit on using the Power button, andturn on the external unit as well. Repeatedly press the SOURCE button to selectLINE IN mode; “line in” will appear in the display. The external audio unit’s outputsound will be heard through this unit’s speakers. If you wish to listen to the iPodin the iPod compartment, repeatedly press the SOURCE button to select iPodmode; “iPod” will appear in the display.FM IN JACK (REAR OF UNIT)For best reception, plug the included FM Antenna Wire into the FM Antenna Jackon the rear of the unit. Unravel and extend <strong>for</strong> best reception.7
1RaiseINSERTING AN iPod2LowerRotate the adjustable iPodsupport knob counter-clockwiseto raise or clockwise to lower thesupport position as desired.Gently slide in the iPod/iPhoneso the connector on the iPod/iPhone slides onto the connectoron this unit.3The iPod/iPhone will charge aslong as this unit is connected withthe AC adapter.Please see the next page <strong>for</strong>instructions on using an iPod/iPhone with this unit.NOTES:• When the iPod/iPhone isconnected to this unit, and iniPod mode, it will be in thePause mode and the Pauseicon will blink in the display.• To remove the iPod/iPhone,gently slide it off the connector.• CHARGING: When the iPod/iPhone is inserted into the dock,whether this unit is on or off,the iPod/iPhone’s battery willcharge until it is full.8
OPERATIONUSING AN iPod WITH THIS UNIT1122With an iPod/iPhone connected (seeprevious page), if not already on, turnthis unit on by pressing the Powerbutton 1. Repeatedly press theSOURCE button 2 to select iPod/iPhone mode; “iPod” will appear in thedisplay.3To play/pause the iPod/iPhone:Press the Play/Pause ®p button1 to start playback on youriPod/iPhone. Press again topause playback and press yetagain to resume playback.To adjust the main volume:Rotate the Volume/Time control2 clockwise to increase thevolume or counter-clockwise todecrease the volume.12you can operate the iPod/iPhoneusing its own controls, as per itsowner’s manual, or you can usethe controls on this unit tooperate the iPod/iPhone.4To skip <strong>for</strong>ward or backward onthe iPod/iPhone: Press theSkip/Search o 1 or n 2 button toskip to the beginning of thecurrent track/previous or nexttrack.To search <strong>for</strong>ward or backwardon the iPod/iPhone: Press andhold the Skip/Search o 1 or n 2button to search within thecurrently-playing track.12NOTES:• To turn this unit off, press the Power button.• While there is an incoming call <strong>for</strong> the iPhone, the music will pause. Afterfinishing the call, the music will resume playing.• After you have adjusted the volume setting, if you turn the unit off and then onagain, the volume level will be set to the level prior to turning the unit off.9
OPERATION (CONTINUED)SETTING THE FM RADIO REGIONThis unit allows you to set the desired radio region. For region details, seethe section on the bottom of this page.131422With the unit on and in <strong>Radio</strong>mode, press and hold the Preset1 1, Preset 3 2, Skip/SearchDown o 3 and Up n 4 buttonssimultaneously until the regionnumber appears in the display.Within four seconds, rotate theVolume/Time control clockwiseone full revolution to increase orone full revolution counterclockwiseto decrease the regionnumber.When done setting, press anybutton or wait <strong>for</strong> five seconds.The region will be set and theregion number will disappear fromthe display.RADIO REGIONSRegion 1 (USA)............................................87.5MHz to 108MHzRegion 2 (Europe) .......................................87.5MHz to 108MHzRegion 3 (Japan-wide)....................................76MHz to 108MHzRegion 4 (Japan) ..............................................76MHz to 90MHz10
OPERATION (CONTINUED)USING THE FM RADIO12Turn this unit on by pressing thePower button.3Repeatedly press the Tune/Skip/Search Down m 1 or Up l 2 buttonto manually advance the frequencyin the display up or down until thedesired frequency appears.For auto tuning, press and hold theTune/Skip/Search Down m 1 or Upl 2 button until the frequency in thedisplay starts to scan and thenrelease; the tuner will search andthen stop on the next strong stationit finds. Repeat this step until thedesired frequency appears inthe display.12Repeatedly press the Source buttonto select the FM <strong>Radio</strong> mode; “<strong>Radio</strong>FM” will appear in the display.NOTES:• To turn this unit off, press thePower button.• After you have adjusted thevolume setting, if you turn theunit off and then on again, thevolume level will be set to thelevel prior to turning the unit off.Antenna:For best reception, plug the included FM Antenna Wire into the FM AntennaJack on the rear of the unit. Unravel and extend <strong>for</strong> best reception.11
OPERATION (CONTINUED)SETTING THE THREE RADIO PRESETS1Follow Steps 1-3 on the previouspage to tune a station. Press andhold one of the 3 Preset buttons.The display will blink twice and thepreset will be set.RETRIEVING THE THREE RADIO PRESETS1Follow Steps 1-2 on the previouspage to turn the unit on and selectthe <strong>Radio</strong> mode. Press one of thePreset buttons (1-3) to tune in thepreset station.NOTE: The preset memories will be erased if the unit is without power (nobatteries/AC adapter is not connected/power failure) <strong>for</strong> a long period oftime, or the FM <strong>Radio</strong> Region is changed.12
OPERATION (CONTINUED)TO SET OR RESET THE ACTUAL TIMEFollow the instructions below to manually set the time. To automaticallyset the time with the iPod, see the following page.1212To set the clock to 24 hour(Military) time, press the 24/12button until “24” appears in thedisplay.To set to standard 12 hour time,press the 24/12 button until “12”appears in the display.Press the Set Time (Sync) button1; the display will blink. Withinfive seconds, rotate the Volume/Time control 2 clockwise toincrease or counter-clockwise todecrease the time.NOTE: If the 24/12 hour button(see step 1) is set to 12, be sureto observe the AM or PMindicators to make sure you haveset the hour correctly.3Press the Set Time (Sync) button(or wait approx. four seconds) andthe time will be set.13
TO SYNC THE TIME1OPERATION (CONTINUED)With the power on, connect an iPod as shown on page 8. Press andhold the Set Time (Sync) button until the current time appears and thedisplay blinks twice. The time will then be synced.NOTES:• The Time (Sync) button will not set the alarm.• The iPod mini, iPod photo and iPod 4th generation do not support theSyNC function.• If you have been traveling, please make sure to reset your iPhone oriPod device so that the system clock on your device is updated toyour current time zone. We recommend that you turn your iPhone oriPod device “OFF” and “ON”. Also make sure to turn the unit “OFF”and “ON”, and then dock your iPhone or iPod device to SyNC.TO SET OR RESET THE ALARM TIME12Press the Set <strong>Alarm</strong> button; “A”will blink in the display.Once the alarm is set, “A” willdisappear and the current time willreturn to the display.Within five seconds, rotate theVolume/Time control clockwise toincrease or counter-clockwise todecrease the alarm time.NOTE: If the 24/12 hour button isset to 12, be sure to observe theAM or PM indicators to make sureyou have set the hour correctly.CONTINUED ON THE NEXT PAGE14
3OPERATION (CONTINUED)4Within five seconds, press theSource button to select thedesired source (iPod, <strong>Radio</strong> orBuzzer) as desired.NOTE: you cannot select Line In.When the alarm is set, the alarmmode will be On; the alarm's timewill appear in the display toindicate it is activated.If set to iPod/iPhone, select atrack be<strong>for</strong>e activating the alarm.If set to <strong>Radio</strong>, set the station (seepages 11-12) be<strong>for</strong>e activating thealarm.NOTES:• When the alarm time is reached, if set to <strong>Radio</strong> or iPod, the alarm volumelevel will begin at 20% of maximum volume and will increase by 10%continuously until it reaches 70% of maximum volume during a five minutecycle (four minutes ramping up/one minute off). This cycle will repeat up tosix times <strong>for</strong> a total of 30 minutes.• If set to buzzer, the alarm first emits a single tone, next a double tone, thena triple tone during a five minute cycle (four minutes buzzer tone/oneminute off). This cycle will repeat up to six times <strong>for</strong> a total of 30 minutes.The volume remains constant throughout each cycle.• If set to <strong>Radio</strong>, the alarm will activate the pre-selected station. If set toiPod, the unit will start playback on the track that you selected and willcontinue with the tracks following it in the playlist.• TO SHUT OFF THE ALARM, see the “TO SHUT THE ALARM OFF” sectionon the next page.15
OPERATION (CONTINUED)TO SHUT THE ALARM OFF12To turn the alarm off, simply pressthe <strong>Alarm</strong> On/Off button. Thealarm will turn off, but will remainset <strong>for</strong> the next day.To turn the alarm off so it will notsound the next day, press the<strong>Alarm</strong> On/Off button again.SNOOZE12While the alarm is sounding,press the Snooze button. Thealarm will turn back onautomatically ten minutes later. Ifdesired, press the Snooze buttonagain <strong>for</strong> another ten minutesafter the original Snooze time hasbeen reached. you may repeatthis process up to six times.To cancel the Snooze function(the alarm will not turn back on),press the <strong>Alarm</strong> On/Off button; thealarm time will stop blinking in thedisplay.16
SLEEP1OPERATION (CONTINUED)With the unit on, press the Sleepbutton; “SLEEP” and "10" will blink inthe display <strong>for</strong> five seconds whichindicates the unit will turn off after 10minutes. Repeatedly press the Sleepbutton to select the Sleep time, up to90 minutes (i.e., "20" turns offautomatically after 20 minutes, "30"turns off automatically after 30minutes, etc.). After five seconds, theSleep time will disappear from thedisplay.NOTE: To cancel the Sleep function,press the Sleep button and “SLEEP”will disappear from the display.24/12 HOUR bUTTON1DIMMER bUTTON1To set the clock to 24 hour (Military)time, press the 24/12 until “24”appears in the display.To set to standard 12 hour time,press the 24/12 button until “12”appears in the display.Repeatedly press the Dimmerbutton to decrease the displaybrightness. There are seven levelsof brightness.17
TROUbLESHOOTING GUIDEIf you experience a problem with this unit, check the chart below be<strong>for</strong>ecalling <strong>for</strong> service.SYMPTOM CAUSE SOLUTIONNo sound. Volume is set Increase volume.to minimum.<strong>Radio</strong>, no sound. Power is not on. Press the Power buttonto turn the power on.Volume is setto minimum.Increase volume.FM <strong>Radio</strong>, poor sound. Station is not tuned Retune the FMproperly.broadcast station.FM: Wireantenna is notextended.Extend FM wireantenna.iPod mode, no sound. Incorrectly connected. Check the connection.Not in iPod mode.Press the Source button.Time reset to Batteries connected Check the batteries.“6:00 PM”. improperly, notconnected or dead.<strong>Clock</strong> is not set.Set the clock.<strong>Alarm</strong> does not <strong>Alarm</strong> is not activated Set and activate alarm asturn on. or set properly. described on pages 14-15.<strong>Clock</strong> is not set.Set the clock.18
SPECIFICATIONSGENERAL:Power Source .........................DC 5.9V Adapter (Center Positive)Battery Backup.................................2 x 1.5V “AAA” size batteriesSpeaker.........................................................................2 x 4 ohmsOutput Power ....................................................................2 x 3 WWeight ..................................................................................1.3 lbsDimensions ...................................5.9 (L) x 5.9 (W) x 3 (H) inchesRADIO REGIONSRegion 1 (USA) .............................................87.5MHz to 108MHzRegion 2 (Europe) .........................................87.5MHz to 108MHzRegion 3 (Japan-wide) .....................................76MHz to 108MHzRegion 4 (Japan) ................................................76MHz to 90MHzSpecifications are subject to change without notice.FOR ADDITIONAL SET-UP OR OPERATING ASSISTANCE, PLEASEVISIT OUR WEbSITE AT:WWW.MEMOREX.COMFOR CONSUMER REPLACEAbLE PART(S), VERIFY PARTNUMbER(S) ON PAGES 4 AND 5, THEN CONTACT OUR PARTSAND ACCESSORIES FULFILLMENT CENTER AT: 1-800-379-8439.Imation Electronic Products1 Imation Way, Oakdale, MN 55128-3414 USA • memorex.com© Imation Corp.<strong>Memorex</strong> and the <strong>Memorex</strong> logo are trademarksof Imation Corp. and its affiliates.19